


PressureVessel
• DonotremovevalvefromCO2cylinder.
• CO2cylinder should be handled only by trained, experi-
enced personneland in accordancewiththe safe handl-
ing practicesrecommended by the current C.G.A. pam-
phlet P-l*.
• Keep out of reach of children.
• Visuallyinspect monthlyor more frequently. If cylinder
shows evidence of corrosionor mechanical damage, it
should be inspected and tested in accordance with the
current C.G.A. pamphlets C-1" or C-6* or it should be
replaced.
CHARGE ONLY WITH DRY CARBON DIOXIDE
• Do not charge with carbon dioxide unlessthe pressure
rating stamped on CO2 cylinder is 1800 PSI or greater.
• When charged with carbon dioxide do not exceed a fill
density of 68%. (Fill density is a percent ratio of the
weight of gas in the cylinderto the weight ofwater that
the cylinderwillhold at 60°F).
• If cylinder has been exposedto temperatures inexcess
of 350°F., it must be destroyed.
Improperuseof cylinder couldcause seriousbodilyinjury
or property damage.
• C.G.A. pamphlets are published by the Compressed
Gas Association, 500 5th Ave., New York, N.Y.
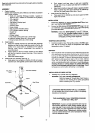
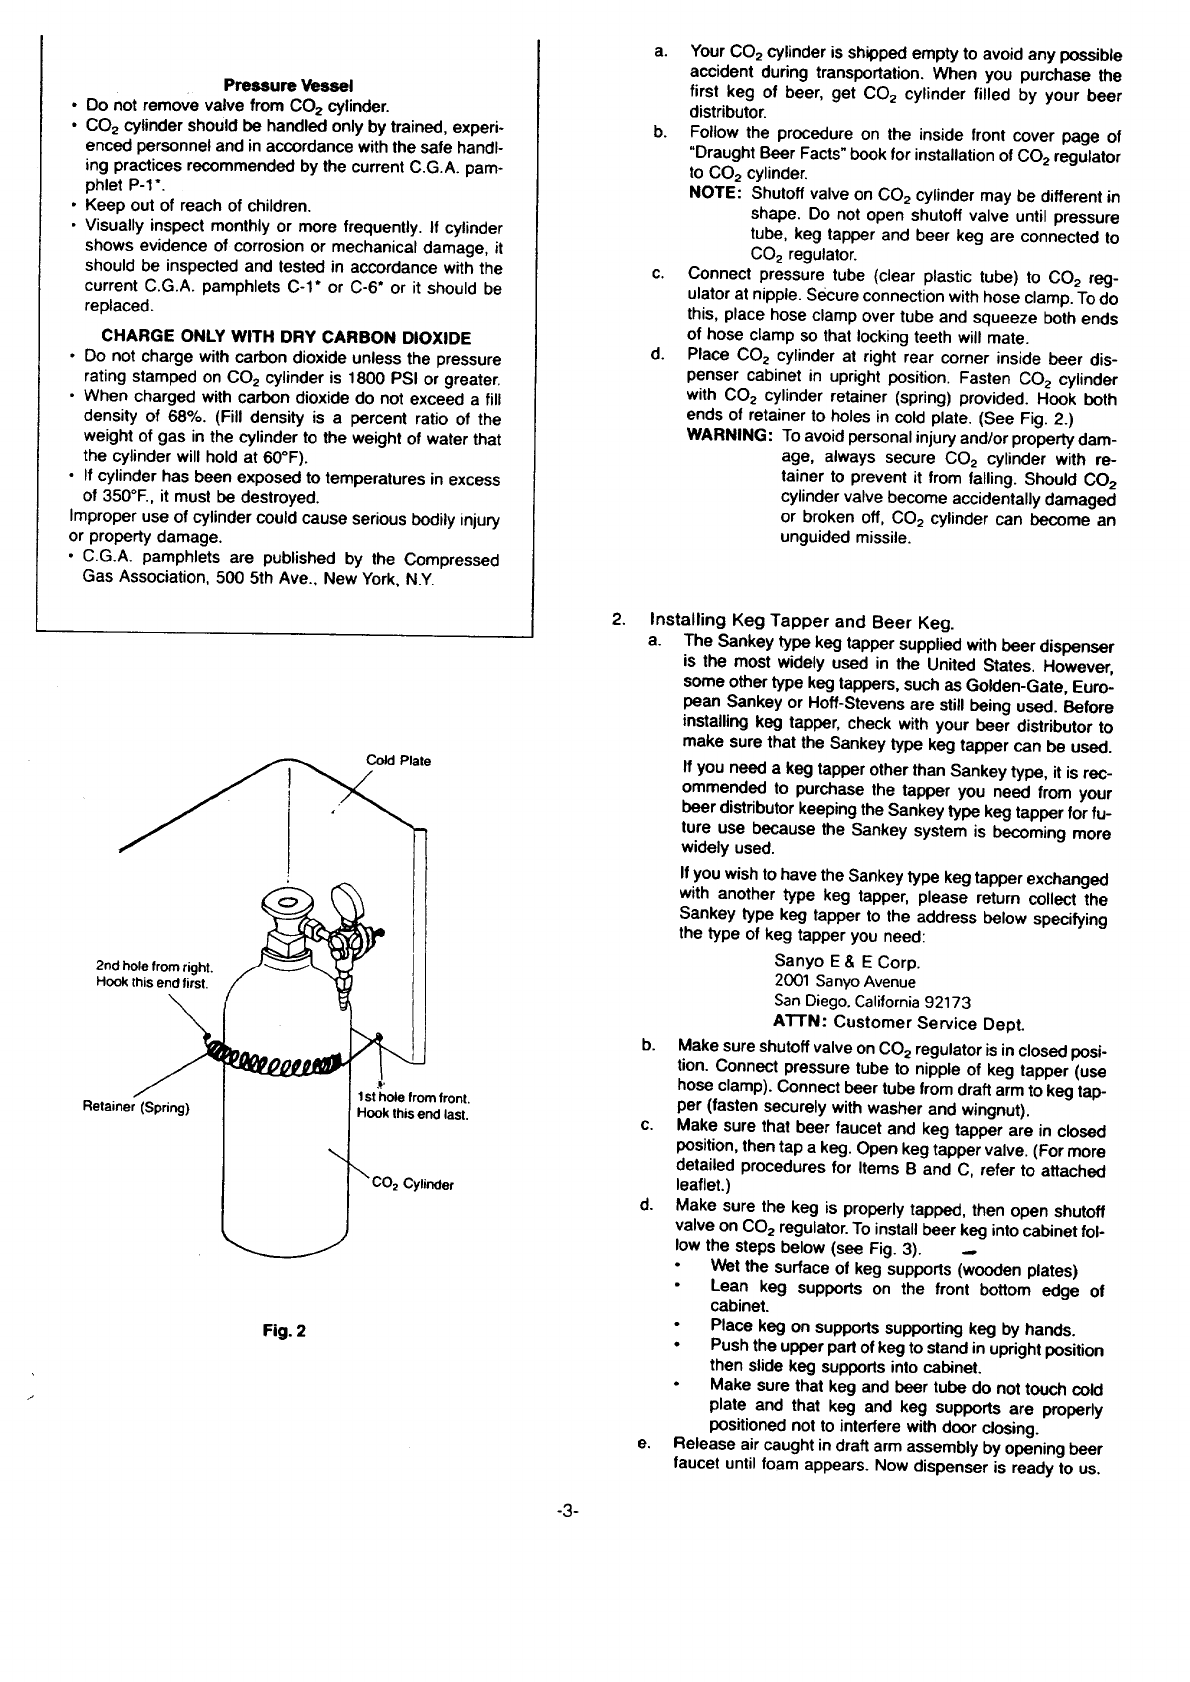
Cold Plate
2nd hole from right.
Hook thisend first.
Retainer (Spring)
1 st hole from front.
Hookthisendlast.
CO2Cylinder
Fig. 2
-3-
2.
a.
a. Your CO2 cylinder is shipped empty to avoid any possible
accident during transportation. When you purchase the
first keg of beer, get CO_ cylinder filled by your beer
distributor.
b. Follow the procedure on the inside front cover page of
"Draught Beer Facts" book for installation of CO2 regulator
to CO2 cylinder.
NOTE: Shutoff valve on CO2 cylinder may be different in
shape. Do not open shutoff valve until pressure
tube, keg tapper and beer keg are connected to
CO2 regulator.
c. Connect pressure tube (clear plastic tube) to CO2 reg-
ulator at nipple. Secure connection with hose clamp. To do
this, place hose clamp over tube and squeeze both ends
of hose clamp so that locking teeth will mate.
d. Place CO2 cylinder at right rear corner inside beer dis-
penser cabinet in upright position. Fasten CO2 cylinder
with CO2 cylinder retainer (spring) provided. Hook both
ends of retainer to holes in cold plate. (See Fig. 2.)
WARNING: To avoid personal injury and/or property dam-
age, always secure CO2 cylinder with re-
tainer to prevent it from falling. Should CO2
cylinder valve become accidentally damaged
or broken off, CO2 cylinder can become an
unguided missile.
Installing Keg Tapper and Beer Keg.
The Sankey type keg tapper supplied with beer dispenser
is the most widely used in the United States. However,
some other type keg tappers, such as Golden-Gate, Euro-
pean Sankey or Hoff-Stevens are still being used. Before
installing keg tapper, check with your beer distributor to
make sure that the Sankey type keg tapper can be used.
If you need a keg tapper other than Sankey type, it is rec-
ommended to purchase the tapper you need from your
beer distributor keeping the Sankey type keg tapper for fu-
ture use because the Sankey system is becoming more
widely used.
If you wish to have the Sankey type keg tapper exchanged
with another type keg tapper, please return collect the
Sankey type keg tapper to the address below specifying
the type of keg tapper you need:
Sanyo E & E Corp.
2001 Sanyo Avenue
San Diego. California 92173
A'r-rN: Customer Service Dept.
b. Make sure shutoff valve on CO2 regulator is in closed posi-
tion. Connect pressure tube to nipple of keg tapper (use
hose clamp). Connect beer tube from draft arm to keg tap-
per (fasten securely with washer and wingnut).
c. Make sure that beer faucet and keg tapper are in closed
position, then tap a keg. Open keg tapper valve. (For more
detailed procedures for Items B and C, refer to attached
leaflet.)
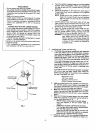
d. Make sure the keg is properly tapped, then open shutoff
valve on CO2 regulator. To install beer keg into cabinet fol-
low the steps below (see Fig. 3). ,-
• Wet the surface of keg supports (wooden plates)
• Lean keg supports on the front bottom edge of
cabinet.
• Place keg on supports supporting keg by hands.
• Push the upper part of keg to stand in upright position
then slide keg supports into cabinet.
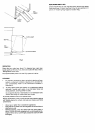
• Make sure that keg and beer tube do not touch cold
plate and that keg and keg supports are properly
positioned not to interfere with door dosing.
e. Release air caught in draft arm assembly by opening beer
faucet until foam appears. Now dispenser is ready to us.