


7
Questions? Call The Kenmore Water Line 1-800-426-9345 or visit KenmoreWater.com
Step 2 - Install Filtered Water Faucet
MAKE HOLE FOR FAUCET
IMPORTANT: A 1-1/4” dia. hole is needed to mount the fil-
tered water faucet. To avoid damaging the sink, consult a
qualified plumber or installer for drilling procedures in porce-
lain or stainless steel.
1. Select one of the following options to install the faucet.
Make sure there is room underneath to make the needed
connections.
Use an existing sink top hole for spray hose or soap
dispenser (must be 1-1/4” in diameter).
Drill a new hole in the sink top.
Drill a hole in the countertop next to the sink.
2. Check to make sure the filtered water faucet base will sit
flat against the mounting surface.
3. If drilling is needed, make a 1-1/4” dia. (minimum) hole for
the faucet in the mounting surface.
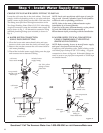
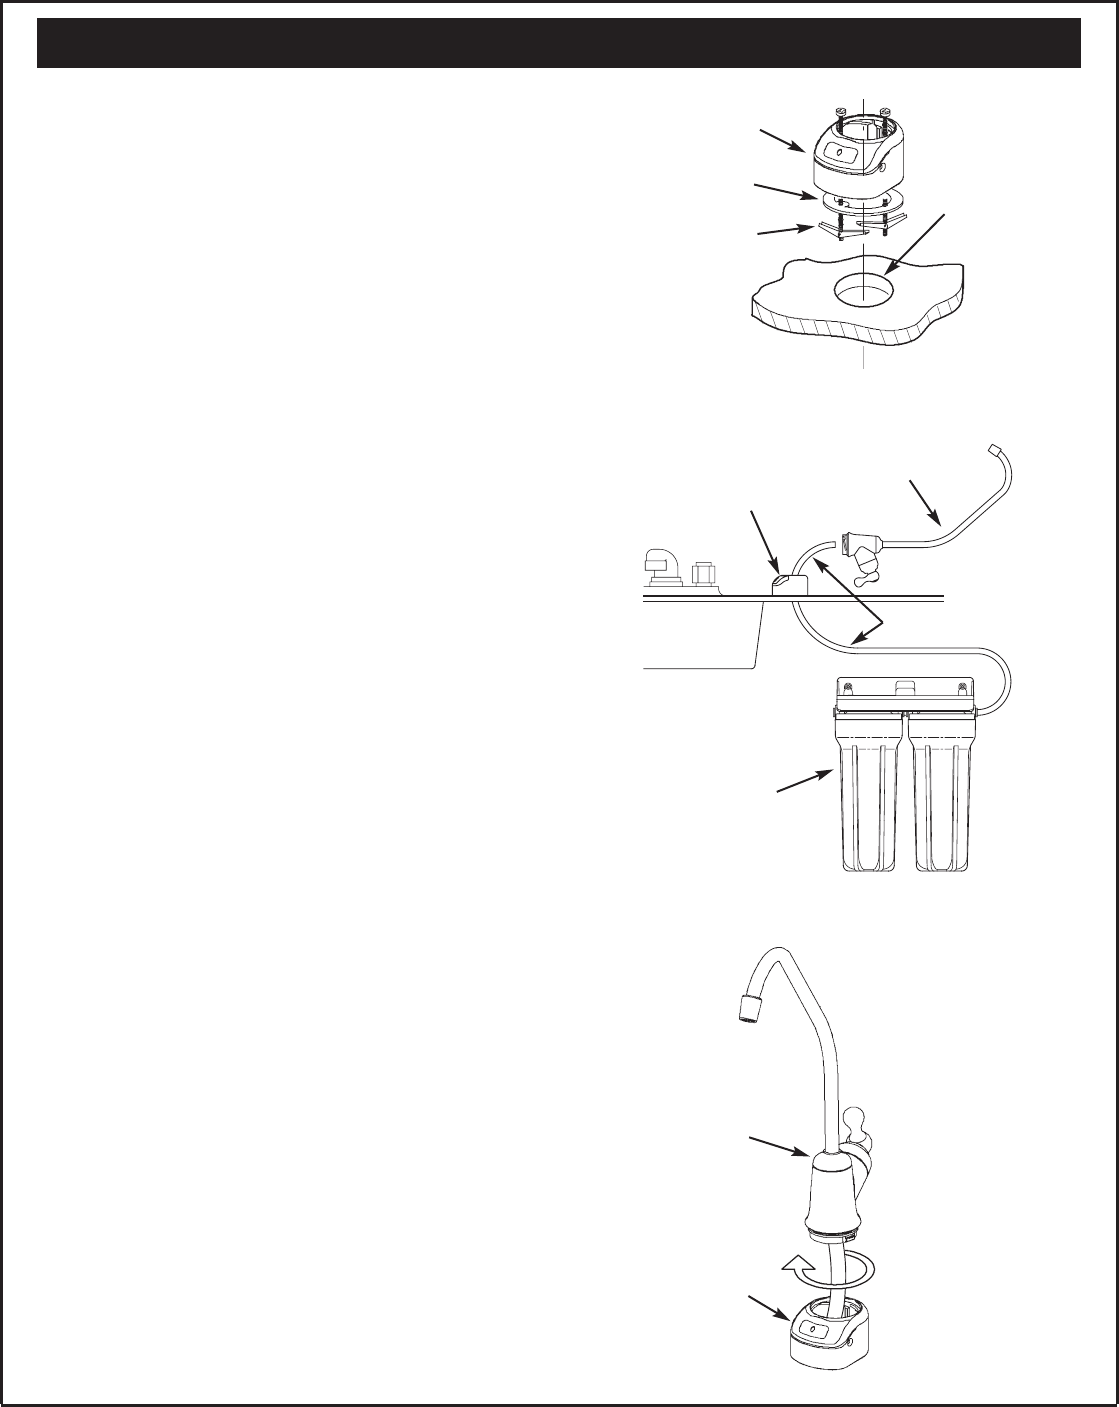
INSTALL FAUCET BASE
1. Locate the faucet base (See Fig. 5) and feed the toggle bolts
down through the hole until the faucet base is square
against the mounting surface (sink or countertop). The rub-
ber gasket should be between the faucet base and mounting
surface.
2. Tighten the toggle bolts until the faucet base is firmly
mounted to the surface. Do not overtighten.
CONNECT TUBE TO FAUCET
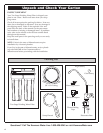
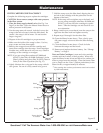
1. Mount the Two-Stage Drinking Water Filter assembly under
the sink. Allow a minimum of 1-1/2” under the sumps for
changing cartridges (See Fig. 2 on Page 5).
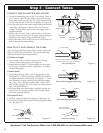
2. Locate the 3/8” O.D. tubing. Refer to the “Connect Tubes”
section on Page 8 and insert one end of the tube all the way
into the 3/8” quick connect fitting on the water OUT side of
the filter assembly. See Figure 6.
3. Feed the other end of the tubing up through the mounting
hole and faucet base. See Figure 6.
4. Refer to the “Cut Tubes to Length” section on Page 8 and
cut the tube square and to length as needed, leaving about
6 inches above the faucet base.
5. Locate the faucet. Refer to the “Connect Tubes” section on
Page 8 and insert the tube all the way into the 3/8” quick
connect fitting on the faucet bottom.
6. Pull on the tube at each end to be sure it is held firmly in
both of the quick connect fittings.
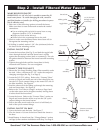
INSTALL FAUCET ON BASE
1. Lower the faucet onto the base. See Figure 7.
2. Give the faucet a 1/4 turn clockwise to attach the faucet to
the base.
3. Install battery in faucet base (See “Change Battery” section
on Page 9) then continue installation with Step 3 on Page 8.
Figure 5
1-1/4” dia. hole
through sink or
countertop
toggle bolts
rubber gasket
faucet base
Figure 7
1/4 turn to connect
faucet to base
faucet base
faucet
Figure 6
faucet base
faucet
tubing
filter
assembly
water
OUT