


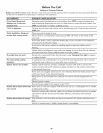


Self Cleaning
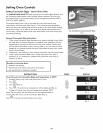
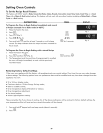
Stopping or Interrupting a Self-Cleanlng Cyde
If it becomes necessary to stop or interrupt a self-cleaning cycle due to excessive smoke or fire in
the oven:
1. Press 0.
2. The oven door can only be opened after the oven has cooled down for approximately 1 HOUR
and the ((DOOR LOCKED)} icon is no longer displayed.
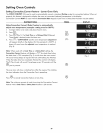
Note: If your dock is set for normal 12 hour display mode the Delayed Self-Clean cycle can never
be set to start more than 12 hours in advance. To set for Delayed Self-Clean Cycle 12-24 hours in
advance set the control for the 24 hour time of day display mode.
@
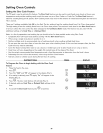
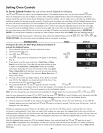
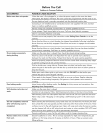
Adjusting Oven Temperature
The temperature in the oven has been pre-set at the factory. When first using the oven_
be sure to follow recipe times and temperatures. If you think the oven temperature is
cooking too hot or too cool for the temperature you select_ you can adjust the actual
oven temperature to be more or less than what is displayed. Before adjusting_ test a
recipe by using a temperature setting that is higher or lower than the recommended
temperature. The baking results should help you to decide how much of an adjustment
is needed.
Note: The oven
temperature adjustments
made with this feature wiii
not change the Self-Clean
cycle or Broil temperature.
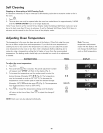
INSTRUCTIONS PRESS DISPLAY
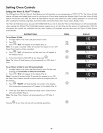
To adjust the oven temperature
Lower
1. Press Ove°.
2. Press and hold [_ for 6 seconds. The preset adjustment number
will appear and "UPPER" will flash in the display (Fig. 1).
3. To increase the temperature use the number pads to enter the
desired change. (Example 30°F) 3 0 (Fig. 2). The temperature
may be increased as much as 35°F (19°C). To decrease the
temperature use the number pads to enter the desired change.
Flex
(Example -30°F) 3 0 and then press Cleon(Fig. 3). The temperature
may be decreased as much as 35°F (19°C).
4. Press _ to accept the temperature change and the display
,,:>,
wiii return to the time of day. Press _ to reject the change if
necessary.
Lower
Oven
8
3O
Flex
3 0 Cbon
@
@
Fig. 1
Fig. 2
Fig. 3
NOTE: Each oven may be adjusted individually.
32