General Care & Cleaning
Porcelain enamel cooktop cleaning instructions
The cooktop is designed to make cleaning easier. Because the gas burner are sealed, cleanups are easy when spillovers are
cleaned up immediately. Correct and consistent cleaning is essential to maintaining your porcelain enamel cooktop. If food
spills and grease spatters are not removed, they may burn onto the surface of the cooktop and cause permanent discoloration.
Do not remove any parts from the cooktop until they have completely
cooled and are safe to handle.
Daily Cleaning
For normal soil:
1. Allow cooktop surface to cool.
2. Wipe off: spills and spatters using a clean paper towel or a clean cloth with warm, soapy
water.
3. If needed, use mild household cleaners or a soap-filled steel wool pad.
4. Be sure to rinse off: aii cleaning solutions or the porcelain may become damaged during
future heating.
For heavy, burned-on soil:
1. Allow cooktop surface to cool.
2. Use a soap filled scouring pad with warm water or cover heavily soiled spots with a solution
of clear water and ammonia. Scour gently. Rinse and wipe dry with a clean cloth.
Do not use harsh abrasive cleaners on the cooktop. They can scratch the porcelain.
Do not use
a cooktop cleaner on a hot
cooktop. The fumes can be
hazardous to your health, and
can chemically damage the
cooking surface.
Before cleaning
the surface cooktop, be sure
the controls are turned to OFF
and the cooktop is cool.
DO NOT
use
cornmerclal oven cleaners on
the cooktop.
Cleaning the grates
The burner grates are dishwasher safe and may be cleaned in the dishwasher. Remove any excessive soils before placing in
the dishwasher.
iMPORTANT
• For proper gas flow and ignition of the burners -- DO NOT allow spills, food, cleaning agents or any other material to enter
the gas orifice opening.
• The cooktop is not removable. Do not attempt to remove or lift the cooktop.
To avoid possible burns use care when cleaning the cooktop. DO NOT attempt to clean the cooktop
whenever the cooktop or burner heads are still hot.
To avoid possible burns DO NOT attempt any of the following cleaning instructions provided before turning
OFF aii of the surface burners and allow them to cool.
To avoid possible burns DO NOT attempt to operate the surface burners without the burner caps
Your appliance isshipped with the burner heads and burner caps in the correct locations. Before using your gas appliance be sure to:
• Follow installation instructions before operating.
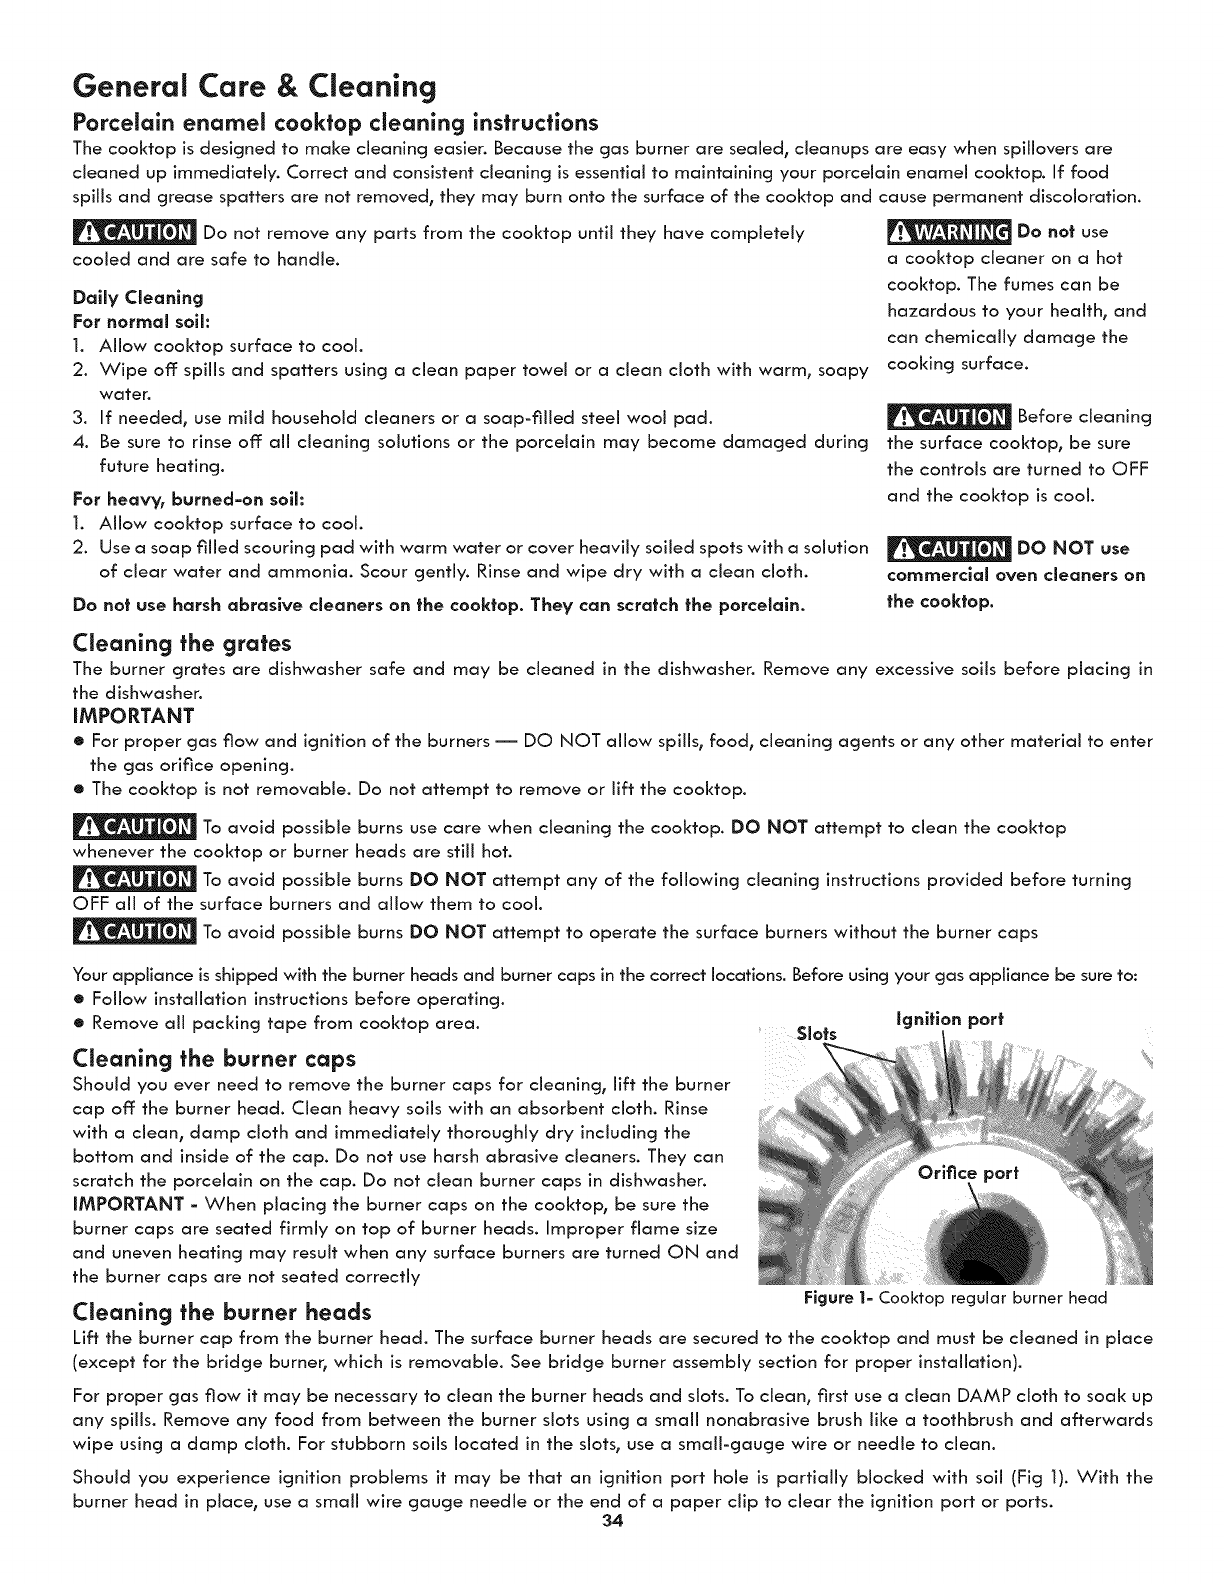
• Remove aii packing tape from cooktop area ..... Slots ignition port
aeaning the burner caps
Should you ever need to remove the burner caps for cleaning, lift the burner
cap off: the burner head. Clean heavy soils with an absorbent cloth. Rinse
with a clean, damp cloth and immediately thoroughly dry including the
bottom and inside of the cap. Do not use harsh abrasive cleaners. They can
scratch the porcelain on the cap. Do not clean burner caps in dishwasher.
IMPORTANT - When placing the burner caps on the cooktop, be sure the
burner caps are seated firmly on top of burner heads. Improper flame size
and uneven heating may result when any surface burners are turned ON and
the burner caps are not seated correctly
Figure 1= Cooktop regular burner head
Cleaning the burner heads
Lift the burner cap from the burner head. The surface burner heads are secured to the cooktop and must be cleaned in place
(except for the bridge burner, which is removable. See bridge burner assembly section for proper installation).
For proper gas flow it may be necessary to clean the burner heads and slots. To clean, first use a clean DAMP cloth to soak up
any spills. Remove any food from between the burner slots using a small nonabrasive brush like a toothbrush and afterwards
wipe using a damp cloth. For stubborn soils located in the slots, use a small-gauge wire or needle to clean.
Should you experience ignition problems it may be that an ignition port hole is partially blocked with soil (Fig 1). With the
burner head in place, use a small wire gauge needle or the end of a paper clip to clear the ignition port or ports.
34
