may need to be cut to fit under the countertop.
Mark with a pencil where each spacer needs to
be cut. Loosen both screws to remove spacers.
Cut across top of each spacer. Replace spacers
and tighten screws. Check that range fits
properly on countertop.
To reduce the risk of tipping the
appliance, the appliance must be securely
1 screws that are provided. ’
fastened to the cabmet using the four
screws
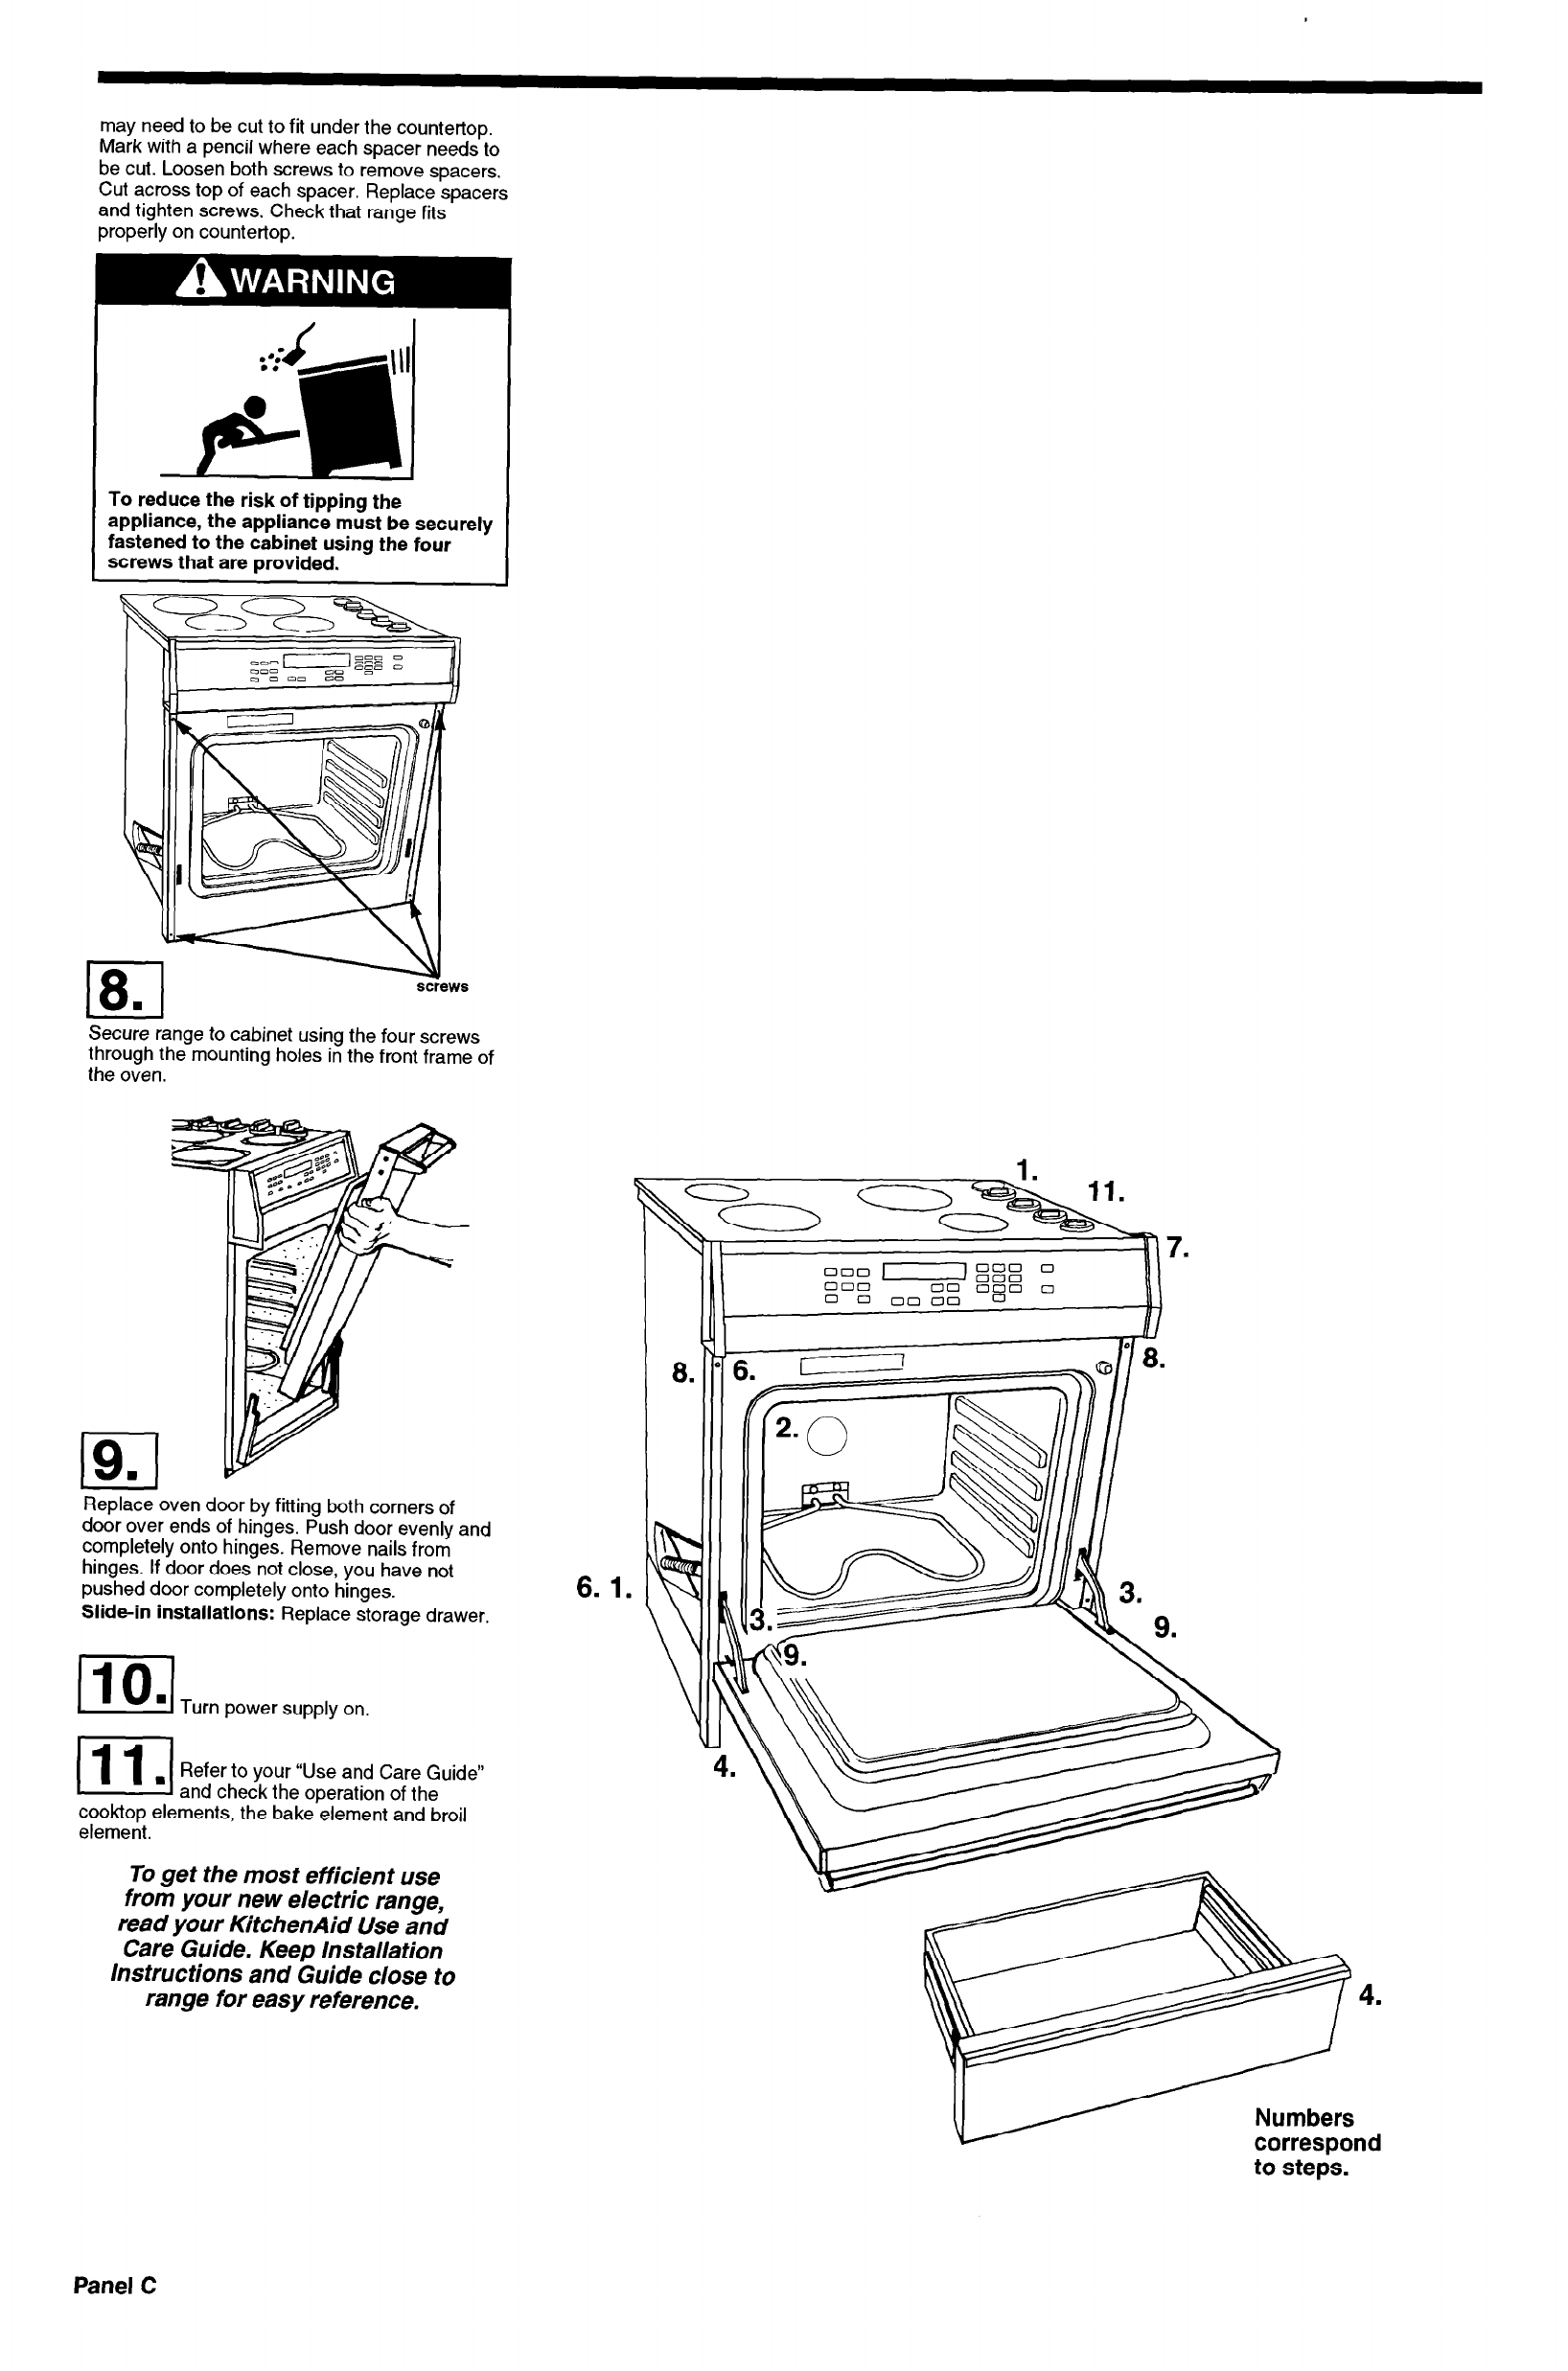
Secure range to cabinet using the four screws
through the mounting holes in the front frame of
the oven.
Replace oven door by fitting both corners of
door over ends of hinges. Push door evenly and
completely onto hinges. Remove nails from
hinges. If door does not close, you have not
pushed door completely onto hinges.
Slide-in installations:
Replace storage drawer.
ml
. Turn power supply on.
Refer to your “Use and Care Guide”
and check the operation of the
cooktop elements, the bake’element and broil
element.
To get the most efficient use
from your new electric range,
read your KitchenAid Use and
Care Guide. Keep Installation
Instructions and Guide close to
range for easy reference.
6. 1.
Numbers
corresoond
to steps.
Panel C


