20
PROGRAMMED COOKING
Convection Cooking
During convection cycles, the convection element heats the air in
the microwave oven cavity, and the convection fan circulates the
hot air. The constantly moving air surrounds the food to heat the
outer portion quickly.
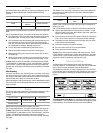
See “Food Type Chart” for automatic convection cycles (Bake or
Roast).
Convection cooking may also be done manually. Use convection
cooking for items such as pies, breads, cookies, cakes and pizza.
See “Manual Cooking” section for instructions.
Manual convection cooking may be used to proof bread. See
“Raising (Proofing) Bread” section for instructions.
NOTES:
■ Use the provided convection rack.
■ Do not cover the turntable or convection rack with foil, as it
interferes with the circulation of hot air.
■ Do not use light plastic containers, plastic wrap or paper
products. All ovenproof cookware or metal utensils can be
used in convection cooking. (Round pizza pans are excellent
cooking utensils for many convection-only items.) Metal
utensils cannot be used in microwave or combination
cooking.
■ No special techniques are needed to adapt standard oven
recipes to convection cooking, although some cooking times
might need to be shortened, and some temperatures
adjusted.
■ This microwave oven may be preheated in the same way that
a standard oven is preheated. (Most recipes for baked goods
call for preheating.)
Combination Cooking
Combination cooking uses microwaves in addition to the
convection system to cook or roast foods more quickly than with
convection alone.
Combination cooking may also be done manually. Use
combination cooking for items such as roasts, meat loaf,
lasagna, casseroles and whole chicken. See “Manual Method
Cooking” or “Convect Time/Temp” sections for instructions.
NOTES:
■ Do not use metal cookware or utensils during combination
cooking.
■ Meats may be roasted directly on the convection rack. Use
the browning pan to catch drippings.
■ Less tender cuts of beef can be roasted and tenderized using
oven cooking bags.
■ Check for doneness after the cycle has ended. If the food is
not completely done, let it stand in the microwave oven for a
few minutes to finish cooking.
■ During any automatic or manual combination cycle, no more
than 30% microwave power is used.
Sensor Cooking
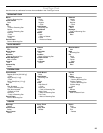
Some automatic cycles are sensor cycles. See “Cook Method
Chart.” No amounts need to be entered. A sensor in the
microwave oven detects humidity released from the food as it
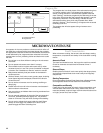
heats, and adjusts the cook time accordingly. The progress bar
appears during sensing (see “Progress Bar” section).
Many sensor cycles require the covering of foods. The provided
steamer vessel has a loose-fitting lid, which allows enough steam
to escape to be detected by the sensor. When covering foods
with plastic wrap, be sure to leave a large enough vent opening to
allow the steam to escape.
NOTES:
■ The microwave oven should be plugged in for at least
2minutes.
■ The microwave oven cavity and the exterior of the cooking
container should be dry.
■ The room temperature should not exceed 95°F (35°C).
■ If the door is opened during a sensor cycle, sensing will stop
and the program will be canceled.
■ For optimal performance, wait at least 30 minutes after
convection cooking or grill cooking before sensor cooking.
Preheating
Preheating of the microwave oven is programmed in some
automatic convection cycles. After the microwave oven is
preheated, it will maintain the set preheat temperature until the
door is opened to add food. Preheating may be skipped after it
has started by touching “Skip Preheat” on the touch screen,
adding food, and then touching “Continue.”
Preheating of the browning pan is programmed in many
automatic cooking cycles. This preheating phase may also be
skipped by touching “Skip Preheat.”
For optimal results, we recommend completing the preheating
phase of each cycle in which preheating is programmed.
However, preheating of the microwave oven would not be
necessary when baking consecutive batches, such as cookies,
as the microwave oven would already be hot.
Doneness
Doneness for food items may be adjusted for most automatic
cycles. Before starting a cycle, touch “Doneness” on the touch
screen, and adjust the doneness with “+” (more done) or “-” (less
done) controls. The “+” control adds to, and the “-” control
subtracts from the recommended default cook time.
The more done and less done settings in most foods for which
doneness may be adjusted are equal. That is, the same amount
of time may be added to or subtracted from the cycle. Some of
the Meat and Poultry cycles have only the more done settings.


