


7
9. If roof or wall cap does not
have a damper, attach damper to
exhaust opening(s) on top of the
hood using two Phillips-head
screws.
10. If 48" (121.9 cm) hood is to
be connected to 10" (25.4 cm) round
vent system, install the vent
transition piece now.
Electrical
connection
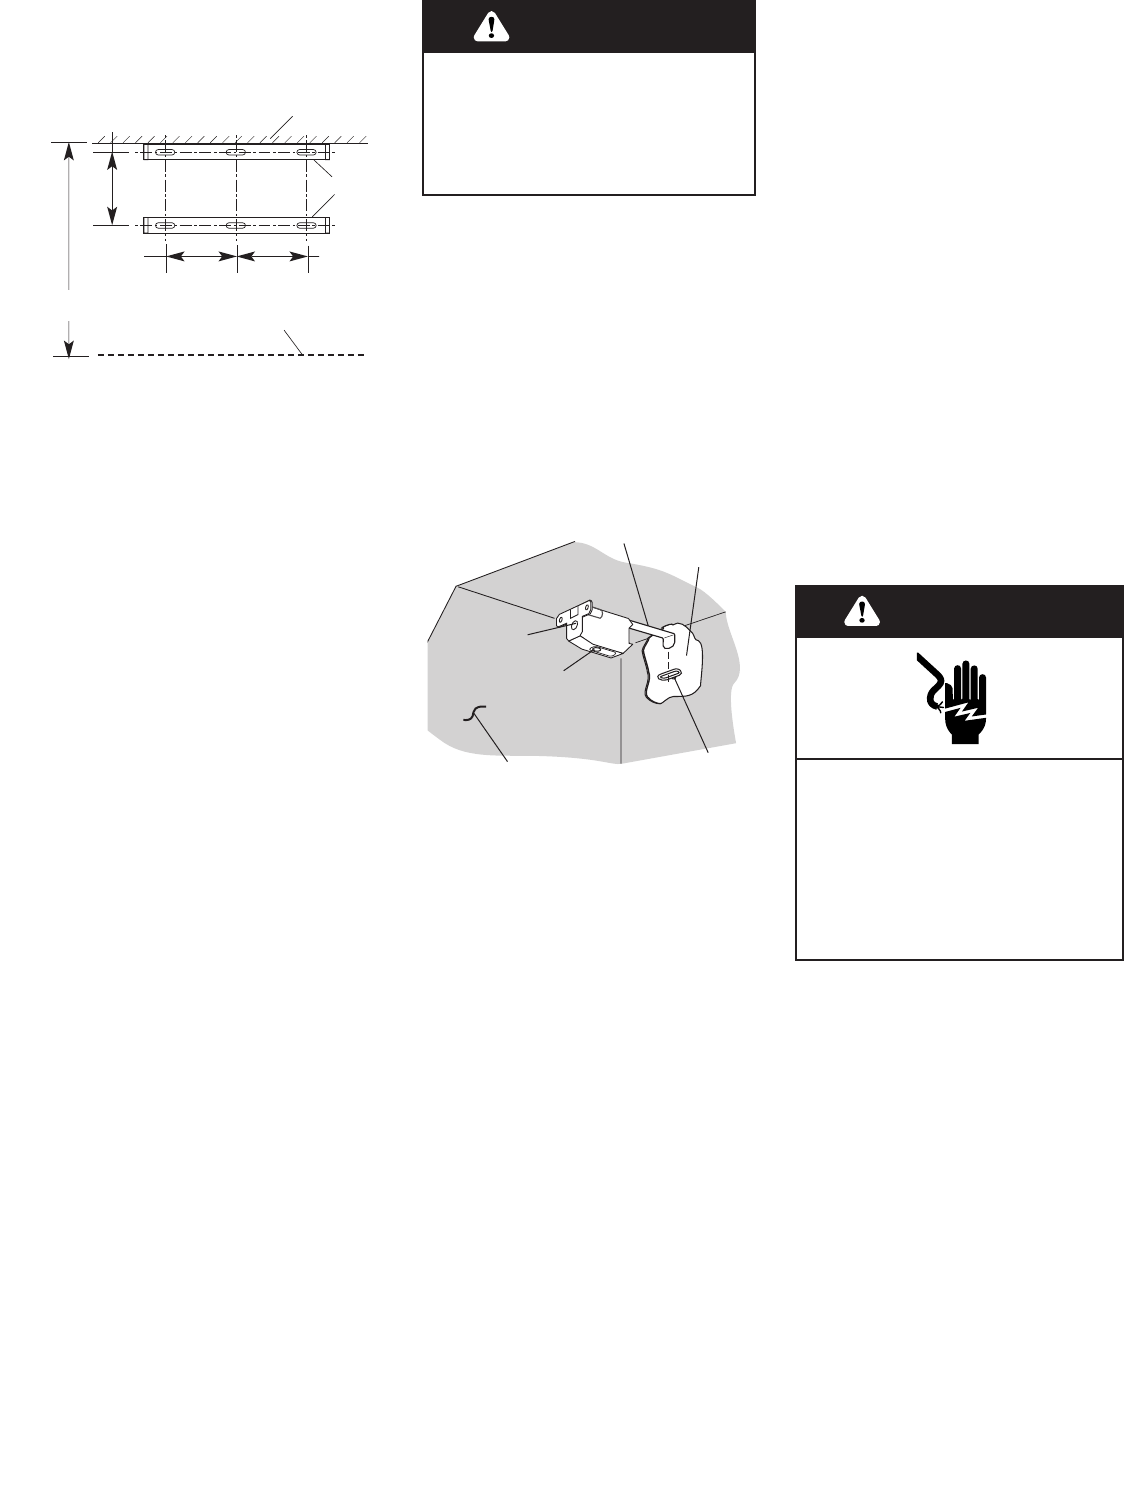
Electrical Shock Hazard
Disconnect power before making
electrical connections.
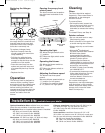
Connect ground wire to green
ground screw in terminal box.
Failure to do so can result in
death or electrical shock.
WARNING
15 . Make electrical connection:
ࠜ Connect the power supply cable
to hood terminal box through
the U.L.- or C.S.A.-listed conduit
connector.
ࠜ Connect the white wire of the
power supply cable with the
white lead in the hood using a
twist-on connector; connect the
black wire of the power supply
cable with the black lead in the
hood using a twist-on
connector.
ࠜ Connect the power supply green
ground wire under the green,
ground screw.
ࠜ Tighten conduit connector
screws.
ࠜ Replace the terminal box cover.
12. The brackets are also used
to adjust the level of the canopy.
Using a Phillips screwdriver, rotate
the screw V2 to adjust the level of
the canopy.
13. Connect vent system to
hood. Seal all joints with duct tape.
14. If your installation uses the
optional vent cover, fit the cover
flanges over the brackets. If
installation uses the chimney
extension, fit the extension over the
brackets. Install the upper section
first, then fit the lower section over
the upper section. Seal extension to
hood with duct tape.
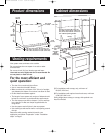
6.Determine and make all
necessary cuts in the wall for the
vent system. Install the vent system
before the canopy hood. See venting
methods on Page 4, and hood vent
opening dimensions on Page 6.
7. Determine the required height
for the power supply cable and cut
a 1-1/4" (3.2 cm) hole at this
location. Run wire through hole
according the National Electrical
Code or CSA Standards and local
codes and ordinances. There must
be enough power supply cable
from the fused disconnect (or
circuit breaker) box to make the
connection in the hood’s electrical
box.
Use caulking to seal all openings.
Do Not turn on power until
installation is completed.
8.Remove the terminal box
cover from the canopy hood.
Remove the power supply cable
knockout using a flat-blade
screwdriver. Attach conduit
connector into power supply cable
opening so that conduit connector
clamping screws are inside of
canopy hood.
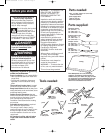
Excessive Weight Hazard
Use two or more people to move
and install range hood.
Failure to do so can result in
back or other injury.
WARNING
36" (91.4 cm) hood has two brackets
42" (106.7 cm) hood has four brackets
48" (121.9 cm) hood has four brackets
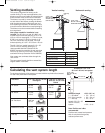
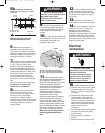
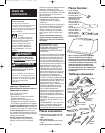
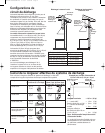
11. The hood attaches to the
wall by screws discussed earlier in
the installation instructions at
Step 5. The hood hangs from these
screws by brackets inside the
range hood. Before attempting to
hang the hood, use a Phillips
screwdriver to rotate the
adjustment screw marked V1
counterclockwise to extend the
brackets from the canopy.
Hang the range hood by inserting
the brackets into the mounting
screws as shown. Note: These
screws must be installed into solid
wood to support the weight of the
hood as described in Step 5. Rotate
the screws marked V1 to tighten
the range hood against the wall.
Make sure that the range hood is
securely tightened against the
wall.
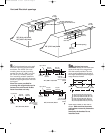
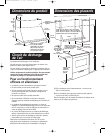
5b.If chimney extension is
used: Attach the extension brackets
as shown.
Make sure that the screws are
securely fastened to the wall.
10-5/8"
(27 cm)
8-1/8"
(20.6 cm)
8-1/8"
(20.6 cm)
brackets
top of hood
ceiling
23" (58.4 cm) max.
12" (30.5 cm) min.
V1
V2
bracket
wall
mounting
screw
hood
YL10564/8284829B 8/7/01 3:32 PM Page 7