


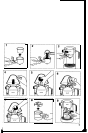

13. Once the coffee has stopped the
complete brewing process, turn OFF the
machine by moving the switch to the
“0” position. The control light will go
out, indicating that the machine is OFF.
14. Before you remove the filter holder for
cleaning, make sure that the boiler is no
longer under pressure (see section
CAUTION-PRESSURE).
A
CAUTION:
Use caution, when removing the filter
holder, metal parts may still be hot.
To remove the filter holder, turn the
filter holder to the left, past the “lock”
markings until the holder dislodges
from the unit.
Al-lENTlON:
Metal parts might still be hot. Cool down by
running under cold water.
To make more espresso, proceed as follows:
n
Check to see if the boiler is empty and not
under pressure (see section “CAUTION
-
PRESSURE”).
n
Remove filter holder
(c).
n
Empty filter basket
(i).
W
Repeat steps 1-12 of this section.
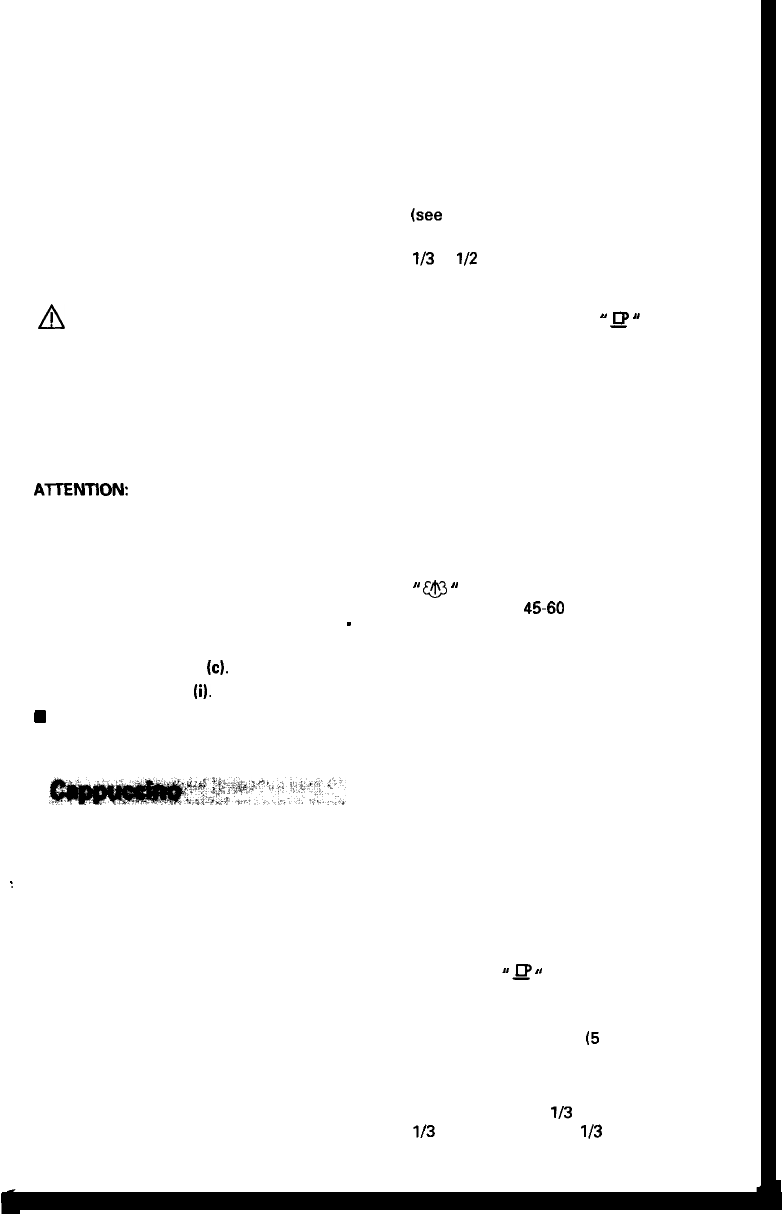
Cappuccino takes its name from the
chocolate hues of the robes worn by the
Capuchin monks who favored this delicious
:
dessert coffee. While cappuccino is
traditionally made up of espresso and
frothed milk, it can be tailored to one’s own
taste with cinnamon, sugar, chocolate flakes
or even liquor. Its versatility makes
cappuccino a worldwide gourmet choice.
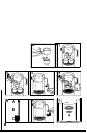
Preparation of cappuccino:
KRUPS “Perfect Froth” attachment lets you
froth milk perfectly for making cappuccino.
n
Note: If the “Perfect Froth” attachment is
not in place, do so at this time
(see
figure 13).
1. The first step in making cappuccino is to
make espresso: Therefore, fill the glass
carafe with the amount of water which is
required to make the amount of espresso
plus additional water for frothing milk
(see
section “Making Espresso”).
2. Fill a small stainless steel frothing pitcher
l/3
to
l/2
full with fresh, cold milk and set
aside. Skim or 1% low fat milk will
produce the best results.
3. Turn the machine to the
”
G
”
position.
As soon as the brewing espresso reaches
the steaming mark on the glass carafe,
turn the selector switch to the “0”
position. At that time the boiler has
created enough pressure and steam to
start frothing the milk. Frothing the milk
before finishing the espresso prevents
you from running out of steam, which can
happen if you froth towards the end of the
brewing process.
4. Now take your pitcher with milk and
insert the steam nozzle half way into the
pitcher. Turn the selector switch to the
”
@3
”
position and leave in for
approximately
45-60
seconds, depending
on how much froth you want and the type
of milk you are using (see
figure 14).
ATTENTION:
Do not bring milk to a boil (this will happen
if large bubbles start forming at the surface
of the milk).
Do not let the “Perfect Froth” attachment
touch the bottom of the pitcher (this will
prevent you from frothing milk).
5. Turn the three way selector switch back to
the “0” position while the nozzle is still
immersed in the milk. This will prevent
splattering of hot milk.
6. After the milk is frothed set the pitcher
aside and allow the frothed milk to settle.
7. Then turn the three way selector switch
back to the
”
D
”
position to finish
making the espresso.
8. Pour the espresso into a cup which has
the capacity of at least
(5
oz.). Add the
steamed milk to the espresso and spoon
on the frothed milk. The proportion
between espresso and milk is to taste; in
Italy it is normally
l/3
espresso,
l/3
steamed milk plus
l/3
froth.
11