


7
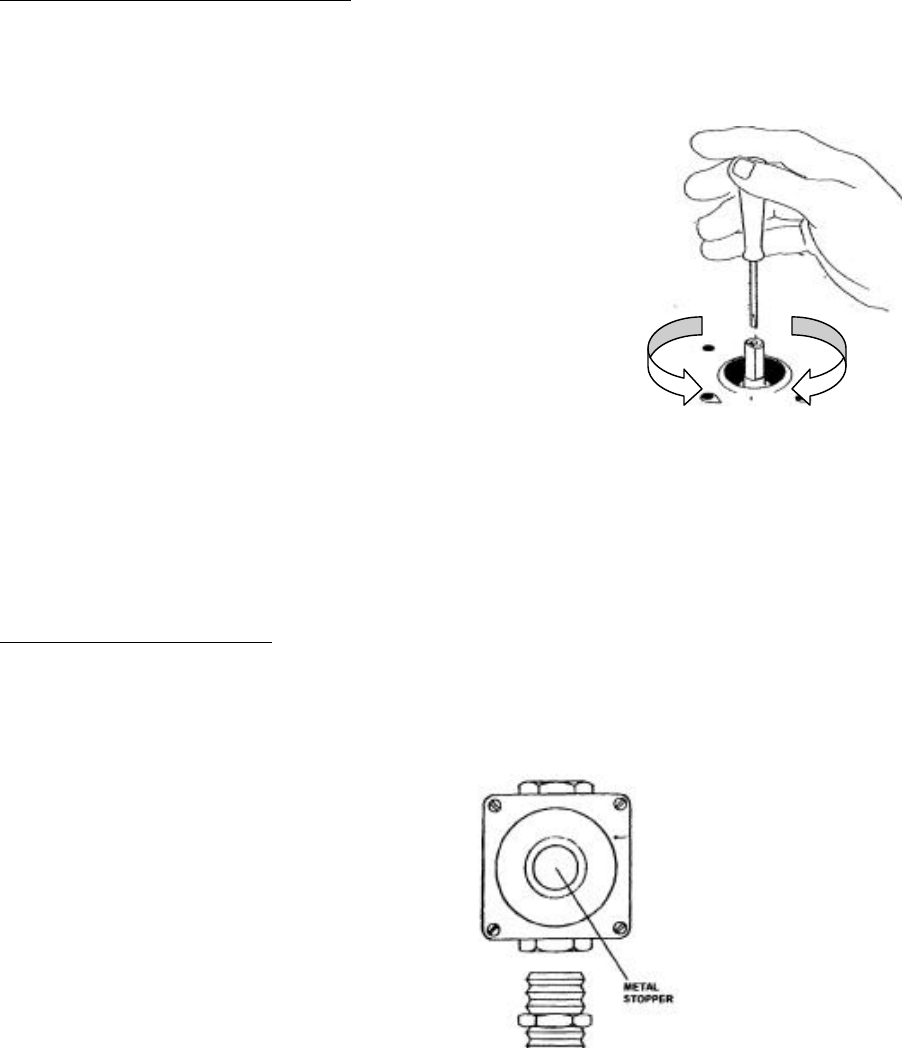
By-pass jet adjustment for low flame setting
1) Turn the right front burner on to ignite. Once lit, turn to the lowest setting (small flame).
2) Remove the knob from the cooktop and place in a secured location.
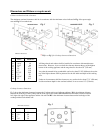
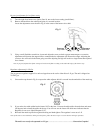
Locate the adjustment screw shown in Fig. 8 in the center of the burner valve shaft.
3) Using a small flat blade screwdriver, locate and adjust the screw to obtain a proper flame height. A clockwise
adjustment will decrease the output while a counterclockwise adjustment will increase the output. Adjusting the
screw too low will result in the flame going out while adjusting too high will result at a larger flame than required
for a simmer.
Note: A properly adjusted low flame setting will result in the flame reaching to the underside edge of the burner cap!
Regulator adjustment for L.P.Gas
The gas pressure regulator supplied is a universal type that can be set for either Nat or L.P gas. The unit is shipped set
To NAT gas.
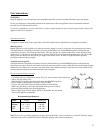
1) Unscrew the cap shown in Fig. 9 to expose the white adjuster which is screwed into the underside of the metal cap.
2) If you notice, the white striker has the letters NAT at the base. Unscrew the white striker from the base and rotate
180 degrees and re-install the striker in the cap. You will now see the Letters LP which now indicates that the
Regulator is now set to Liquid Propane (L.P.).
3) Re-install the metal cap into the regulator housing and hand tighten. The regulator is now set to L.P.
Note: If the unit is converted back to NAT gas in the future, follow the above steps to convert back to NAT gas operation.
The unit is now ready to be operated on L.P gas. ……………………………………..Conversion Complete!
Fig. 8
Increase Decrease
Larger Flame Smaller Flame
Fig. 9