5
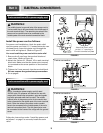
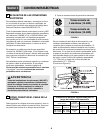
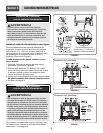
Install the power cord as follows:
For power cord installations, Hook the strain relief
over the power cord hole (1
3
/
8
”) located below the rear
of drawer body. Insert the power cord through the
strain relief and tighten it. (Refer to Figure 5.)
You must install the power cord with a strain relief.
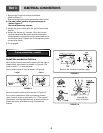
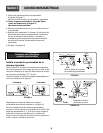
1. Remove the 3 nuts from the terminal block and
retain them. (Refer to Figure 6.)
2. Attach the 3 wires (L1, Neutral, L2) to each terminal
block bolt. Make sure that the center wire (neutral)
is connected to the center position of the terminal
block.
3. Tighten the 3 nuts securely into the terminal block.
Do not remove the ground strap connection.
4. Go to page 8.
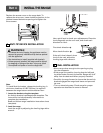
Follow the instructions under “Install the power cord
as follows” on page 5 to correctly install the strain
relief.
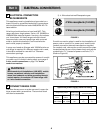
Part 3 ELECTRICAL CONNECTIONS
WARNING
The middle (neutral or ground) wire of the power cord or
3-wire conduit has to be connected to the middle post of
the main terminal block. The remaining two wires of the
power cord or conduit have to be connected to the
outside posts of the main terminal connection block.
WARNING
Only a 4-conductor power-supply cord kit rated
120/240 volts, 50 amperes and marked for use with
ranges with closed-loop connectors, open-end spade
lugs with upturned ends shall be used. The middle
(neutral) wire of the power cord or 4-wire conduit has
to be connected to the middle post of the main terminal
block. Other two wires of the power cord or conduit
have to be connected to the outside posts of the main
terminal connection block. The 4th ground wire must
be connected to the frame of the range with the ground
screw.
L2 L1N
L2
G
L1
N
FIGURE 5
L2 L1NL2 L1N
L2
G
L1
N
FIGURE 6
3-wire connection
L2 L1N
L2L2
GG
L1L1
NN
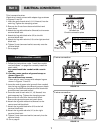
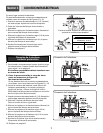
FIGURE 7
4-wire connection
Attach the strain relief
to the 1
3
/
8
” opening in
Conduit connection plate
3-wire connection with a power supply cord
4-wire connection with a power supply cord


