9
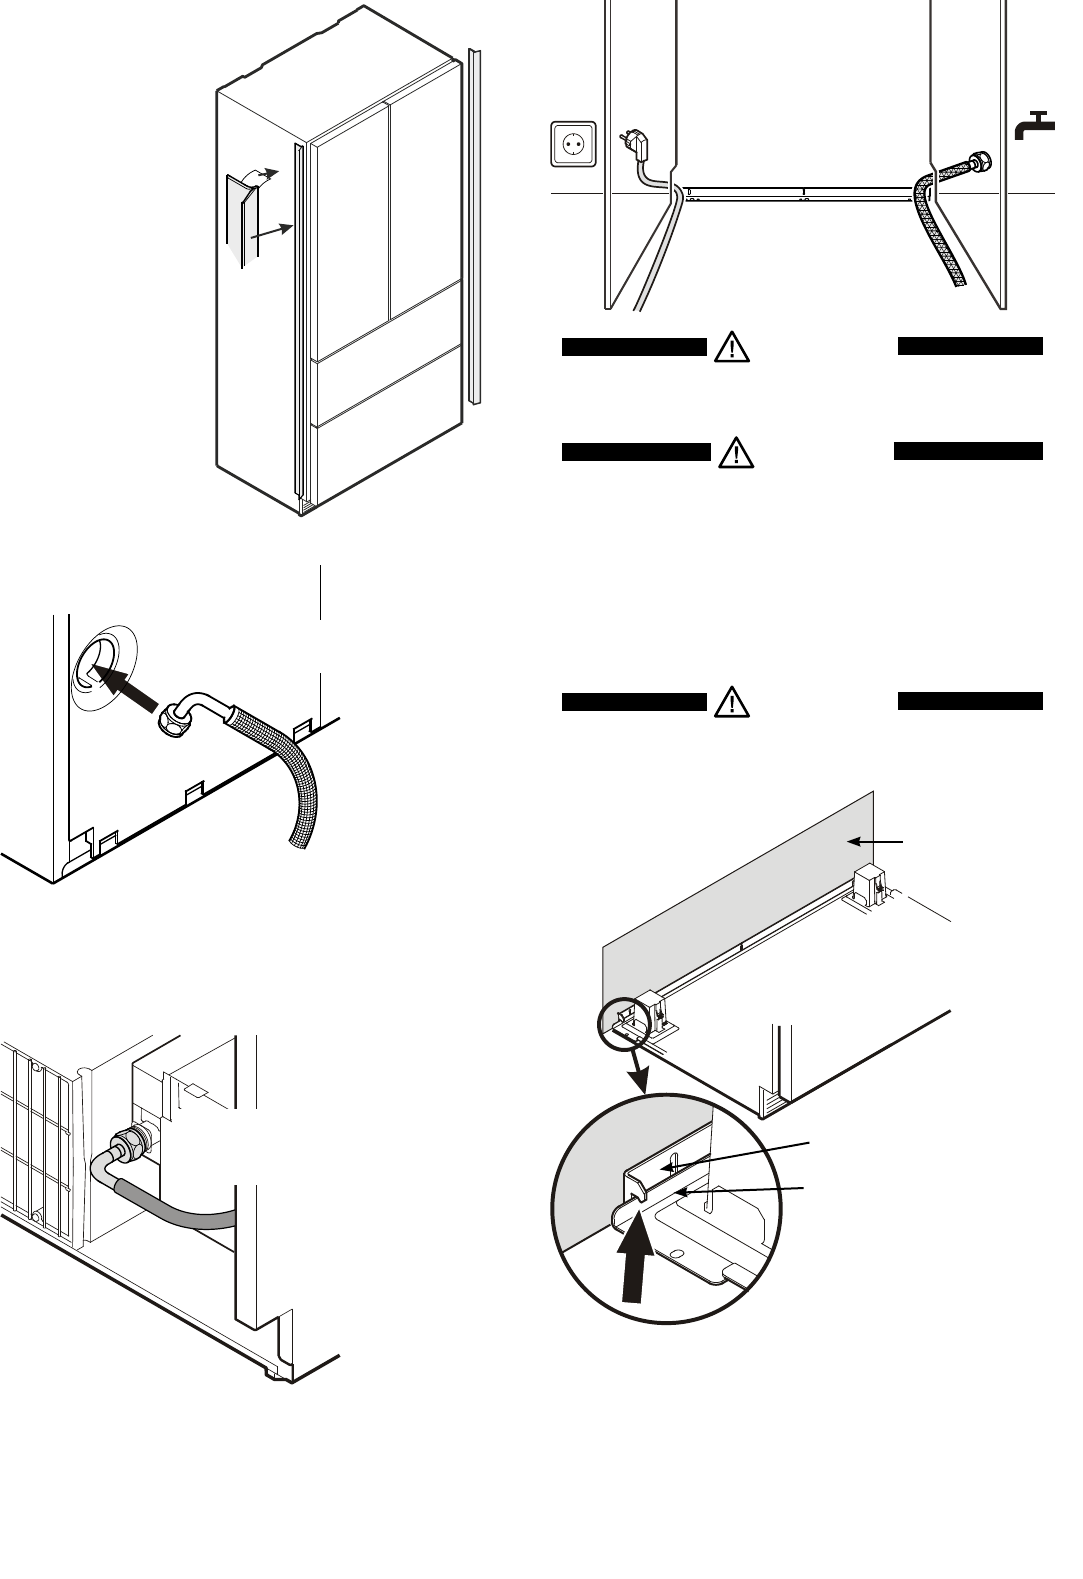
3. Insertthebentsectionofthehosethrough
theopeningattherearoftheappliance.
4. Connectthehosetothesolenoidvalve
atthefrontsideoftheappliance.
WARNING!
Do not connect the appliance to the power supply until the
installation is completed.
CAUTION!
Lay the mains cable and the water hose in such a way
that they will not be damaged when the appliance is slid
into the installation recess.
Anti-tippingbracket
Compressormounting
plate
Wall
Appliance
7. Pushtheapplianceslowlyintotherecessuntilthecompressor
mountingplatetouchestheanti-tippingbracket.
WARNING!
To prevent the appliance from tipping forwards, the com-
pressor mounting plate must be touching the anti-tipping
bracket!
8. Connectthehosetotheshut-offtap.
Opentheshut-offtapandcheckthesystemforleakage.
Important!
Aftertheicemakerhasbeenswitchedon,thewatersupplysystem
mustbebled.SeethesectionBleeding the ice makerinthe
operatinginstructions.
5.
6.
6.Route the water hose
towardsthewatershut-
offtap.
5. Route the mains cable
towardsthesocket.
Installation
1. Place the appliance in front of the
installationrecess.
2. Applycoverstripsonthe
side walls of the appli-
ance.


