A delight in freshness
WF1051 / EWTNes 2956
11
REVERSING DOOR HINGES
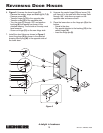
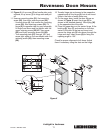
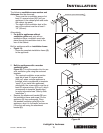
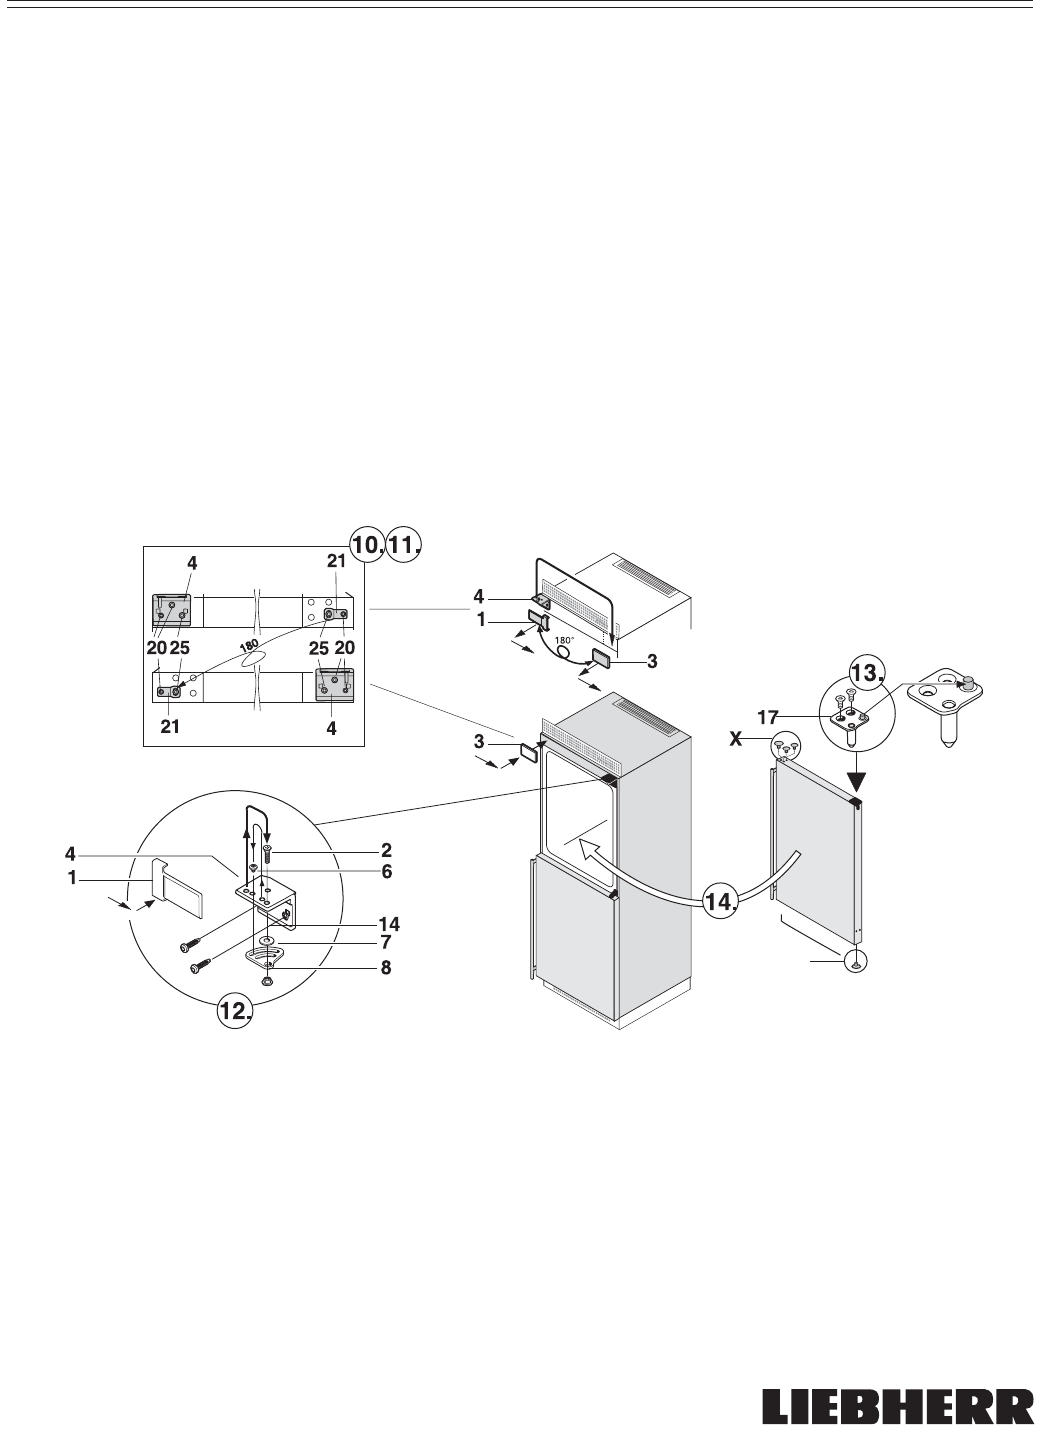
10. Figure 6: Lift up cover (3) on handle side, push
outward; lift up cover (1) on hinge side and pull
off.
11. Unscrew mounting plate (21): first mounting
screw (20), then inner retaining screw (25).
- Unscrew hinge (4): first remove the mounting
screw (20), then retaining screws (25). Fit
hinge (4) to opposite side: for easy assembly,
fit hinge from above and first tighten with the
upper retaining screw (25) M5, then screw
(25) and finally mounting screw M4 (20).
- Turn mounting plate (21) through 180° and
screw tight again on the new handle side: first
retaining screw (25), then mounting screw
(20).
12. Transfer hinge pin and screw to the respective
opposite side of the hinge (4), but do not insert
them in the hole or fasten them now.
13. On the upper door, install the door fittings as
shown in Figure 6. Insert the plugs (X) as
shown in the detailed drawing. Move plug (W)
to the opposite side of the door.
14. Place the upper door on the center hinge, fit the
bushing (8), stop (7) and washer on the door,
swivel in the door at the top and insert and
secure the hinge pin (2) from above through the
hinge and stop. Insert screw (6) for fixing the
opening angle to 130°.
Check for proper alignment of all doors. Adjust
them if necessary using the slots on the hinge.
W
Figure 6


