


Impinger I – 1000 Series Ops Manual
11
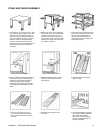
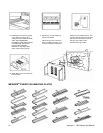
STAND AND FINGER ASSEMBLY
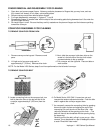
1. The stand is a 40” (1016 mm) x 49” (1245
mm) rectangle. Set it in place with a 40”
side facing out. This will be the front of
the oven. Using a carpenter’s level, level
all four (4) sides of the stand. To raise or
lower the stand use the leg adjusters.
Ovens on casters require a level floor.
NOTE: The oven top is packed with oven
stand. Remove top from stand before
assembly.
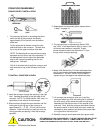
2. Remove the oven from the dolly and
set it on the stand. The control panel
should be on the right rear as you
face the oven. Be sure that the oven
sets squarely on the stand and is fully
seated. For a single oven, install top.
For double, see step 3.
3. If you purchased a double stack oven,
place the second oven on top of the
first one. Be sure that it sets on
squarely and is fully seated. The
control panel goes on the right rear.
Now install oven top.
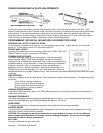
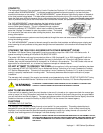
4. Before installing the retaining brackets in
the oven(s), be sure all of the packing
material is removed from the plenum
shroud. Install the finger retaining
brackets by placing them upside down
and hooking the retaining pin as shown
above.
5. Rotate the finger brackets until the
notches in the brackets sit on the
retaining pins.
6. Assemble fingers as shown in
steps 7 and 8.
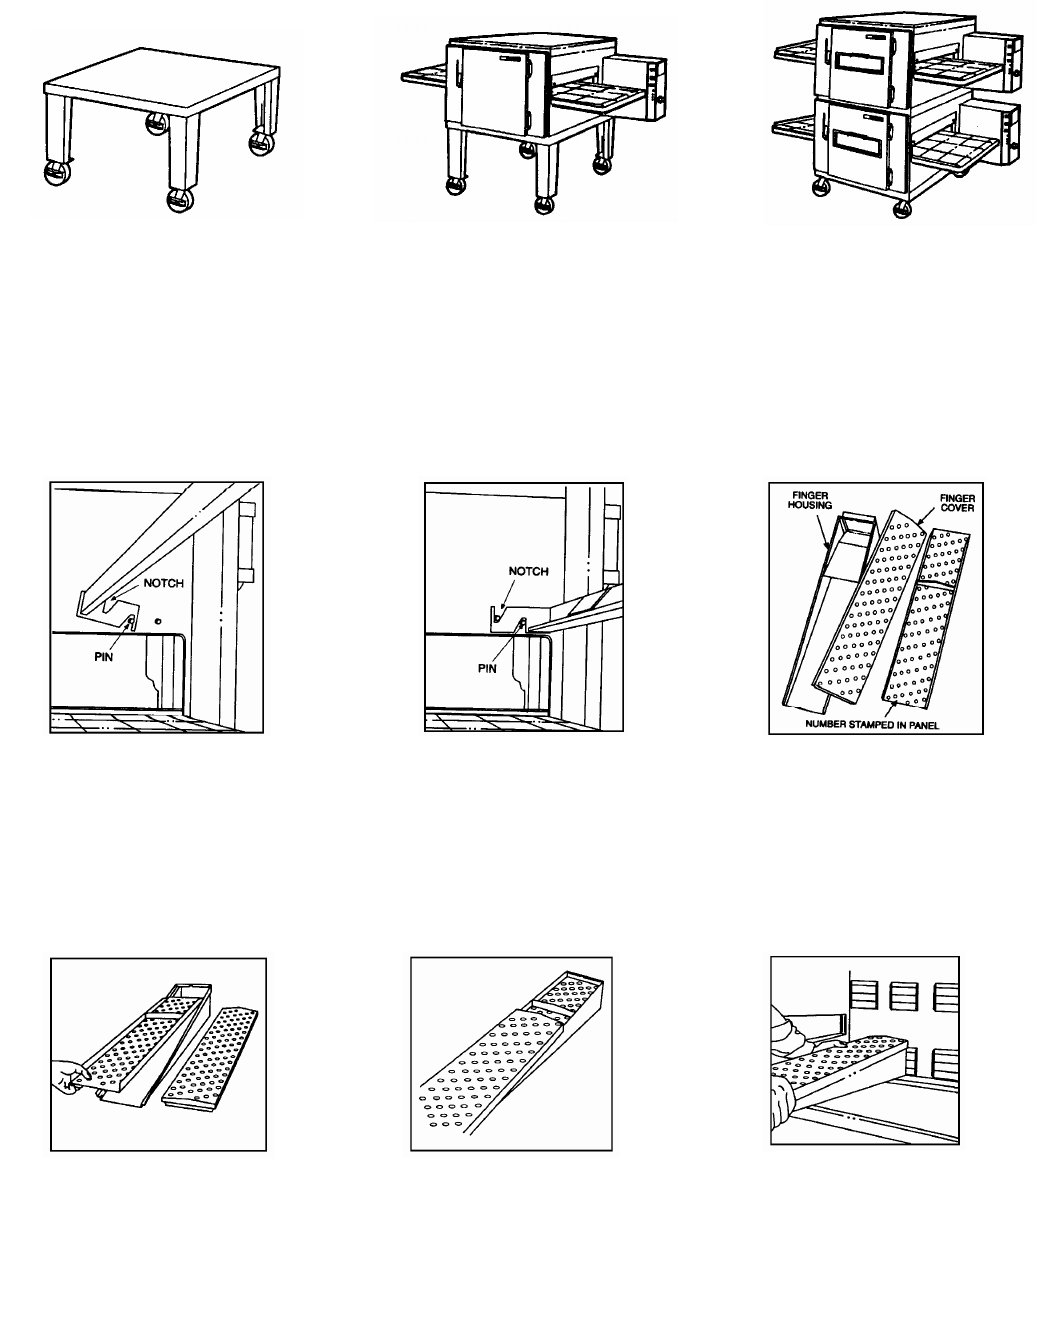
7. Insert columnating plate so the step
goes under the lip of the finger housing
and the plate lies flush with the housing
side edge.
8. Install cover by sliding it on the
small end.
9. Insert assembled finger through
door opening starting with lower
left. NOTE: The customer
MUST tell you what position to
place the assembled finger in,
for their application.