Impinger 3255 – Operator Manual
15
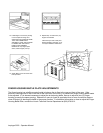
FINGER REMOVAL AND DISASSEMBLY FOR CLEANING
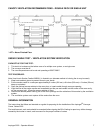
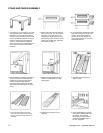
1. Open door and remove upper fingers. Note any particular placement of fingers that you may have, such as
fully closed, half-closed, or fully open, columnating plates.
2. Remove conveyor and then remove bottom fingers.
3. For finger disassembly, see “Stand and Finger Assembly” section.
4. Reassemble fingers in reverse order with the step of the columnating plate facing downward so it fits under the
lip of the finger housing.
5. Re-install finger in oven. Be sure that they are fully seated over the plenum flanges and the holes are pointing
toward the conveyor.
CONVEYOR DISASSEMBLY FOR CLEANING
TO REMOVE CONVEYOR FROM OVEN
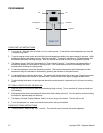
1. Remove conveyor chain guard. Remove crumb pans.
2. Lift right end of conveyor and push in approximately 3” (76mm). Remove drive chain.
3. Pull conveyor out the right end. Place on table or work surface.
CONVEYOR INSTALLATION
1. Insert the conveyor through the opening in the right side. Sprocket should be to the right side of the conveyor.
2. Slide conveyor through the oven chamber until the locking bar on the drive end of the conveyor is
approximately 2” – 3” (50 – 76 mm) into the oven chamber. Install drive chain by placing it over the drive
sprocket and placing it over the conveyor sprocket.
3. Lift conveyor just enough to allow you to pull the conveyor toward you until the locking bar is outside of the
oven cavity, at the same time push the conveyor downward so that the bar locks on the outside of the oven
wall.
4. Reinstall conveyor crumb pans and chain guard cover.
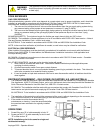
CAUTION:
!
Set tension on the conveyor belt. The belt should be able to be lifted enough to allow
it to be ¼” (6 mm) from the top of the conveyor opening on the oven. Do not over
tighten the belt!


