


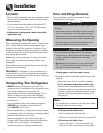
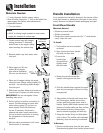

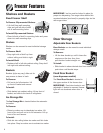

4. Select models also have rear adjustment screws (B).
Using the hex head driver, turn each of these
adjustment screws (B) to raise or lower the rear of
the refrigerator.
5. Using the carpenter’s level, make sure front of
refrigerator is
1
⁄4" (6 mm) or
1
⁄2 bubble higher than
back of refrigerator and that the refrigerator is level
from side to side.
6. If required, correct rocking of refrigerator by turning
rear adjustment screw clockwise to raise rocking
corner. If doors are uneven, do the following:
• Determine which door needs to
be raised.
• Turn front roller adjustment
screw (A) clockwise to raise
front corner of door.
• If one refrigerator door has reached the limit of its
adjustment range and doors are still not level,
raise or lower the opposite door by turning roller
adjustment screw counterclockwise.
• Check with level to verify
1
⁄4" tilt to the back for
proper door closure.
• If refrigerator is aligned and stable, replace toe
grille and hinge covers.
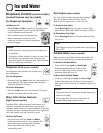
7. Replace bracket cover(s).
• Position cover into the outer edge of the hinge.
• Swing the cover toward the cabinet and snap it
into place.
8. Replace the toe grille.
6
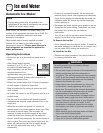
Installation
Leveling
To protect personal property and refrigerator from
damage, observe the following:
• Protect vinyl or other flooring with cardboard, rugs,
or other protective material.
• Do not use power tools when performing leveling
procedure.
CAUTION
To enhance the appearance and maintain performance,
the refrigerator should be level.
Note
• Complete any required panel installation and/or a
water supply connection, before leveling.
Materials Needed
•
3
⁄8" hex head driver
• Carpenter’s level
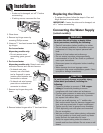
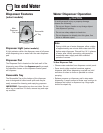
1. Remove toe grille.
• Grasp firmly and pull bottom outward to unclip.
2. Remove bottom bracket cover(s).
• Place the eraser end of a pencil or similar blunt
tool in the cover notch.
Notch
Location
• Use slight pressure to pry the
cover loose.
• Continue to maintain downward
pressure to the notched side of
the cover while swinging it off.
3. Using hex head driver, turn both of the front
adjustment screws (A) clockwise to raise and
counterclockwise to lower the front of the
refrigerator.
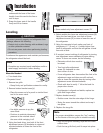
underneath the base of the lower
handle. Insert the card to the line or
until it stops.
2. Grasp the lower part of the handle
firmly and lift to remove.
Note
• For proper reinstallation, ensure the “top” marking
on the interior of the toe grille is oriented correctly.
• Align the toe grille mounting clips with the lower
cabinet slots.
• Push the toe grille firmly until it snaps into place.
Note
• Some models only have adjustment screws “A.”