


©2000 Maytag Appliances Sales Company
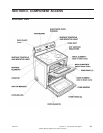
16010107 Section 3. Component Description
3-9
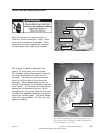
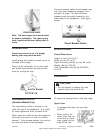
seated on the hinges. Push down on
the top corners of the door to
completely seat door on hinges. Door
should not appear crooked.
NOTE: The oven door on a new range
may feel “spongy” when it is closed.
This is normal and will decrease with
use.
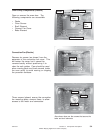
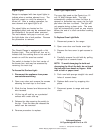
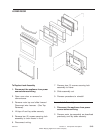
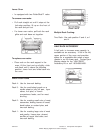
To Disassemble Door:
1. Open door to the stop position and lift
door off hinges. Remove door and lay
on protected surface, liner side up.
2. Remove three (3) screws securing the
doorframe to the liner at the bottom.
3. Remove two (2) side screws securing
doorframe to door liner.
4. Remove four (4) screws securing the
door trim at the top.
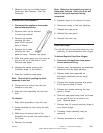
5. Slide the doorframe and glass off liner
from the bottom.
6. Remove four (4) screws securing the
door handle to the door liner. (Two on
the sides and two in front).
7. Remove two (2) screws securing door
baffle to liner.
8. Remove four (4) screws securing door
baffle to window pack. Remove baffle.
9. Remove insulation wrap.
10. Remove four (4) screws securing window
pack to liner. Window pack comes out as
an assembly.
11. Door gasket can be replaced without
door being disassembled by pulling
gasket out of bottom insert of door. The
gasket is secured with clips inserted into
door liner.
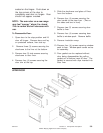
UPPER DOOR