


©2000 Maytag Appliances Sales Company
16010107 Section 3. Component Description
3-11
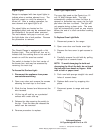
3. Remove main top and slide forward.
Disconnect wire harness. (See Top
Removal).
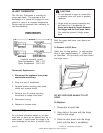
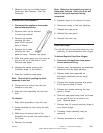
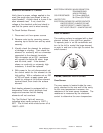
LOWER LATCH ASSEMBLY
1. Disconnect the appliance from power
source before servicing.
2. Remove main top as outlined
in main top removal.
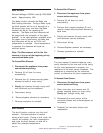
3. Remove the screws
securing the side
panel at the top and
back of frame.
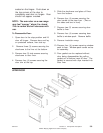
4. Remove the screws
securing the rear
panel to frame. Remove rear panel.
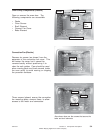
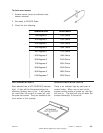
5. Slide side panel away from the frame at
rear and lift out of the slots in front.
Remove side panel.
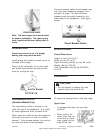
6. Release the bands, securing the
insulation wrap, at the bottom.
7. Slide the insulation wrap back.
Note: This will aid in guiding the latch
assembly in and out.
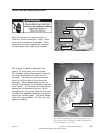
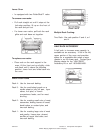
8. Disconnect the wiring from the lock
switches at the rear.
9. Slide the latch assembly out from the
rear.
To reinstall:
1. Slide latch assembly in from the rear.
2. Guide assembly to front using the side
access.
3. Make sure the screw holes of the
assembly line up with the screw holes in
the frame.
4. Reinsert the screws.
Note: Make sure the insulation is back in
place when finished. Failure to do so will
result in hot spots and poor baking
complaints.
5. Reattach band to the bottom of frame.
6. Reconnect wiring to the lock switches.
7. Reinstall the side panel.
8. Reinstall the rear panel.
9. Reinstall the main top.
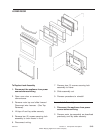
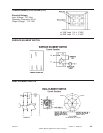
Oven Door Hinge
The unit will have to be pulled away from the
cabinetry to remove/replace door hinges.
To Access/Replace Oven Door Hinges:
1. Disconnect the appliance from power
source before servicing.
2. Remove main top assembly as described
previously and lay aside securely.
3. Remove oven door assembly as
previously described and lay aside
securely.
4. Remove the screws securing side panel
at the top and back of frame.
5. Remove the screws securing the rear
panel to frame.
6. Slide the side panel away from the frame
at rear and lift out of the slots in the
front. Remove panel.
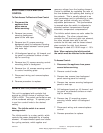
7. Remove two (2) screws securing hinge to
front frame flange.
8. Complete hinge assembly may be
removed.
9. Reverse procedure to reinstall.