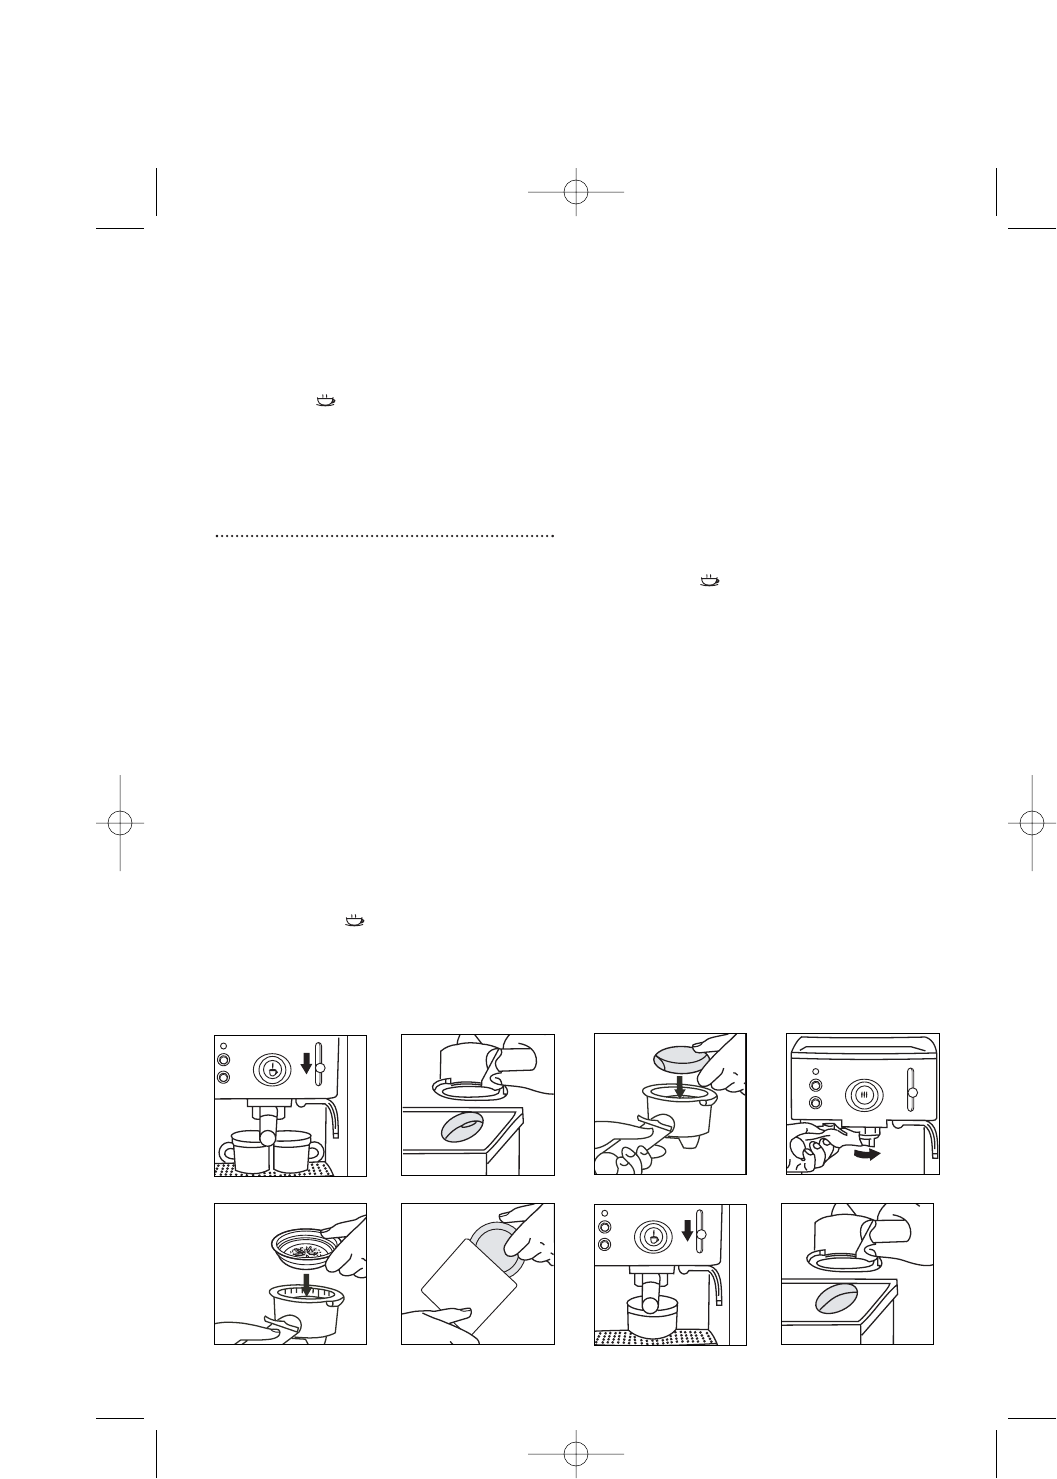
11To remove the used coffee grounds from
the filter, push the filter lock fl forward
over the edge of the filter and turn the
filter holder upside down. Gently tap out
the coffee. J
12Once the sign shows, your machine
is ready to make the next espresso.
Note: It is normal for the symbols on the
display to cycle on and off during the water
heat up process.
Using with the coffee pods
1 Select the pod filter Ï and place in the
filter holder ‡. K
2 Remove the espresso pod from the
packaging. L
3 Place the coffee pod in the filter Ï.
Ensure that the flap is placed inside the
filter. M
4 Place the filter holder ‡ on the brewing
head fi and position the handle so it
points left. Ensure the filter holder is flat
against the brewing head and turn the
handle towards the right N as far as it
will go.
5 Place a pre-heated cup below the holes
in the filter holder. O
Note: One coffee pod has the measured
amount of coffee for one single espresso.
When the coffee is at the correct
temperature the sign will be displayed.
6 Move the lever down to the coffee
setting. You will hear the machine
making a pumping noise, this is normal.
7 Once the cup is nearly filled to the
desired level, move the lever back to the
off position. Water will filter through for
approximately 8 seconds after the
machine has been turned off.
8 Remove by turning the filter holder
slowly to the left.
9 To remove the pod from the filter, push
the filter lock fl forward over the edge
of the filter and turn the filter holder
upside down. P
10Once the sign shows, your machine
is ready to make the next espresso.
Note: It is normal for the symbols on the
display to cycle on and off during the water
heat up process.
5
IJ
K L P
O
N
M
47507 Rev 1 5/4/05 4:02 PM Page 5


