2
IMPORTANT SAFEGUARDS (Continued)
12. A unit that is plugged into an outlet should not be left unattended.
13. A short power supply cord is provided to reduce the risk resulting from becoming
entangled or tripping over a long cord.
14. This appliance has a polarized plug (one blade is wider than the other). To
reduce the risk of electrical shock, this plug is indented to fit into a polarized
outlet only one way.
SAVE THESE INSTRUCTIONS!
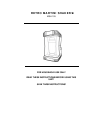
ABOUT YOUR RETRO MARTINI SHAKER™
Thank you for purchasing the RETRO MARTINI SHAKER™. This 50s-styled automatic
martini shaker will quickly mix martinis and other shaker type cocktail drinks. The RETRO
MARTINI SHAKER™ is perfect for entertaining! The ability to quickly mix refreshing
cocktail drinks will provide a fun addition to your family party or group gathering.
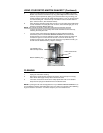
The RETRO MARTINI SHAKER™ includes a 16 ounce shaker with a sieve lid and closed
cap. The thin upright design requires little counter space and the handsome black and
silver finish will compliment your room or bar decor. The four rubber suction feet on the
bottom of the unit keep the RETRO MARTINI SHAKER™ stationery while shaking and
mixing drinks.
With your RETRO MARTINI SHAKER™ you can mix any alcohol (Gin, Whiskey, Vodka,
etc.) with tonic, soda, water or juices to create your favorite cocktail drink.
This machine is designed for kitchen or home bar use but can be used anywhere .
The RETRO MARTINI SHAKER™ is easy to use, and requires no assembly. Just follow
the step by step instructions in the following pages.
BEFORE FIRST USE
It is recommended that after unpacking your RETRO MARTINI SHAKER™, you wipe down
the unit with a clean damp non abrasive sponge or cloth, to remove any post production
soil or packing debris. Wash the 16 ounce Shaker cup in warm soapy water and towel dry.
USING YOUR RETRO MARTINI SHAKER™
1. Place your RETRO MARTINI SHAKER™ on a flat, level surface near an
electrical outlet.
2. Moisten the four suction cups and set the unit into place.
NOTE: TO RELEASE THE SUCTION CUPS, LIFT UP ON THE FRONT OF THE
UNIT AND TILT THE UNIT BACKWARD. THE AIR IN THE SUCTION CUPS
WILL RELEASE.
3. Plug the electrical cord into the wall outlet making sure the chosen location is
away from any water source.
4. Fill the Shaker cup with your choice of measured liquids, adding ice cubes as
your recipe states.
NOTE: You may want to place the cup in the freezer or fill with ice for about 5 or
10 minutes (and then empty) before adding your liquid.


