3
USING YOUR RETRO MARTINI SHAKER™ (Continued)
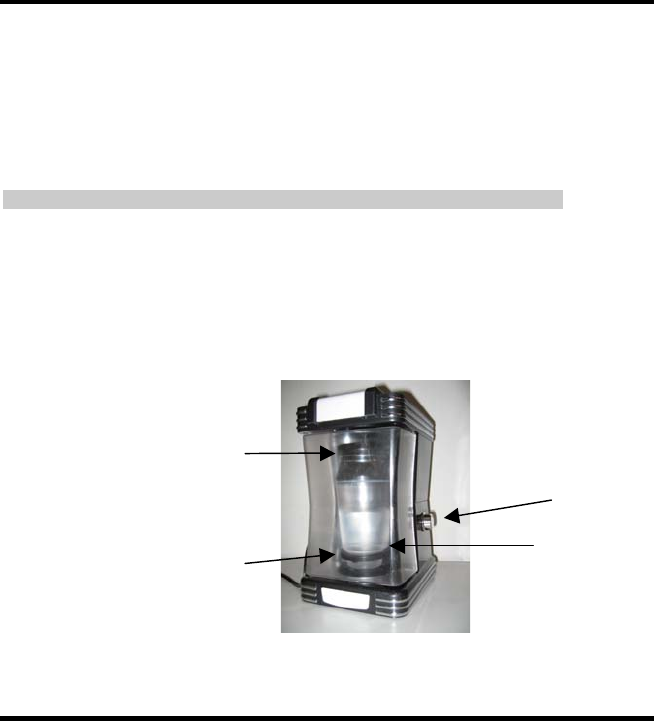
5. Place the cocktail shaker into the bottom holding ring (at the base of the Retro
Martini unit) and close and latch the top ring (at the top of the Retro Martini unit).
Latch the cup into position by placing your hand around the ring and using your
thumb, pull back on the latch clip while pressing forward – then, as the clip closes
over the extruding tab - release the clip. This motion locks the martini shaker in
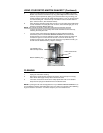
place. Close the door. (See illustration below)
6. Close the clear protective safety door securely. Turn the safety door handle down
counter clockwise. The safety door lock is secure, when the blue light goes on at
the base of the Retro Martini Shaker™.
NOTE: The unit will not function unless the safety door lock has been secured.
To open and unlock, turn the safety door handle clockwise to the left and up,
releasing the safety door lock.
7. Turn the power control knob (the ON/OFF and speed adjustment switch)
clockwise to power on the RETRO MARTINI SHAKER™ and increase the
shaking speed. Turn counter clockwise to lower and shut off the unit. Allow unit
to shake on high for no more then 45 seconds. To remove the shaker cup,
unlatch the top ring clip, open the ring and remove the cup. Within seconds, you
should have the desired results - just pour and enjoy!
Top stabilizing ring
with latch clip and tab
Power/Control knob
Door
Bottom stabilizing ring
RETRO MARTINI SHAKER™
CLEANING
1. Unplug the unit before cleaning.
2. Remove the martini shaker and wash the shaker, sieve and cap in hot soapy
water. Rinse thoroughly and dry with a soft cloth or towel.
3. The motor unit outer box shell can be easily wiped clean with a non-abrasive
damp cloth or sponge and dried with soft non abrasive towel.
NOTE: To prolong the life and visual appearance of your RETRO MARTINI SHAKER™, be
sure to follow the cleaning instructions after every use. Return your shaker to the stabilizing
rings and close the cover door. You will be ready for your next cocktail event!


