www.oster.com
www.oster.com
6
7
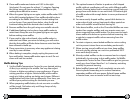
3 Close wae maker and rotate unit 180º to the right
(clockwise). Do not open for at least 1
1
⁄2 minutes. Opening
the lid too soon will cause under-baked waes to split,
making them dicult to remove.
4 When the green light goes on again, rotate wae maker 180º
to the left (counterclockwise). Your waes should be done
according to the Wae Temperature Control setting that
you’ve chosen. If you want them darker, close the lid and
continue baking until the desired color is achieved.
5 Remove waes from the grid using non-metallic utensils.
6 If additional baking is to be done, close wae maker to
retain heat. Always be sure the green light goes on again
before making more waes.
7 If you need to take a short break, close wae maker to
maintain heat. When you return to baking, you will notice
that the rst waes will bake faster because extra heat has
been allowed to build up.
8 Close supervision is necessary when any appliance is being
used by or near children.
9 When baking is complete, simply unplug the power cord
from wall outlet. Leave wae maker open to cool. Do not
clean until unit has cooled.
Wae Baking Tips
1 Set the Wae Temperature Control to your desired setting.
At rst, try a setting in the middle. You may later adjust
it lower or higher according to your preference. A lower
setting produces a lighter colored wae, while waes
made at a higher setting are darker and crisper. Dierent
wae batters will also cook up dierently. Over time, you
will nd your perfect setting for the batter you use.
2 When preparing wae batter, do not over mix or waes
will be tough. Stir batter only until large lumps of dry
ingredients disappear.
3 The optimal amount of batter to produce a full-shaped
wae, without overowing, will vary with dierent wae
batters. Pouring batter from a measuring cup will help you
gauge how much batter to use each time. Fill bottom grid
of wae maker with enough batter to cover peak areas of
the grid.
4 For more evenly shaped waes, spread thick batters to
outer edge of grid, using a heat proof rubber spatula or
other non-metallic utensil before closing lid.
5 Cake-based waes, such as the Chocolate Waes are more
tender than regular waes, and may require more care
when removing from wae maker. You may want to break
these waes into halves or quarters before removing. Use
a spatula to support waes when removing from the
wae maker.
6 To retain crispness, move baked waes to a wire cooling
rack to prevent steam from accumulating underneath.
7 When serving several waes at one time, keep waes
hot and crisp by placing on a rack in a preheated 200°F
oven until ready to serve.
8 Already cooled waes can be re-warmed and re-crisped,
individually, by returning to hot wae maker. Set Wae
Temperature Control to low. Place wae on grid so grooves
match up; close lid and heat for 1 to 2 minutes, watching
carefully to prevent burning.
9 Baked waes freeze well. Cool completely on wire rack.
Store in plastic freezer bag or in covered container,
separating waes with wax paper. Reheat frozen waes
in toaster oven, oven or toaster until hot and crisp.


