


4
befoRe usinG CanneR foR THe fiRsT TiMe
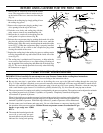
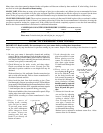
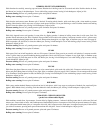
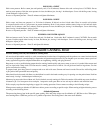
1. Remove the air vent/cover lock from the canner
cover. The cup portion of the air vent/cover lock,
on the inside of the cover, unscrews from the pin
(Fig. A).
2. Remove the sealing ring by simply pulling it from
the sealing ring groove.
3. Remove the overpressure plug by pushing it out
of its opening from the top of the cover.
4. Wash the cover, body, and sealing ring with hot,
sudsy water to remove any manufacturing oils.
5. Reinsert the air vent/cover lock making sure the
small gasket is in place as shown (Fig. B).
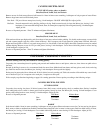
6. Reinsert the overpressure plug by pushing the domed side of the
plug into the opening from the underside of the cover, until the
bottom edge is fully and evenly seated against the underside of the
cover (Fig. C). When the overpressure plug is properly installed,
the word (TOP) will be visible on the overpressure plug when
viewing the outside of the cover.
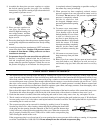
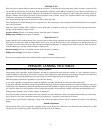
7. Replace the sealing ring in the sealing ring groove, making certain
to fit the ring under the stop tab located on the inside rim of the
cover (Fig. D).
8. The sealing ring is prelubricated. If necessary, to help make the
cover easier to open and close, a very light coating of cooking oil
may be applied to the sealing ring and underside of the body lugs
(Fig. E). The cover should open and close easily when following
the instructions on page 5.
How To use YouR CanneR
IMPORTANT: Read carefully. Do not attempt to use your Pressure Canner before reading these instructions.
Before using your canner for the first time, clean according to the instructions above.
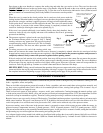
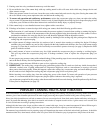
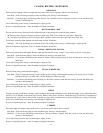
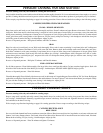
Be sure the vent pipe is open before each use by holding the cover up to the light and looking through the vent pipe
(Fig. F). If the vent pipe is blocked, excess pressure cannot be released through it. Pressure may then build to unsafe levels.
Pressure will continue to build until the overpressure plug is forced out of its cover opening. Therefore, clean the vent pipe
with a small brush or pipe cleaner if it is blocked or partially blocked (Fig. G). Also clean the vent pipe nut as shown.
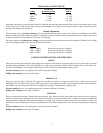
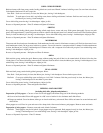
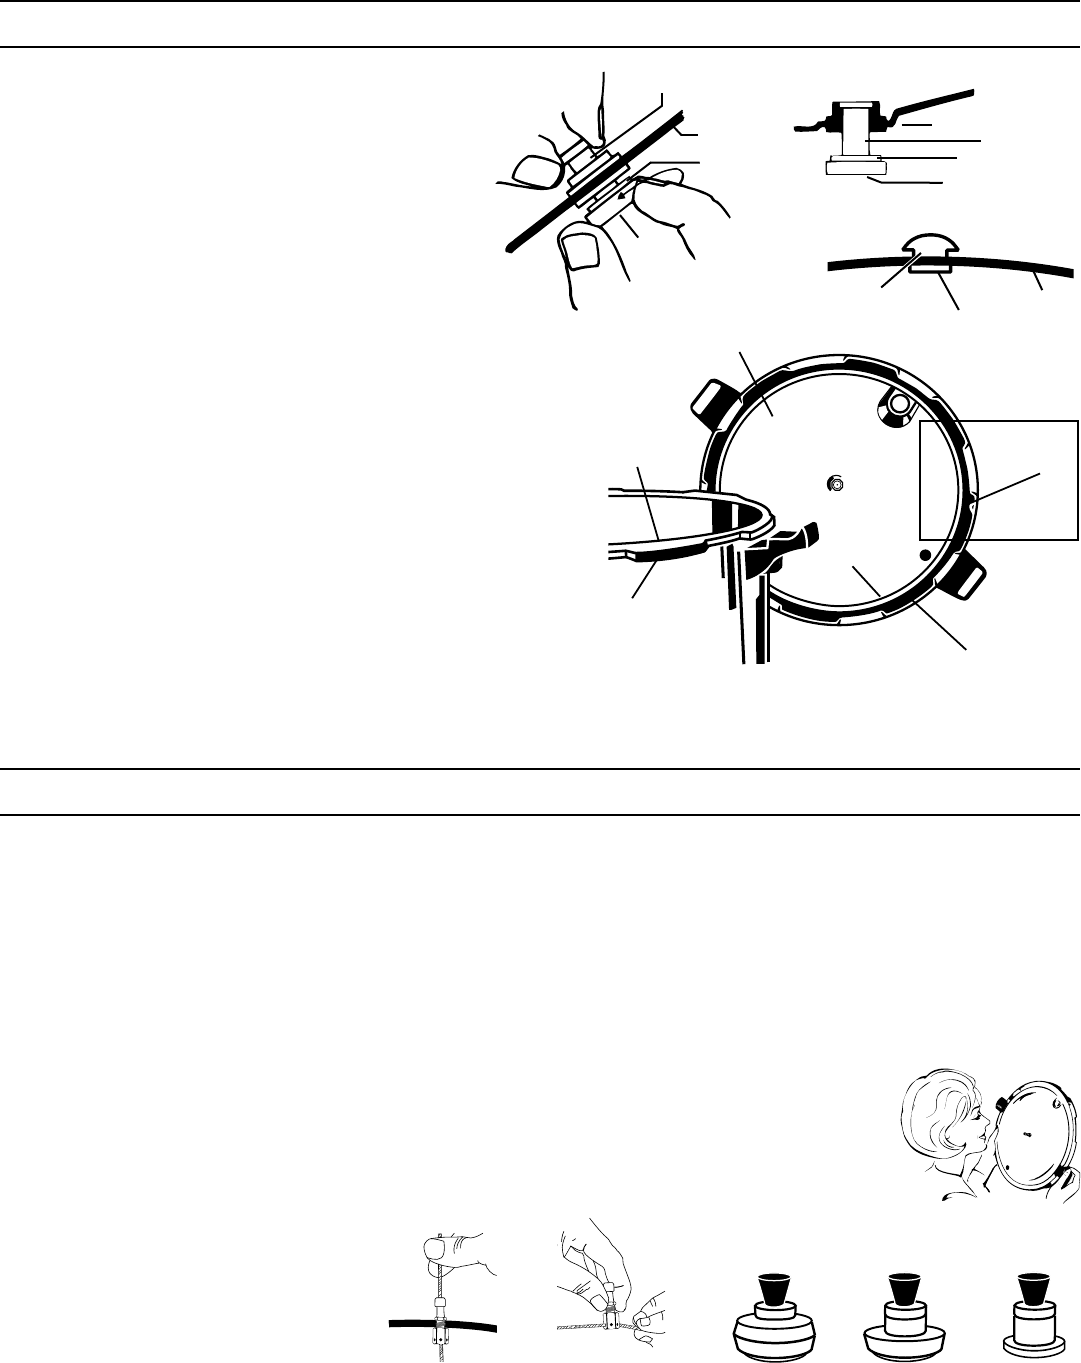
The correct pressure for canning and cooking is maintained by the pressure regulator. The regulator can be adjusted to maintain
any of three pressure levels (5 pounds, 10 pounds, or 15 pounds). Completely assembled, the regulator
will maintain 15 pounds of pressure.
When it is desirable to use another pressure level (see recipe section), the regulator can be adjusted by
removing the appropriate number of weight rings (Fig. H). When one ring is removed, the regulator will
maintain 10 pounds of pressure. With both rings removed, 5 pounds of pressure will be maintained.
Use the canner on a level burner and range only. Use on a tilted burner or range may interfere with
the operation of the pressure regulator. Caution: Do not use pressure canner on an outdoor LP gas
burner or gas range over 12,000
BTU’s.
The canner has been designed so the
cover will go on in only one posi-
tion and rotate in only the directions
indicated for closing and opening.
Pin
Cover
Small
Gasket
Cup
Cover
Pin
Small Gasket
Cup
Indented
Portion
Overpressure
Plug
Cover
Top
Fig. A
Fig. B
Fig. C
Fig. F
Fig. G
Cover
Body Lug
Apply
Cooking
Oil Here
Apply
Cooking
Oil Here
Stop Tab
Sealing Ring in
Sealing Ring
Groove
Fig. E
Fig. D
Fig. H
15 POUNDS
PRESSURE
10 POUNDS
PRESSURE
5 POUNDS
PRESSURE