


12 |
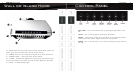
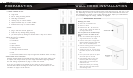
PROLINE
RANGE HOODS
USER MANUAL | 13
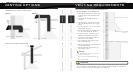
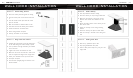
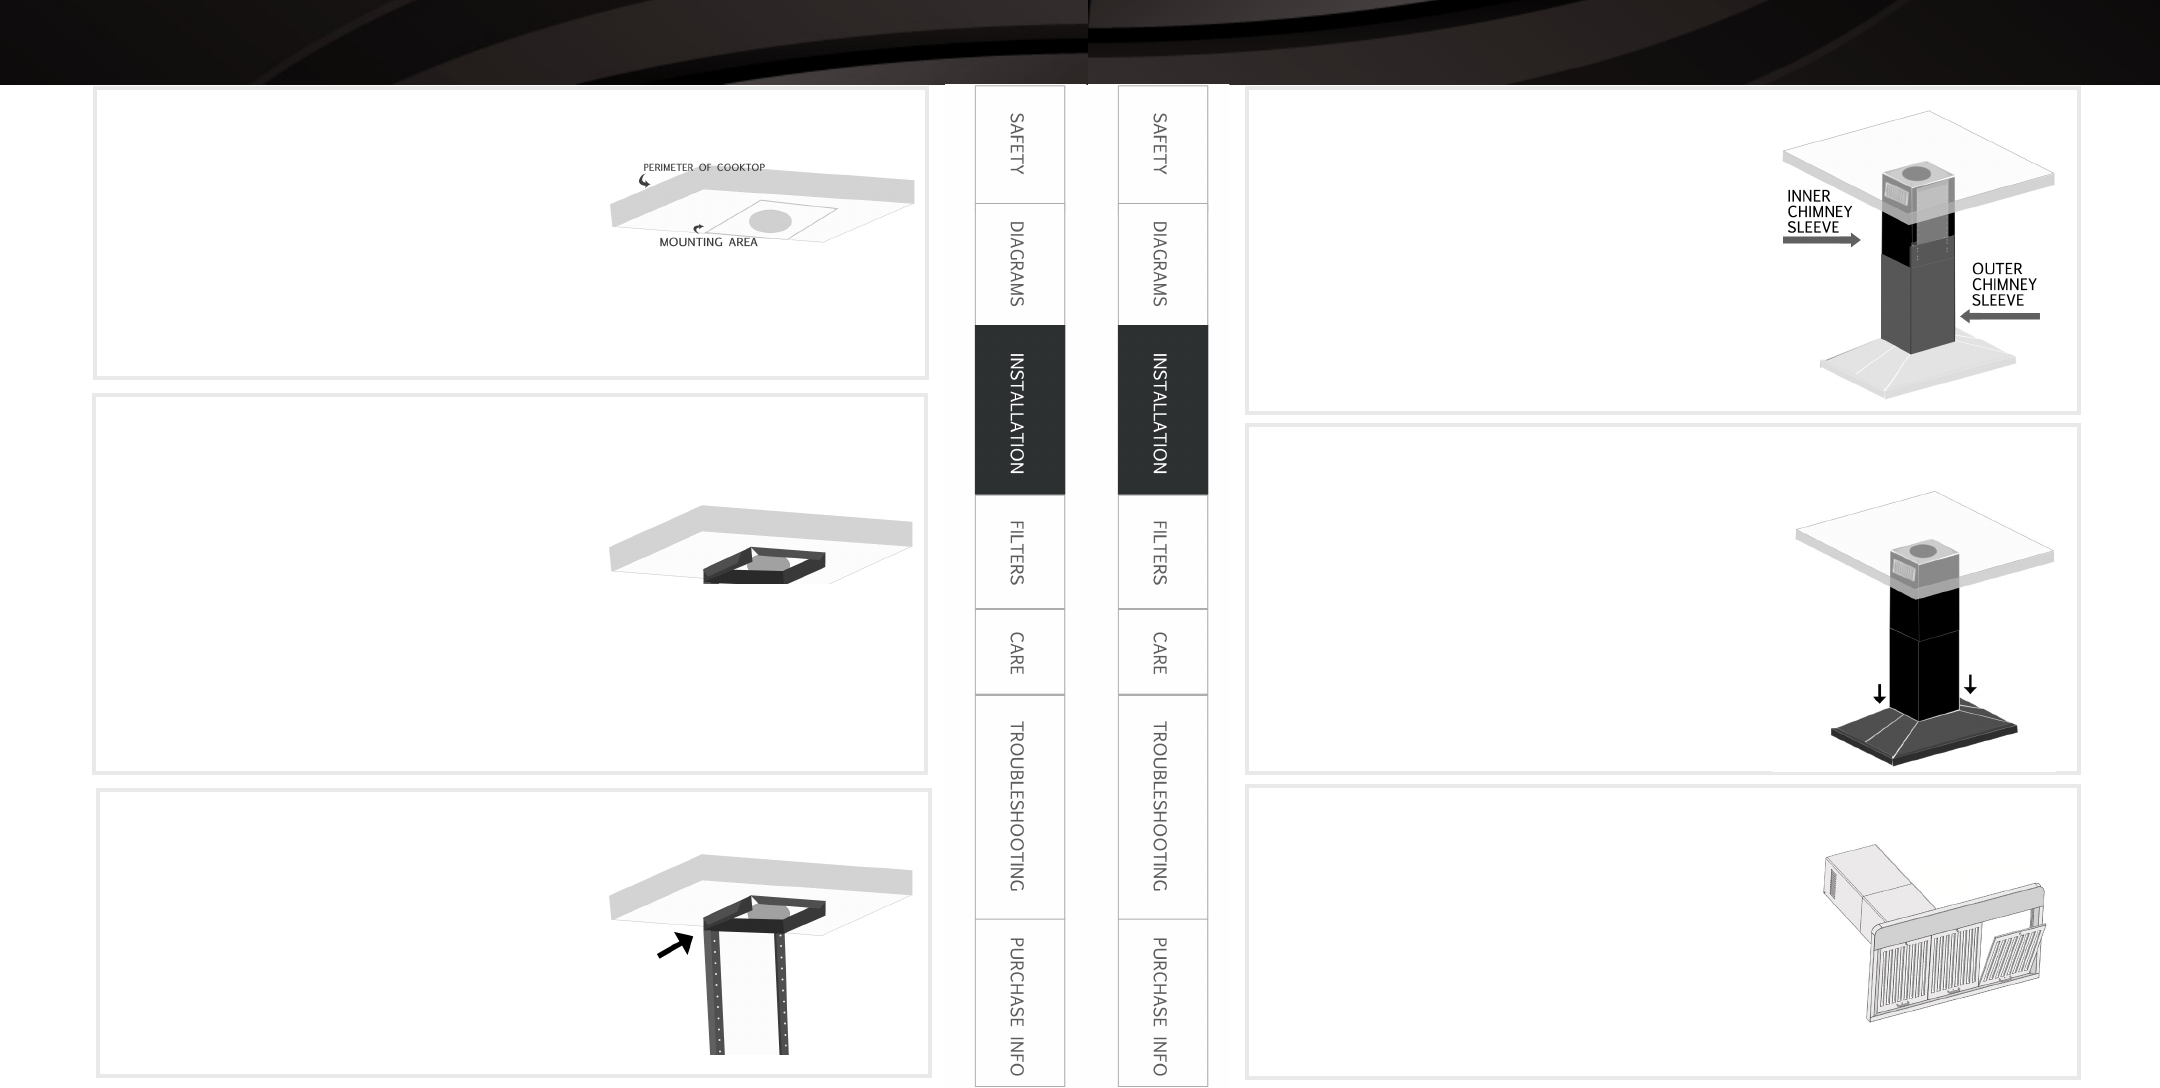
island hood installation
step 1
step 2
step 3
♦ place brackets vertically along 4 cor-
ners of the ceiling bracket
♦ extend the brackets to the appropri-
ate length. (the bottom of the hood
should be 28”-36” above the cooktop)
♦ screw all support brackets to the ceil-
ing mounting bracket
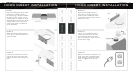
step 4
step 5
step 6
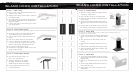
island hood installation
Mark ceiling
♦ place 4 marks on the ceiling, directly above the 4
corners of your cooktop
♦ drawing on the ceiling, connect those 4 marks into
a rectangular shape
♦ this shape should be the same as the perimeter of
your cooktop, and located on the ceiling directly
above the cooktop
♦ find the center point. This is where you will mount
your ceiling bracket
Install ceiling bracket
♦ center the bracket on the ceiling, directly above
your cooktop (using your lines from step 1)
♦ trace the outline of the ceiling bracket onto the
ceiling
♦ mark the 4 corners where you will drill holes
♦ if you are venting to the outside of your home:
cut out a hole in the ceiling and drop your rigid
ductwork and electrical wiring though the hole
♦ put chimney bracket against ceiling
♦ drill holes into ceiling where marked, securing the
ceiling bracket into place
*ceiling bracket must be mounted to a weight-bearing ceiling able to support at least twice the weight of the hood.*
Install support brackets
Install Chimney
♦ slide inner chimney sleeve over support brackets,
covering the ceiling bracket
♦ screw into place at the top of ceiling bracket
♦ slide outer chimney sleeve to the bottom portion
of the chimney
♦ adjust until the bottom chimney sleeve comes a
few inches from the bottom of the support brack-
ets
♦ you may want to use painters tape to help hold
the chimney in place while you proceed to step 5
Attach Hood
♦ if your hood comes with a transition ducting piece,
secure it to the base of your hood before mount-
ing
♦ place the base of the hood directly under the
chimney
♦ screw hood to the support brackets on all 4 cor-
ners
♦ feed electrical and ducting work through chimney
♦ slide outer chimney sleeve down into place, meet-
ing the top of the hood
*first make sure your ductwork and electrical work are pulled through the ceiling and ready to go
(see preparation work and step 2 above)
Install Filters
♦ if your hood will be ductless, install the charcoal
filter (see filter information after the Control Panel
diagram above)
♦ peel off any protective tape or film on the metal
filter
♦ pop the spring loaded metal filter into place, di-
rectly under the hood
♦ That’s it! Now you’re ready to enjoy your new
island hood!