20
Transferring Music
Transfer Audio Files to your Player
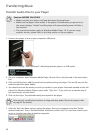
Caution: BEFORE YOU START:
• Make sure that your player is off and disconnect the earphones.
• Make sure the player is not locked. If the player is locked when you power it on,
the screen displays “locked” and the player will automatically power off after a
few seconds.
• The instructions below apply to Windows Media Player 10. If you are using
another version, please refer to the Help section on your program.
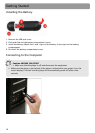
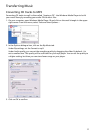
1. Connect the player to one of your computer’s USB ports.
2. The screen displays “USB Connected”, indicating that the player is in USB mode.
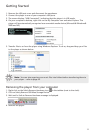
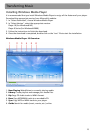
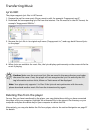
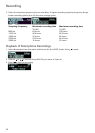
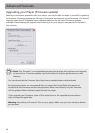
3. On your computer, open Windows Media Player 10 and click on the Sync tab in the top button
bar.
4. Click on Edit Playlist to add the tracks to be transferred to your player. Click on OK once all the
desired tracks have been added.
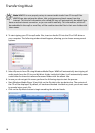
5. You should now see the tracks you wish to transfer to your player listed and checked on the left
side of the Windows Media Player screen under “Sync List”. If you wish not to transfer any of
the listed tracks, uncheck them.
6. Click on Start Sync. The selected track(s) are copied to the player.
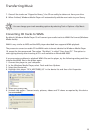
7. After the files have been copied, unplug the player from your computer using the “Safely
remove hardware” icon in the Notification Area (next to the clock). You can now listen to your
music or transfer your data to another computer.
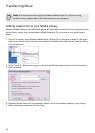
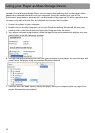
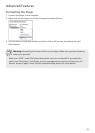
Alternatively, use Windows Explorer to drag-and-drop audio files to the player (refer
to page 22 for details).