


Drain requirements
Insertin
Dishwas er
%
in Opening
Some models ore not equipped with
a drain hose. A drain hose that meets
AHAM DW-I test standards must
be securely clamped to the pump’s
drain outlet. Drain hoses are available
through your Roper dealer. Drain
hose, when supplled, meets AHAM
DW-1 test standards.
Drain line connectIon to house
plumbing must be mlnlmum 20”
1
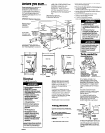
Shut off water line valve Check
n
that electric supply is off
2
If color of door and access
n
Dane1 ore to be chonaed or
Cut 1%” hole in cabinet wall for drain
hose. Additional drain line (a minimum
of %” I.D. and no longer than 20 feet]
can be used if needed.
Pick one method.
custom baneIs Installed. change the
panels now See Panel E for detailed
Instructions.
Numbers
correspond
to steps.
Recommended
Avoid opening dishwasher door
before dlshwasher is installed.
Dishwasher may tip over when
the door is opened, resulting
in personal injury or produc(
damage.
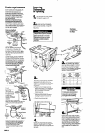
Install air gap
(Port No. 300096]: according to
kit inslructions. in the drain line
before line connects to household
plumbing. If other brands of air gaps
are used, they should be checked to
make sure they allow for the same
water flow.
Connect the air gap to a waste tee
(Part No. 675149)’ or disposer using
CI rubber connector (Part No. 6743811:
Most disposers have ‘/a” connectors or
special connectors are available at
plumbing supply houses. Be sure to
remove the disposer plug before
connecting the drain hose.
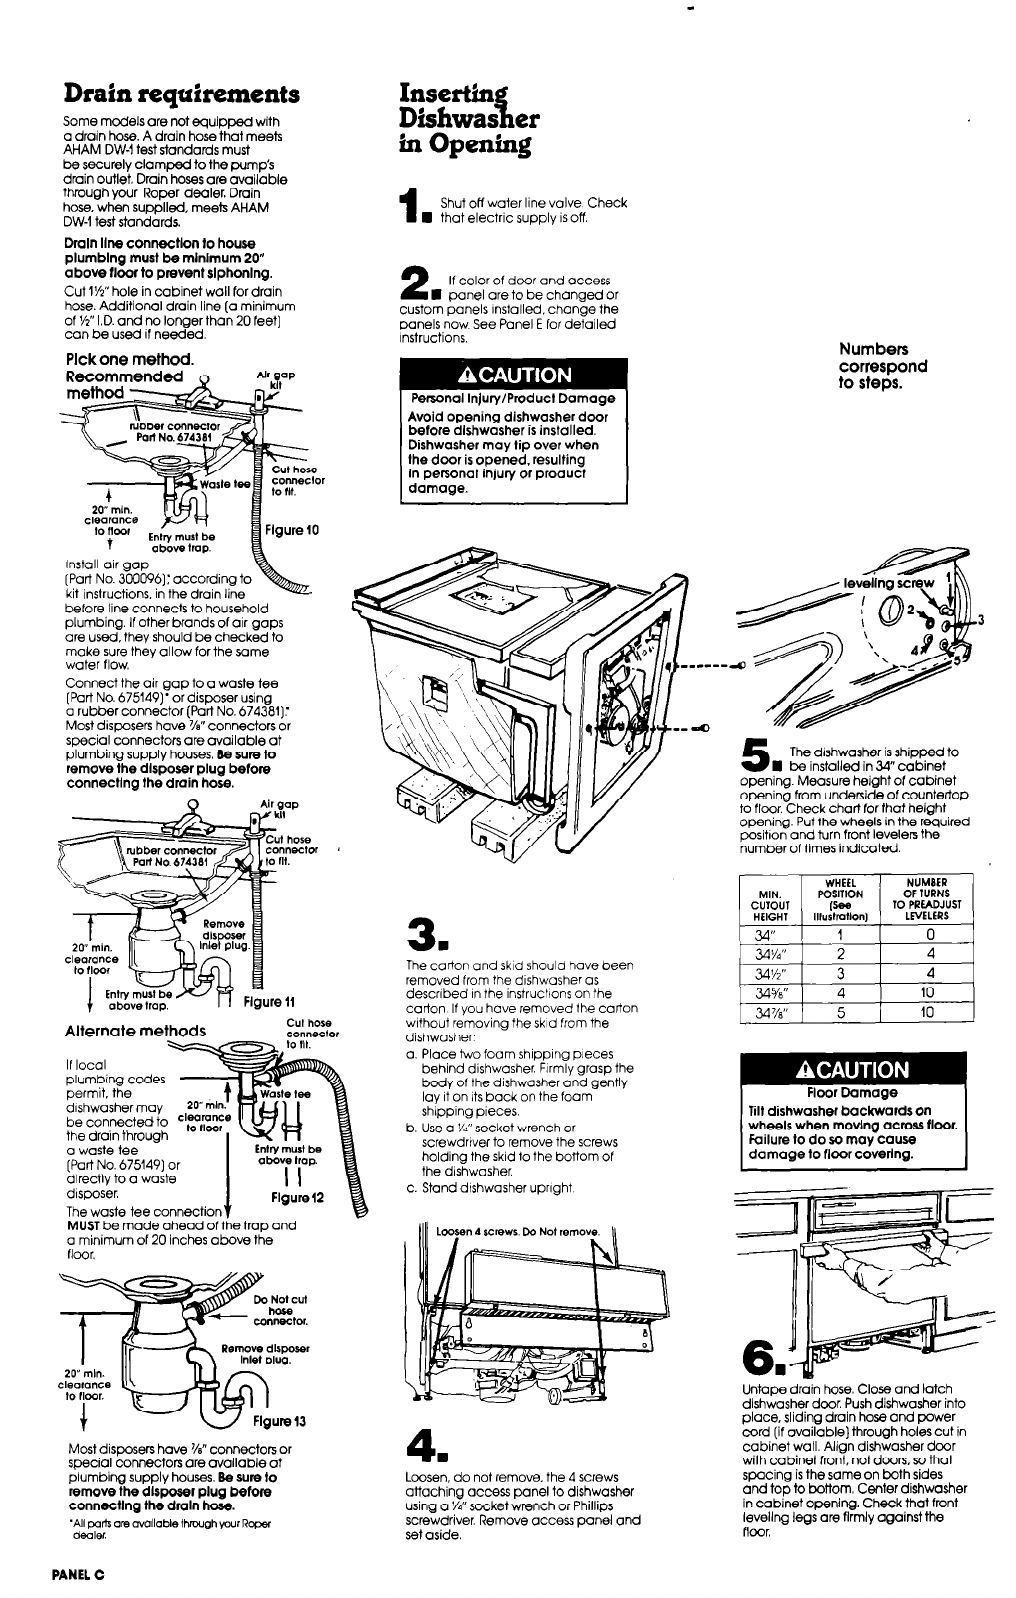
5
The dishwasher is shipped to
n
be installed in 34” cabinet
opening. Measure height of cabinet
opening from underside of countertop
to
floor. Check chart for that height
opening. Put the wheels in the required
psitvm and turn front IeveleR the
number of times indicated
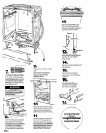
3.
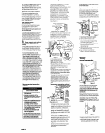
The carton and skid should have been
removed from the dlshwosher OS
described I” the instructions on the
carton If you have removed the carton
without removing the skid from the
dishwasher
CI Place two foam shipping pieces
behind dishwasher. Firmly grasp the
body of the dishwasher and gently
lay It on its bock on the foam
shipping pieces.
b. Use a YA” socket wrench or
screwdrlver to remove the screws
holding the skid to the bottom of
the dishwasher.
c. Stand dtshwasher uprlght
Alternate methods
If local
plumbing codes
permit. the
blshwasher may
20^ mkt.’
be connected to “z:z
the drain throuah
I
P
Tilt dishwasher backwardson
wheels when moving
ocmss
floor.
Failure to do so moy cause
damage to floor COVednQ.
0 waste tee -
[Part No. 6751491 or
dlrectlv to a waste
. .
disposer.
Flgurel2
The waste tee connection
MUST be made ahead of the trap and
o minimum of 20 inches above the
floor.
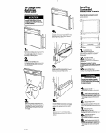
Untape drain hose. Close and latch
dlshwasher door. Push dishwasher into
place, sliding drain hose and power
cord (if available) through holes cut in
cabinet wall. Align dishwasher door
with cabinet front, not doors. so that
spacing is the same on both sides
and top to bottom. Center dishwasher
in cabinet opening. Check that front
leveling legs are firmly against the
floor.
4.
Most disposers have %” connectors or
special connecton ore avallable at
plumbing supply houses. Be sure to
remove the disposer plug before
connecting the drain hose.
‘Al po65 ore mllable thrwoh ywr Roper
dealer.
Loosen, do not remove. the 4 screws
attaching access panel to dishwasher
using a ‘/4” socket wrench or Phillips
screwdriver. Remove access panel and
set aside.
PANEL C