


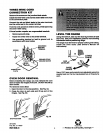
(Stability device instructionscontinued...)
2. If the bracket side of the range Is adjacent to s
cabinet, place the bracket against beck wall and
cabinet as shown In Figure 1.
If there Is no adjacent cabinet, determine where the
location of the range side (painted outside panel) will
be. Plane the bracket with Its outside edge at this
location and agalnet back wall. See Figure 1.
3. Dstermlne whether you will anchor the bracket to the
floor or wall. Fasten the bracket securely with the
screws provided. Screws are self-drllllng In wood,
plywood, particle and chlp board, and most metal
tramlng. Ifattachlng to masonry you can buy sultable
screws and anchors at hardware stores. Use a
masonry drill to drill the required holes.
ADJACENT CABINET OR FINAL
LOCATION OF RANGE SIDE
pANEL
Fig. 1
OUTSIDE EDGE OF
__HTBRACKET TO BE
FLUSH_IIErr_ LEFT ORE
_'---I.-_ _ \l, ti !i!l WALLBEHIND
4. Slide the range Into place. Be sure rear leg leveler
gully engages slot In bracket. If range cannot be
moved back far enough for rear leg leveler to enter
bracket, move bracket forward as redulred and attach
to floor In new lOCation.
5. If appliance Is removed for cleaning or any other
reason, check to make sure bracket Is re-engaged. A
risk of the range tipping over may result from
abnormal usage, Including excess loading of oven
door, If the bracket Is not re-engaged properly.
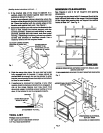
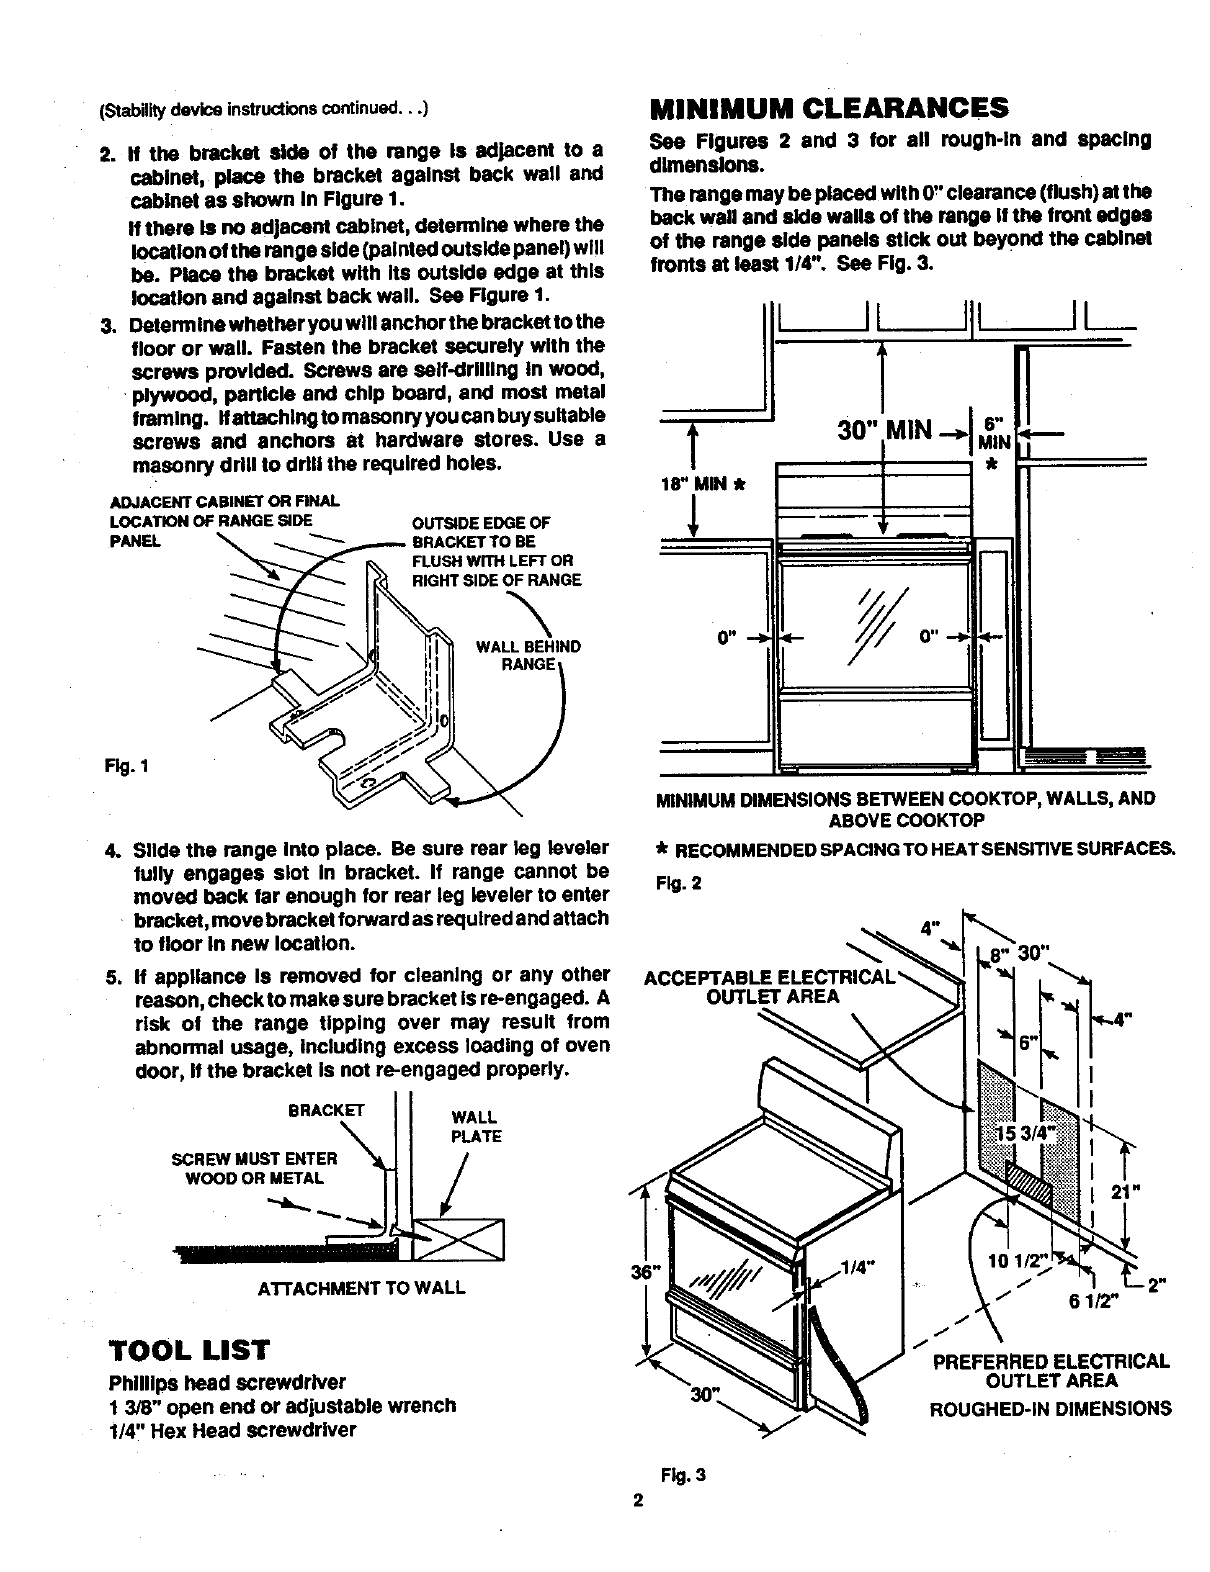
MINIMUM CLEARANCES
See Figures 2 end 3 for ell rough-In and spacing
dimensions.
The range may be placed with 0" clearance (flush) at the
back wall and side walls of the range if the front edges
of the range side panels stick out beyond the cabinet
fronts st isast 1/4". See Fig. 3.
11L
18" MIN *
1
O" ,-I _.-
m
i
MINIMUM DIMENSIONSBETWEENCOOKTOP,WALLS, AND
ABOVE COOKTOP
* RECOMMENDED SPACING TO HEAT SENSITIVE SURFACES.
Fig. 2
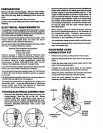
ACCEPTABLE ELECTRICAL_
OUTLET AREA
BRACKET
SCREWMUSTENTER%'_
WOODORMETAL |
r---
WALL
PLATE
/
ATrACHMENT TO WALL
TOOL LIST
Phillips head SCrewdriver
1 3/8" open end or adjustable wrench
1/4" Hex Head screwdriver
I" 2"
/ 61/2"
/"
PREFERRED ELECTRICAL
OUTLET AREA
ROUGHED-IN DIMENSIONS
Fig.3
2