Instructions for the Installer
6
2. INSTALLING THE APPLIANCE
It is the law that all gas appliances are installed by authorised persons.
Clearance around the cooker must comply with the requirements of
AS5601.
2.1 Positioning and levelling the appliance
The appliance is equipped with wheels and adjustable feet to simplify the
positioning procedure. To use the front wheels, screw in the foot as
shown here, so that the appliance rests on the front wheels. However, to
allow the appliance to be moved freely it must be lifted at the back. To do
this, proceed as follows:
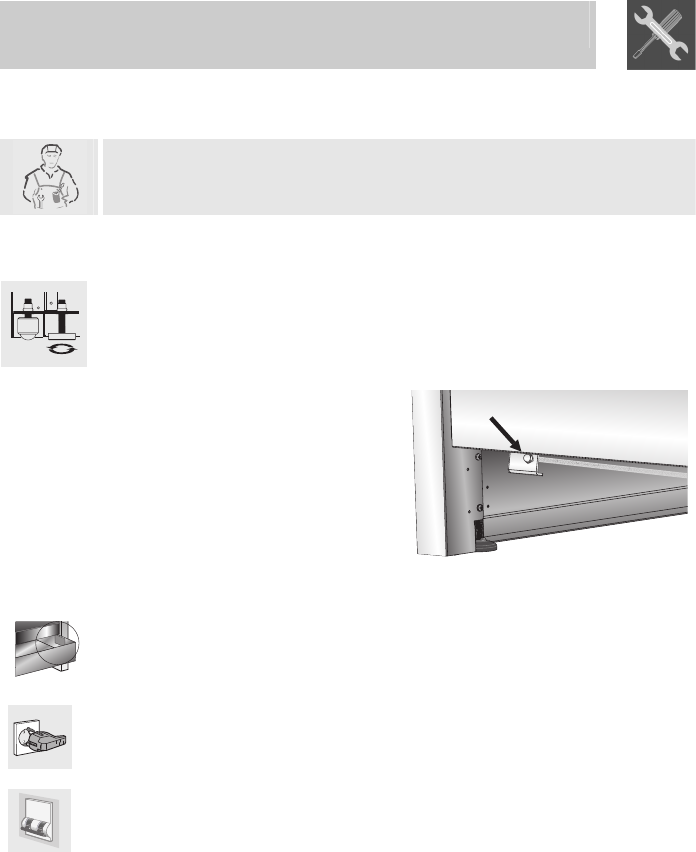
use a 10 socket wrench to screw in
the 2 hex nuts underneath the oven
compartment: this raises the
appliance either to level it or to
allow it to be moved around.
Once all procedures are complete,
retighten the front feet and the hex
nuts to set the cooker stable and
level.
2.2 Electrical connection
Check that the voltage and size of the power supply line are as specified
on the nameplate inside the storage compartment.
This nameplate must never be removed.
The plug on the end of the power supply cable and the wall socket must
be of the same type (in compliance with the relevant national standards).
Check that the power supply line is properly earthed. The use of
reductions, adapters or junctions is not recommended.
The appliance's power supply line must be fitted with an omnipolar
breaking device with contact gap of at least 3 mm, located in an easily
accessible position close to the appliance itself.


