


SSE 2
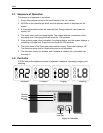
6-4 Operation
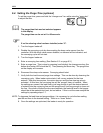
6.4. Setting the Purge Time (optional)
To set the purge time, press and hold the “change-over” key while using the “arrow key”
to adjust the time.
& The purge time that was last selected appears
in the display.
The purge time can be set at 1 to 99 seconds.
F If no line clearing valve has been installed, enter “0".
1. Turn the hopper loader off.
2. Disable the conveying cycle by disconnecting the dump valve sensor from the
controller. With the dump valve sensor disabled, no demand will be indicated, and
the conveying cycle will not start.
3. Turn the hopper loader on.
4. Enter a conveying time setting. (See Section 6.3. on page 6-3.)
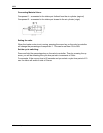
5. Enter a purge time. This is done by pressing (and holding) the change-over key (the
bottom and center LED should be lit). Then pressing the arrow key. The purge time
on the display will increase.
6. Reconnect the dump valve sensor. Conveying should start.
7. Verify both the load time and purge time settings. This can be done by observing the
conveying cycle. When loader motor starts it will convey material for the time
entered. After this time expires, the motor stays on and the line clearing valve is
activated. At this time, the conveying line will be “purged” clean of material. When
the settings are correct, the load time is just long enough to pull the desired amount
of material into the conveying line and the purge time is just long enough to clean out
the line. Once both of these functions are complete, the material level in the hopper
should be at the material inlet level, but not above. If this is not the case readjust the
settings by repeating steps 1-7.
NOTE: To decrease the load time and purge settings, it is necessary to cycle the time setting
past 99 and then to the desired setting. There is no “down” button.
8. Once the settings are optimized, the loader is ready for operation.