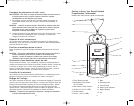
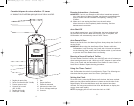
Presetting the Brewing Cycle
To preset your Coffeemaker to begin brewing at a later time, first follow
steps 1 through 6 in the Brewing Instructions section. Check to make
sure that the clock is set to the correct time. If it is not, follow the
above instructions to set the clock. Press the PROGRAM Button once, the
Digital Display will flash Program. Press the HR and MIN Buttons until the
desired brew time is reached. Make sure the proper AM/PM appears on
the left side of the Digital Display. Press the Drip Button. The green
AUTO Light will illuminate indicating that the Coffeemaker is now
waiting for the preset brew time to be reached before it begins the
brewing cycle. To cancel the Auto Brew, press the Drip Button and the
green Light will shut OFF. If you want to brew at a stronger strength,
press the Brew Strength Button. A filled coffee cup icon will appear in
the Display.
Hints for Great Tasting Coffee
•A clean Coffeemaker is essential for making great tasting coffee.
Regular cleaning, as specified in User Maintenance Instructions is
highly recommended. Always use fresh, cool water in your
Coffeemaker. Finer grinds, such as drip and ADC coffee, promote
fuller extraction and provide rich, full-bodied coffee. Regular grind
will require slightly more coffee per cup to provide the strength of a
finer grind.
• Store coffee in a cool, dry place. Once coffee has been opened,
keep it tightly sealed in the refrigerator to maintain freshness.
For optimum coffee, buy whole beans and grind them just
before brewing.
• Do not re-use coffee grounds since this will greatly impair
coffee flavor.
•Reheating coffee is not recommended. Coffee is at its peak flavor
immediately after brewing.
• Small oil droplets on the surface of brewed, black coffee is due to
the extraction of oil from the coffee grounds. Oiliness may occur
more frequently if heavily roasted coffees are used. Over
extraction may also cause oiliness, indicating a need to clean
your Coffeemaker.
USER MAINTENANCE INSTRUCTIONS
This appliance requires little maintenance. It contains no user-service-
able parts. Any servicing requiring disassembly other than cleaning must
be performed by a qualified appliance repair technician.
WARNING: Unplug from wall outlet before cleaning.
9
3
Fiche polarisée
Par mesure de sécurité, cet appareil est muni d’une fiche d’alimentation
électrique polarisée (dont l’une des broches est plus longue que l’autre). Pour
prévenir tout risque d’incendie et de décharge électrique, cette fiche ne peut
être insérée que d’une seule façon dans la prise murale. Si les deux broches
n’entrent pas complètement, renverser la fiche. Si elle n’entre toujours pas
correctement, faire appel à un électricien professionnel. Ne jamais tenter de
modifier ou de contourner ce dispositif de sécurité.
Consignes relatives au cordon court
Cet appareil est muni d’un cordon d’alimentation court visant à prévenir qu’on
s’y prenne les pieds et trébuche, ce qui risque toujours de survenir lorsqu’un
appareil est équipé d’un cordon plus long. Ainsi, ne jamais utiliser de rallonge
avec cet appareil.
Précautions relatives aux plastifiants
MISE EN GARDE : Afin d’éviter que les plastifiants exsudent de la finition du
plan de travail, de la table ou de tout autre support, utiliser des dessous de
verre ou des napperons NON PLASTIFIÉS entre l’appareil et la finition du plan
de travail ou de la table.
Le non-respect de cette consigne pourrait faire que fonce, se décolore ou se
tache de manière permanente la finition du plan de travail ou de la table.
Alimentation électrique
Si le circuit électrique est surchargé par d’autres dispositifs, cet appareil
pourrait ne pas fonctionner correctement. Dans la mesure du possible, le
brancher à un circuit indépendant.
MISE EN GARDE
POUR RÉDUIRE LES RISQUES D’INCENDIE OU DE DÉCHARGE ÉLECTRIQUE, NE
JAMAIS RETIRER LE FOND DE LA BASE. CET APPAREIL NE CONTIENT AUCUNE
PIÈCE QUE VOUS POUVEZ RÉPARER VOUS-MÊME. TOUTE RÉPARATION DOIT
ÊTRE EFFECTUÉE PAR UN TECHNICIEN AUTORISÉ SEULEMENT.
Capacité :
Cafetière 12 tasses : Donne 12 tasses d’environ 5 oz de café chacune.
REMARQUE : La tasse de 5 oz constitue la norme en Amérique du Nord. Elle
est donc la référence commune utilisée par la plupart des fabricants.
RH_RH12DSBCAN_IB_13-5-05 5/13/05 4:45 PM Page 19


