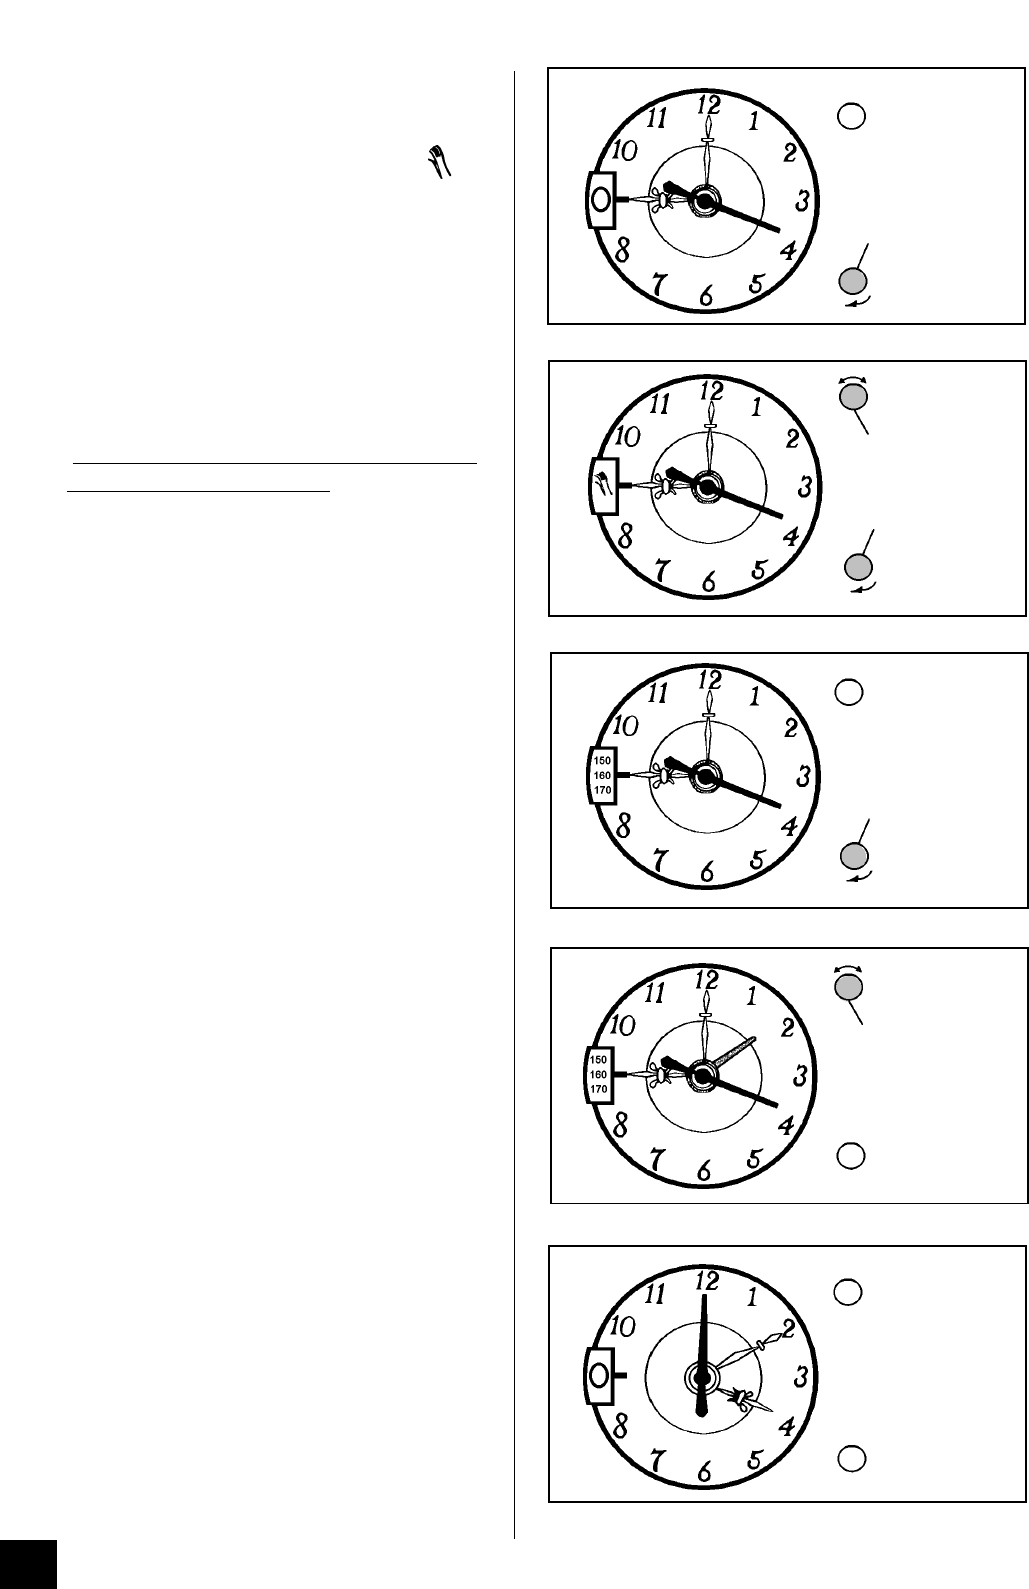
Turn setting knob (A) clockwise, without pulling
it out until "0" or the manual symbol ( )
appears in the display window as Fig. 4.
5. HOW TO SET THE AUTOMATIC TIMER
When using the automatic timer for the very first
time, it is advisable to let it operate while you are
at home. The timer can be checked to show that
it is operating correctly and you will then feel
confident to leave a meal to cook automatically in
the future.
A) TO SWITCH THE OVEN ON AND
OFF AUTOMATICALLY
i) Make sure the electricity supply is switched
ON.
ii) Check the clock shows the right time of day
and the cooker is set in manual (see point 2).
Adjust as necessary as Fig. 5.
iii) Place food in oven.
iv) To set the length of time you want the food to
cook; turn setting knob (A) clockwise,
without pulling it out, until the required
cooking period can be seen in the display
window e.g. 160 minutes (2 hours 40
minutes) as Fig. 6.
v) Set the start time, by pushing in and turning
setting knob (B) in either direction until the
green start timer indicator lines up with the
time you want the food to start cooking e.g.
1.30 p.m. as Fig. 7.
vi) Turn the oven temperature control to the
required setting. The oven indicator neon
should be OFF.
vii) When automatic cooking starts the oven
neon will cycle ON and OFF showing that the
oven temperature is being maintained.
viii) The green start time indicator will move with
the hour hand of the clock until the length of
cooking time is complete. A buzzer will sound
which can be cancelled by following point 4.
See Fig. 8.
ix) The maximum cooking time on automatic is 3
hours.
18
CLOCK
COOK TIME
START
Fig. 8
CLOCK
COOK TIME
START
B
Fig. 7
CLOCK
COOK TIME
A
START
Fig. 6
B
A
CLOCK
COOK TIME
START
A
Fig. 5
CLOCK
COOK TIME
START
Fig. 4
4. TO CANCEL MINUTE MINDER/BUZZER
