


............ www.truemfg.com ............
True Food Service Equipment, Inc.
5
5
INSTALLATION / OPERATION INSTRUCTIONS
P
A. Set unit in its final location. Be sure there is adequate
ventilation in your room. Under extreme heat
conditions, (100°F+, 38°C+), you may want to install
an exhaust fan.
WARNING
Warranty is void if ventilation is insufficient.
B. Proper leveling of your TRUE cooler is critical to
operating success (for non-mobile models). Effective
condensate removal and door operation will be
effected by leveling.
C. The cooler should be leveled front to back and side
to side with a level.
D. Ensure that the drain hose or hoses are positioned in
the pan.
E. Free plug and cord from inside the lower rear of the
cooler (do not plug in).
F. The unit should be placed close enough to the
electrical supply so that extension cords are never
used.
WARNING
Cabinet warranties are void if OEM power cord is tampered
with. TRUE will not warranty any units that are connected to
an extension cord.
LEVELING
LOCATING
REMOTE UNITS (This section applies to remotes only!)
• Remotecabinetsmustbeorderedasremote.
We do not recommend converting from a
standard self contained to remote system.
• Allremotecabinetsmustbehardwired.
• Nocastorsavailable.
• Allremotecabinetscomestandardusing404A
refrigerant.
• Allremoteunitscomestandardwithexpansion
valve, liquid line solenoid, heated condensate
pan, and defrost timer when applicable.
• ContactTRUETechnicalServiceforBTU
requirements.
• Nowiringnecessarybetweencabinetand
condensing unit.
• Allremotecondensingunitspurchasedfrom
TRUE are 208/230 volts single phase.
If you have any questions regarding this section, please
call TRUE at 1-(800)-325-6152.
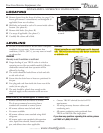
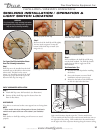
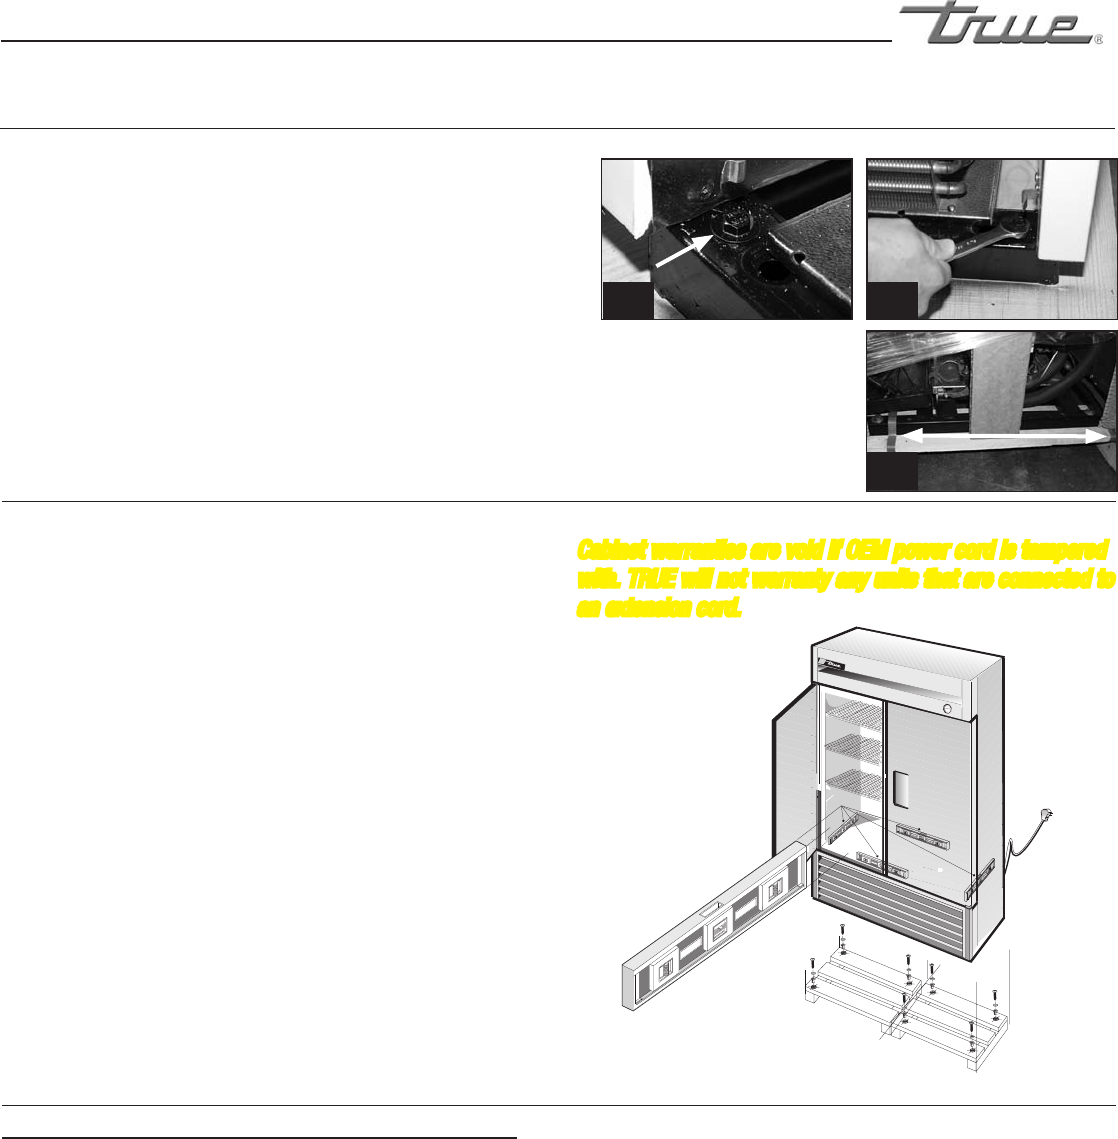
A. Remove louver from the front of cabinet (see page 17 for
louver grill removal / reinstallation) and backguard (if
applicable) from rear of cabinet.
B. Skidboltsarelocatedineachof4cornersinsidecabinet
bottom. (See photo A).
C. Remove skid bolts. (See photo B).
D. Cut straps if applicable. (See photo C).
E. Carefully lift cabinet off of skid.
Removing skid from bottom
of cabinet.
A B
C