66
True Food Service Equipment, Inc.
............ www.truemfg.com ............
INSTALLATION / OPERATION INSTRUCTIONS
LEVELING AND CASTOR ADJUSTING
A. Setunitinitsfinallocation.Besurethereisadequate
ventilationinyourroom.Underextremeheat
conditions,(100°F+,38°C+),youmaywanttoinstall
anexhaustfan.
WARNING
Warranty is void if ventilation is insufficient.
B. ProperlevelingofyourTRUEunitiscriticalto
operatingsuccess(fornon-mobilemodels).Effective
condensateremovalanddrawer/dooroperationwill
beeffectedbyleveling.
C. Theunitshouldbeleveledfromtopofthecabinet.
Placealevelonthetopoftheunitfronttobackand
sidetoside.
D. Ensurethatthedrainhoseorhosesarepositionedin
thepan.
E. Freeplugandcordfrominsidethelowerrearofthe
cooler(donotplugin).
F. Theunitshouldbeplacedcloseenoughtothe
electricalsupplysothatextensioncordsarenever
used.
WARNING
Cabinet warranties are void if OEM power cord is tampered
with. TRUE will not warranty any units that are connected to
an extension cord.
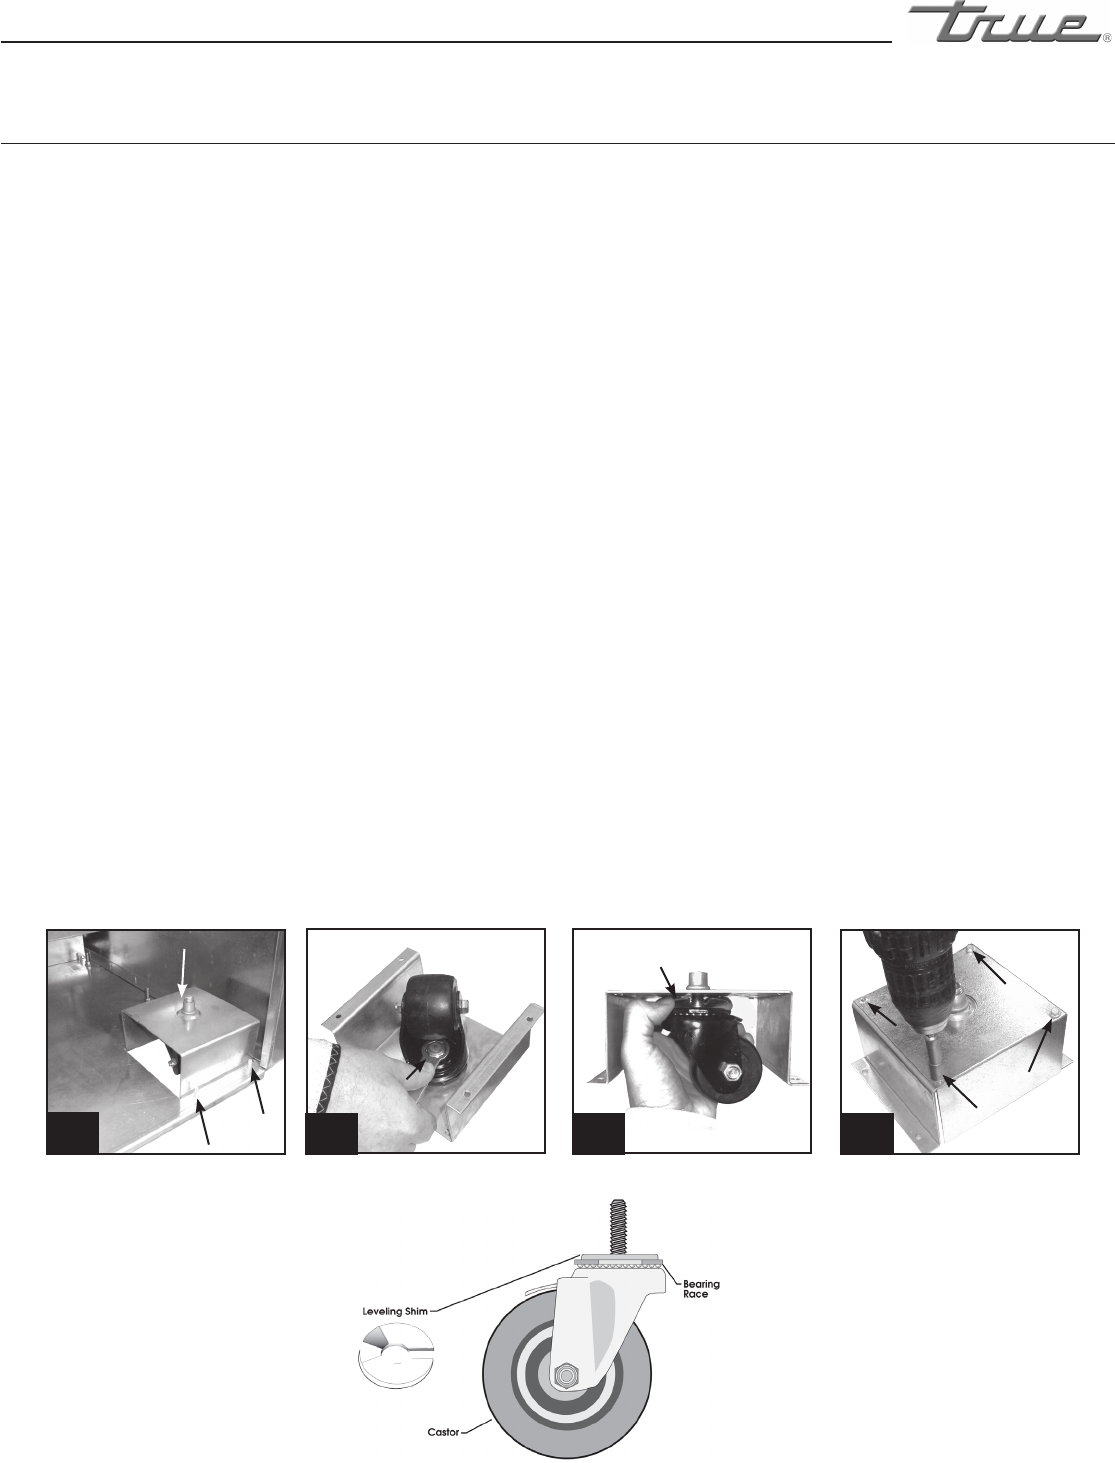
Adjusting Castors for Proper Leveling
Levelunit.Ifunitisnotlevelshimsarerequired.
Followtheseinstructionstoinstallshims.
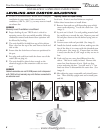
1.Removefrontandreargrilldependinguponwhich
castorneedsadjusting.Locatethecastorbox.(See
image1).
2.Layunitonit’sback.Usesoftpackingmaterialand
becarefulnottoscratchtheunit.Removepansand
lidandplacethemtothesidebeforelayinguniton
it’sback.
3.Loosencastorwithtoolprovided.(Seeimage3).
4.Installthedesirednumberofshims,makingsurethe
slotoftheshimisincontactwiththethreadedstem
ofthecastor.(Seeimage4).Ifmorethanoneshim
isused,turntheslotata90°anglesotheyarenotin
line.
5. Eachunithasonecastorboxdifferentfromthe
others.Thisboxistotallyinclosed.Removethis
castorboxfrombottomofunit.Backoutfour
screwsanchoringthebox.Youwillneeda
1
/4”hex
headnutdrivertodisassemblethiscastorbox.(See
image4).
6.Afteradjustingcastorreassembleandreinstallcastor
box.Thencarefullyuprightunitandreinstallpans
andlid.
1
4
2 3
Locate castor box
One castor box on each unit is
fully inclosed.
Loosen castor. Install shims.
Castor Box
Anchor
Screws


