


2175DWRWC 15
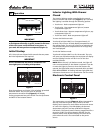
Light Bulb Replacement
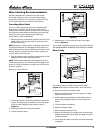
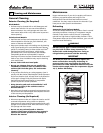
To replace the light bulb in your U-Line unit:
Figure 14
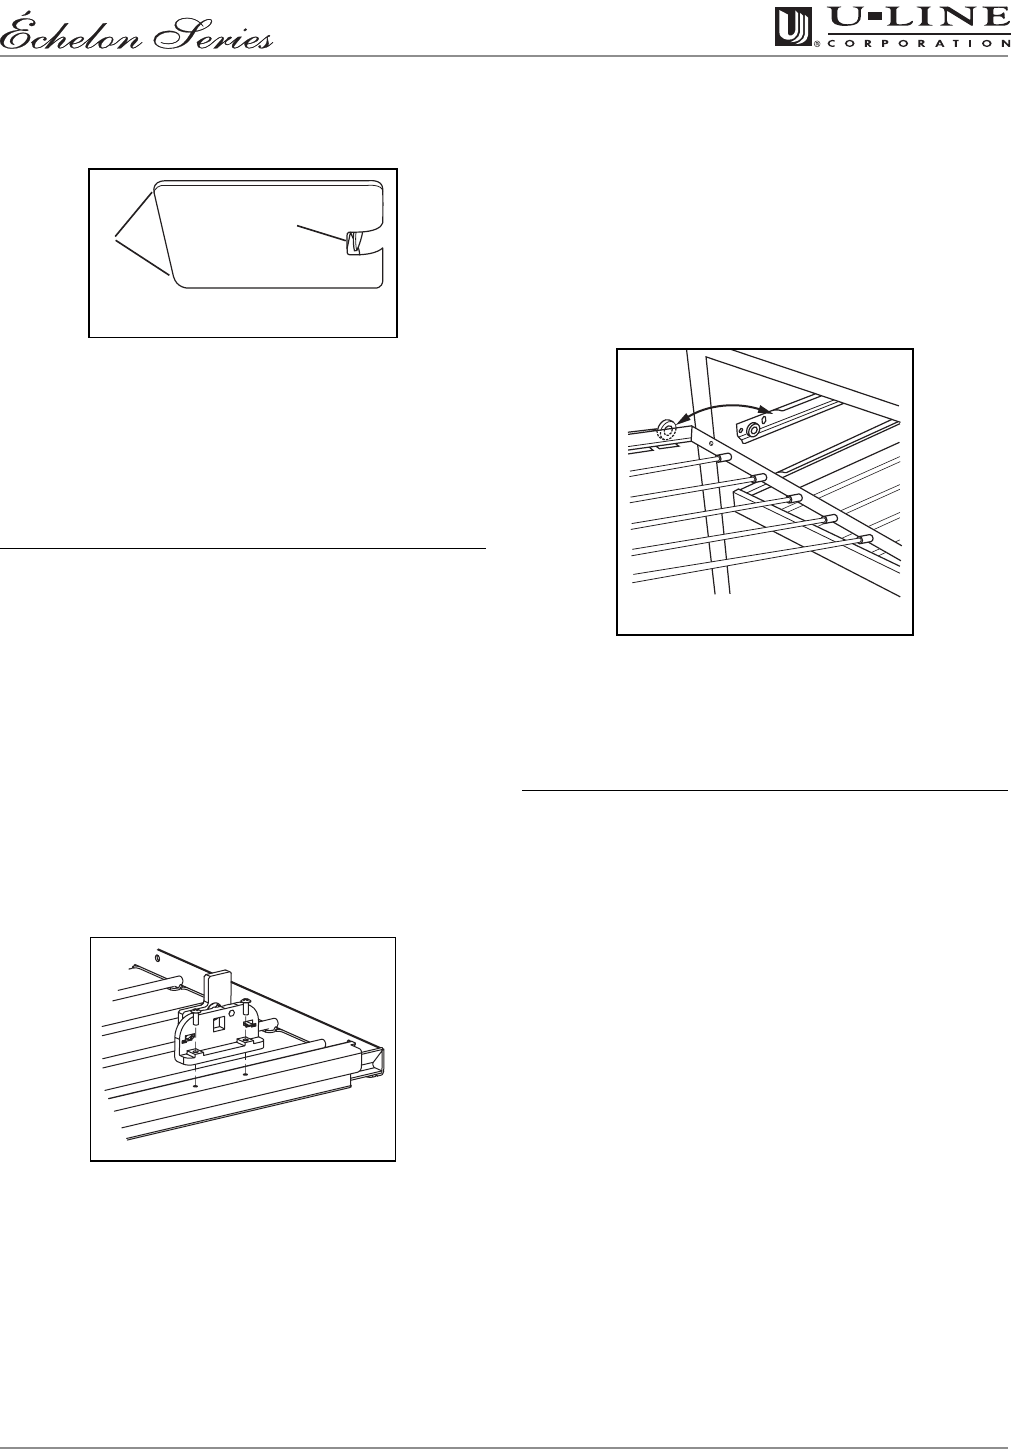
1. Grasp the edges of the light housing lens
(Figure 14, 1) opposite the exposed tab and gently
push the lens toward the tab (Figure 14, 2).
2. Pull the edge of the lens down
(Figure 14, 1)
and
swing it out of the light housing.
IMPORTANTIMPORTANT
ALWAYS use a genuine U-Line replacement bulb (P/N
31317) in the light housing. Use of any other bulb
within the housing will generate excessive heat,
causing damage to the light housing and cabinet
interior, and will compromise the precise
temperature control of your unit.
3. Replace the bulb only with a genuine U-Line P/N 31317
replacement.
4. Replace the lens by first inserting the tab side back into
the housing at a slight angle. While gently pushing the
lens towards the tab end, push the free end up into the
housing, and release when you will hear a snap/click.
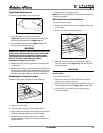
Disabling the Cascade Feature
To disable the cascade components in the drawers:
Figure 15
1. Open the drawer fully.
2. Push the upper rack back to the closed position.
3. Using a Phillips screwdriver, remove the two screws that
attach the cascade assembly to the drawer slide.
4. Repeat Step 3 on other side of drawer to disable
cascade completely. There are two of these assemblies
on each drawer.
5. Repeat Steps 1-4 on other drawer.
NOTE: Retain these assemblies if you wish to activate your
cascade action again.
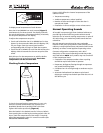
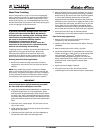
Wine Rack Removal/Installation
To remove the wine racks:
1. Grasp the end of the wine rack, and gently slide it out
until it stops.
2. Remove any bottles stored on the rack.
Figure 16
3. Raise the end of the rack to allow the rear rollers to
clear the cabinet tracks
(Figure 16)
, and pull the rack
from the cabinet.
IMPORTANTIMPORTANT
Do not remove the two racks attached at the
drawer slides.
To insert the wine racks:
1. Position the wine rack above the cabinet channels
where the rack is to be inserted.
2. Slide the rack into the cabinet at an angle until the rack
rollers engage the channel
(Figure 16)
on both sides.
3. Lower the free end of the rack, and slide into the
cabinet completely.
1
2
ULIN_0001_A
ULIN_0244_A
ULIN_0009_A