


22
User’s Manual
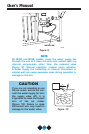
NOTE
Use care not to bend light switch bracket (where installed),
located on door bottom when installing door insert. Do not
set door on bottom edge when pushing insert into place.
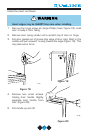
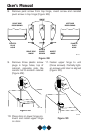
6. Slide custom door panel insert into 1/4" channel in door front.
7. Holding door gasket out of the way, replace handle on door mak-
ing sure it is seated properly on insert and that screw holes line
up.
8. Install two small screws removed in step 4.
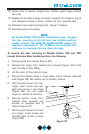
9. Starting at the corners and working inward, push door gasket into
place on door.
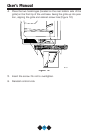
10. Place door on bottom hinge pin and install upper hinge screw
(Figure 19).
11. Reinspect door seal and alignment. Adjust if needed.
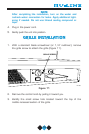
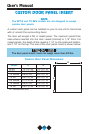
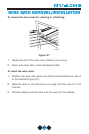
WOOD TRIM ON WINE RACKS
Your 75 BEV is equipped with a natural wood trim on the wine racks.
For appearance and durability, the wood trim has been coated at the
factory with a clear vinyl sealer, which will adequately protect the wood
in normal usage.
To prevent permanent damage to the inner liner of your
75 BEV, the wine rack wood trim MUST be removed from
the unit for staining and/or finishing. Allow stain/finish to
dry thoroughly (at least 24 hours per coat) in accordance
with the stain/finish manufacturer’s instructions prior to
re-installing the wood trim inside the cabinet of the 75 BEV.
Failure to do so may cause the inner liner of the unit to have
a permanent odor, which is not covered by the warranty.
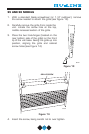
You have three options regarding the wood trim on the wine racks.
(1) You can leave as is, (2) add a final finish coat or (3) you may stain
the wood trim. The final finish coat was not applied at the factory so
that the wood trim could be stained. YOU CANNOT STAIN THE
WOOD TRIM ONCE YOU APPLY THE FINAL FINISH. Review the
following guidelines when staining and or sealing the wood to ensure
proper adhesion and durability of the finish.
!
WARNING
30035 User Manual Body.qxd 1/5/05 8:08 AM Page 22