9
2
2
1
1
x2
4
x2
3
Locators
2
x4
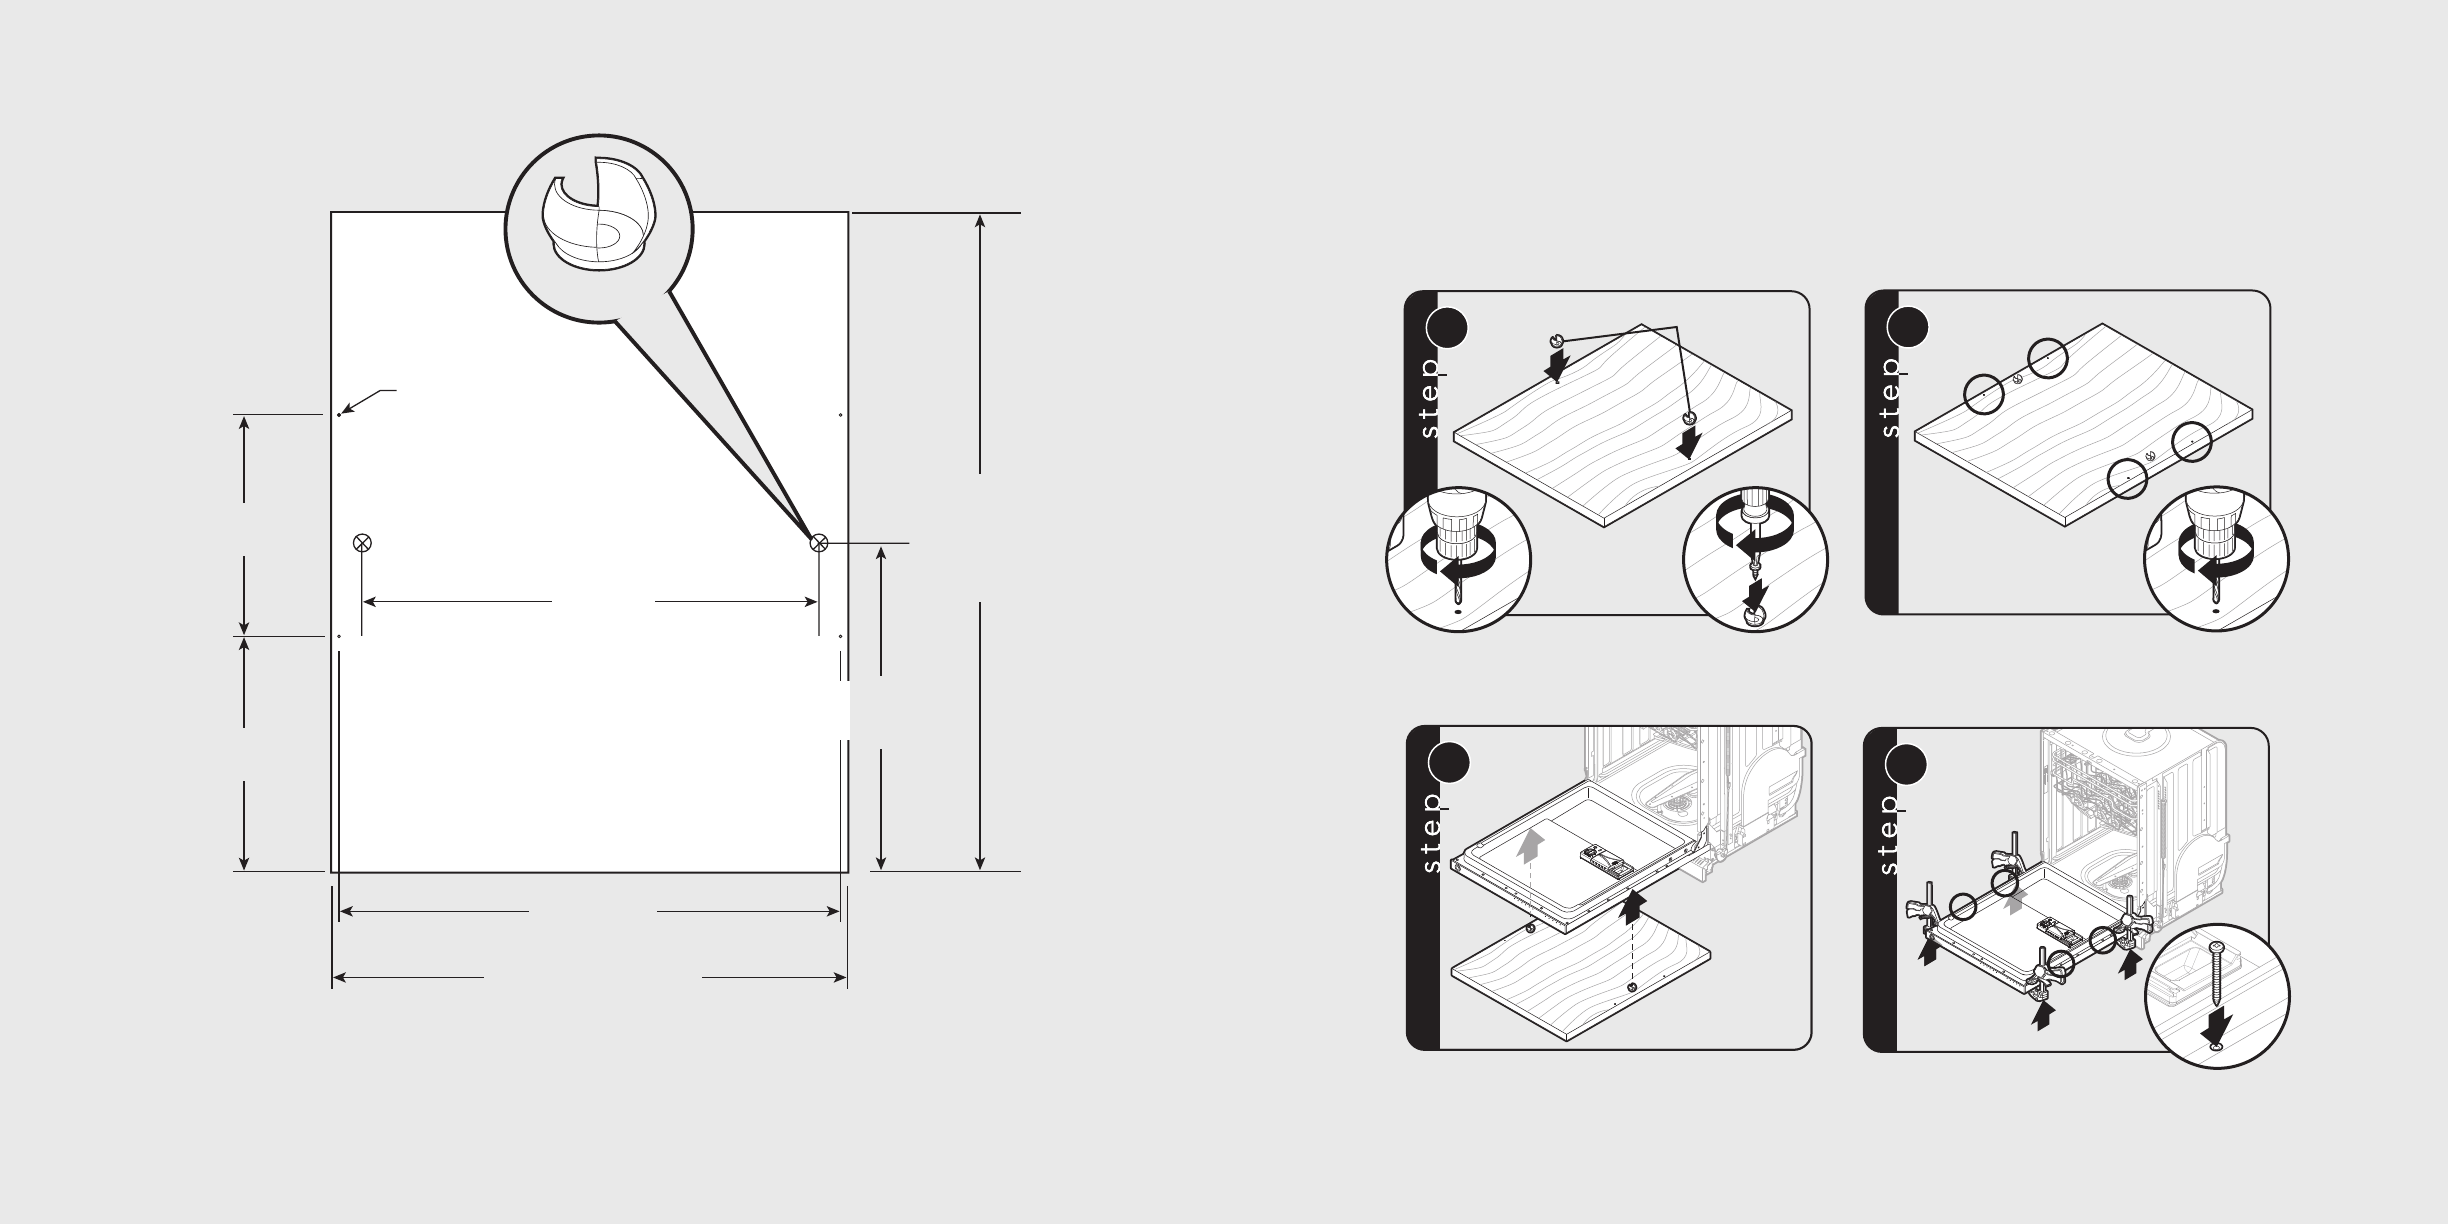
Pre-drill two holes with 1/8” drill bit for the locators
using dimensions shown in the figure. Attach plastic
locators using the Torx (T20 BIT) pan head screws
provided in the hardware package.
Pre-drill other four locations for wood screws
to attach the panel to the dishwasher door using
the dimensions shown in the figure.
1
1
3
1
1
1
1
4
2
x4
Use locators to align the panel to the
dishwasher door holes.
Use non-marring clamps to hold custom panel in place.
Use the truss head 1-3/4” long screws provided in the
hardware package for the panel attachment.
Note: If you are using any special panel material
and that require special screws, always use a #8 1-3/4”
long truss head Torx stainless steel screws. The screws
MUST BE stainless steel to avoid corrosion.
Have the overlay panel constructed per dimensions.
The panel thickness MAY NOT exceed 3/4" (1.91 cm)
for flush installation in most cabinets. Ensure that the
design, construction, and installation of the panel
overlay and its handle mounting is sufficient to reliably
operate in this application with a maximum panel
weight of 18 lbs. (8.2 kg.) Custom panels should not
exceed 18 lbs. (8.2 kg.)
Custom Door Panel (Installation Option)
29-3/4”
(75.6 cm)
to
31-1/4”
(79.4 cm)
22-21/32”
(57.5 cm)
23-9/32"with trim
(59.1 cm)
or
23-7/8” without trim
(60.6 cm)
14”
(35.6 cm)
22-5/32”
(56.3 cm)
13-1/2”
(34.3 cm)
10-5/8”
(27.0 cm)
ø1/8” 4 places
(0.3 cm)
Locator
8
Custom Door Panel
(Specifications for FDB301/FDB451 Models)
Note: Back side of panel shown. Use caution not to drill through front of panel.
Note: If panels are made longer than 29-3/4” (75.6 cm), the door panel will be taller than dishwasher control panel.
Note: All hole location dimmensions should be measured from the bottom of the door per the illustration above.


