19
2
1
6
D
O
W
N
U
P
7
DOW
N
U
P
DOW
N
U
P
DOWN UP
Equal distance
8
Installation (cont.)
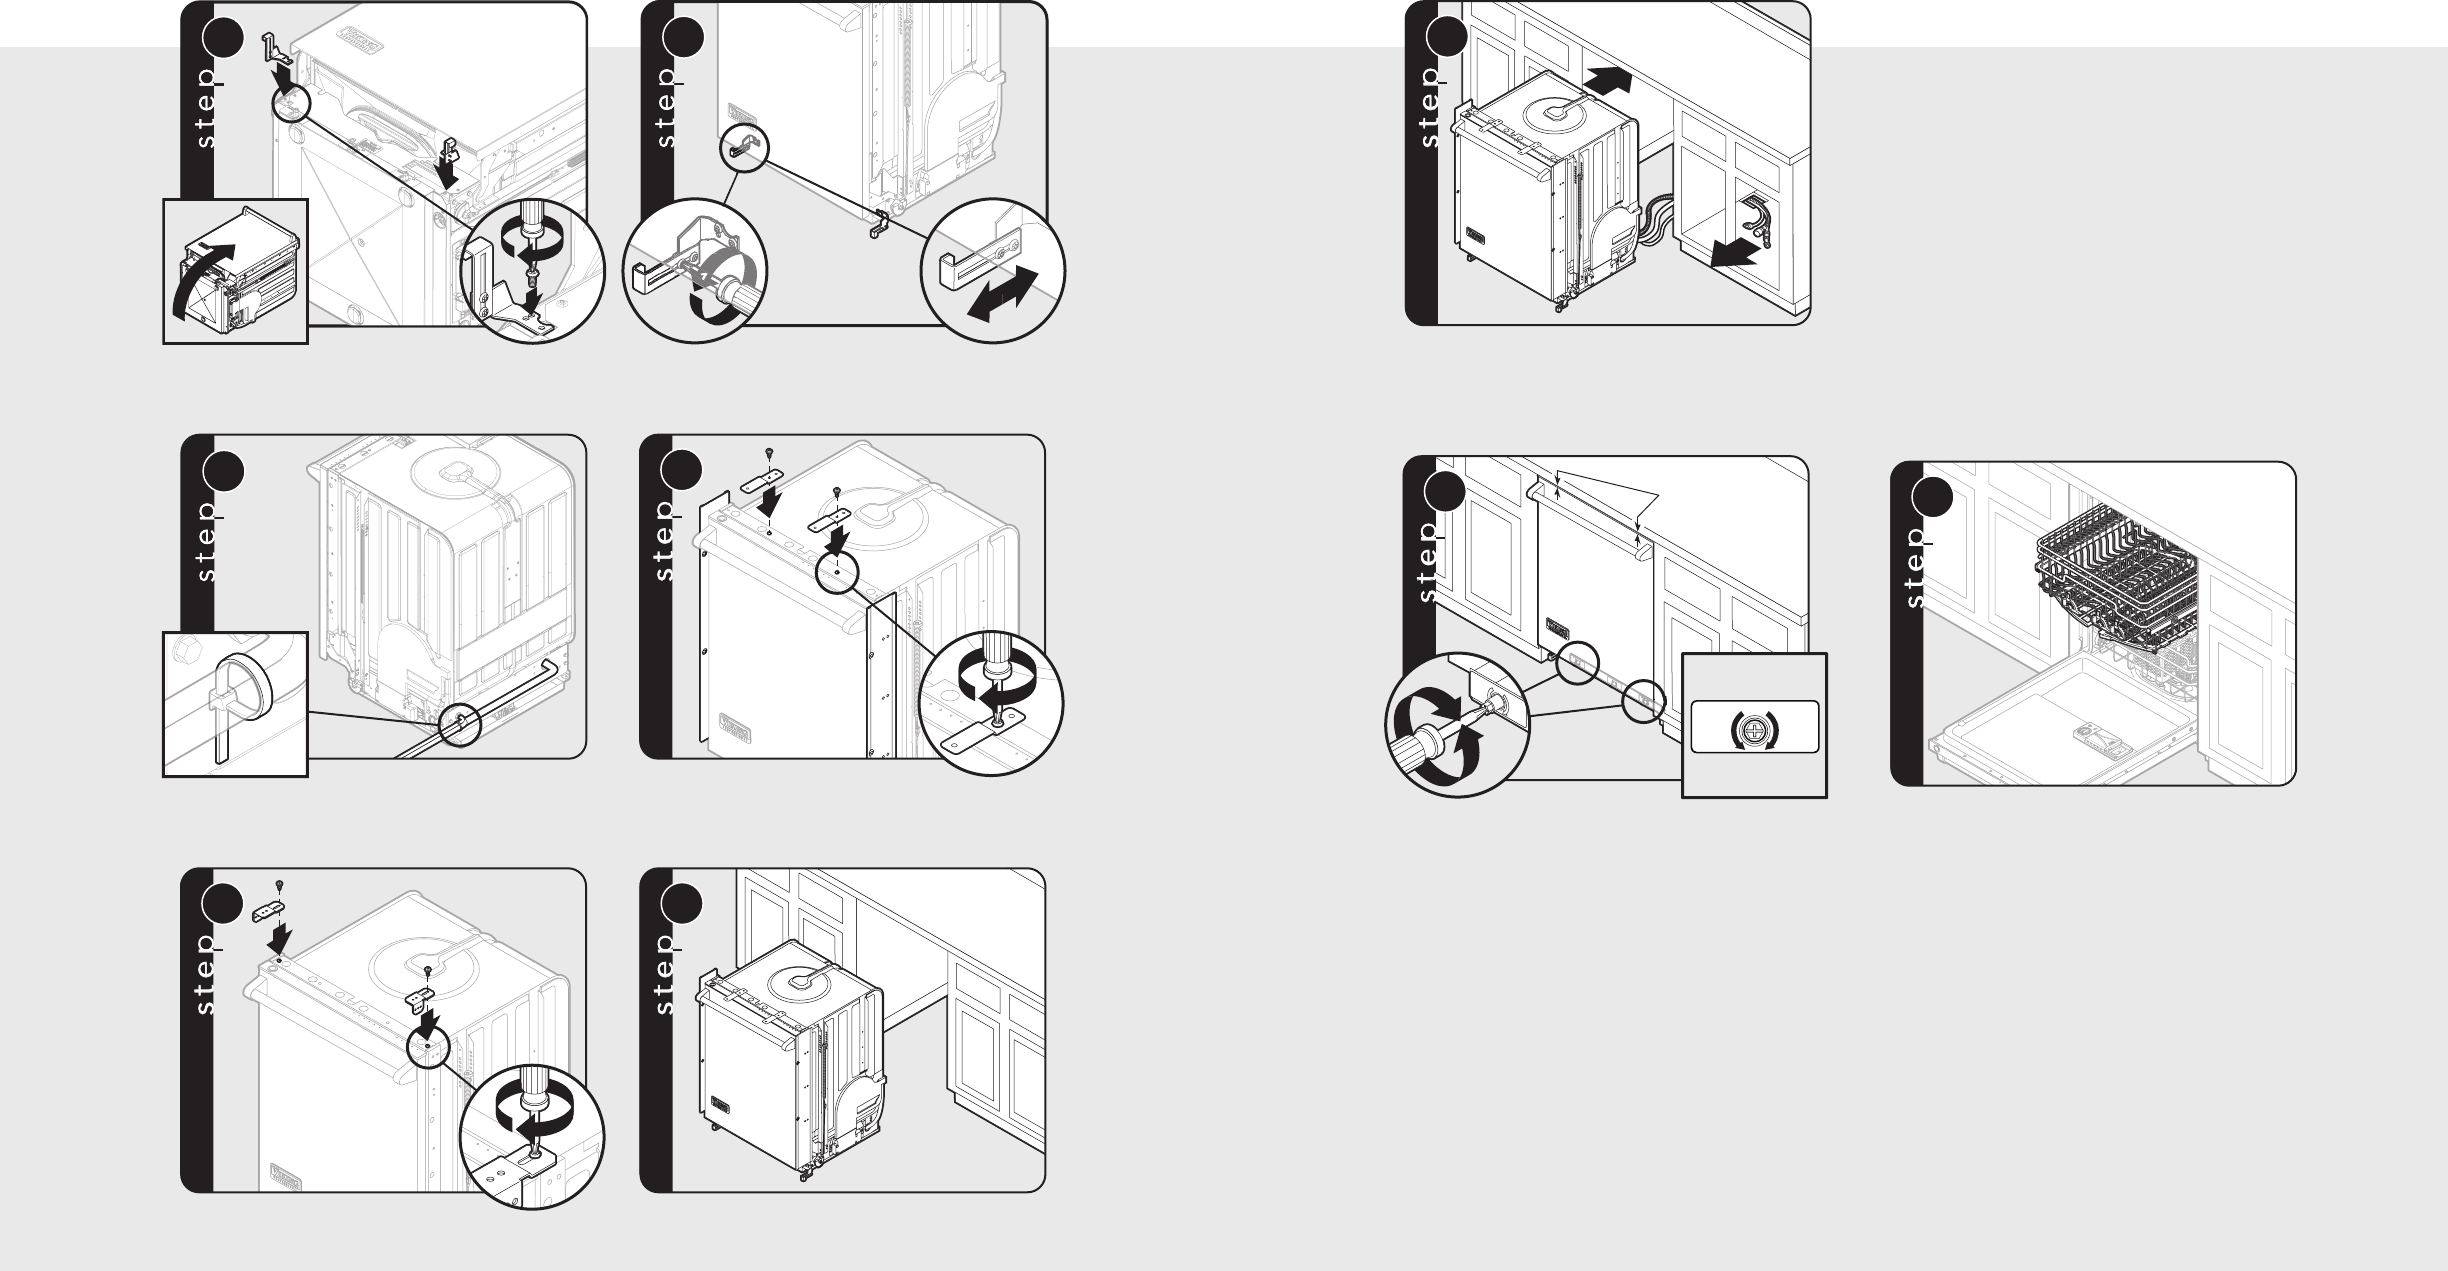
Slide unit into opening; be sure to feed water, electrical
and discharge lines into adjacent cabinet.
Place a level on handle, then adjust to appropriate
height. Left and right adjust side to side and center
adjusts front to back.
To check level, front to back, pull the top rack half-way out of
unit. The rack should remain stationary and not move in or out.
Note: Leveling is important for optimal performance.
18
Installation
2
2
1
x4
3
4
1
2
1
2
Carefully lay dishwasher on its back and attach the kick
plate brackets. Screws for the brackets will already be
in the base.
Note: Be careful not to pinch hoses or
power cord beneath dishwasher.
To adjust the depth of the kick plate, loosen screws on
the bracket and position in the required depth. Tighten
screws and repeat for other side.
3
1
1
4a
2
x2
Using tie strap attached to dishwasher, band water line,
drain line, and power cord together.
For installation with trim, attach brackets with two
screws (1 per bracket).
1
1
4b
2
x2
5
For installation without trim (301 models only), attach
brackets with two screws (1 per bracket).
Position unit in front of cutout.
Leveling


