


— 14 —
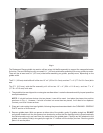
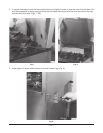
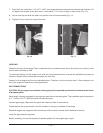
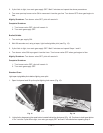
7. From the front, install four
1
/4-20 x 2
5
/16" (58.7 mm) long machine screws and secure bolts with locknuts. Do
not tighten the screws all the way down. Leave about
1
/4" (6.3 mm) of play in each screw (Fig. 10).
8. Lift the shelf up and slide the shelf into position over the screw heads (Fig. 11).
9. Tighten the four screws to secure the shelf.
Fig. 10 Fig. 11
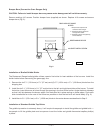
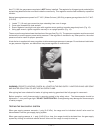
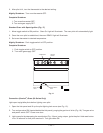
LEVELING
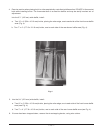
Check the leveling of the range. Place a carpenter’s level inside the oven cavity across the oven rack(s). Level
front-to-back and side-to-side.
To adjust the leveling, tilt the range to one side and, using channel locks, unscrew the adjustable leg insert as
required. Repeat this procedure as necessary for each leg.
Casters for this range are of the non-adjustable type. Therefore, the floor must be level. If floor surface is not
level, the range will experience cooking problems.
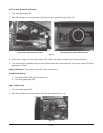
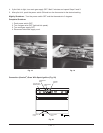
GAS CONNECTIONS
CAUTION: All gas supply connections and any pipe joint compound used must be resistant to the action
of propane gases.
Each range is factory-equipped for the type gas specified on the rating plate. The installation gas connection is
a
3
/4" (19 mm) 14 FPT ANSI schedule #40 standard pipe.
Connect gas supply. Make sure the pipes are clean and free of obstructions.
Codes require that a gas shutoff valve be installed in the gas line ahead of the range.
Standard ranges are equipped with fixed burner orifices which coincide with installation elevation.
Install the gas pressure regulator.
Before installing, ensure that regulator supplied agrees with rating plate gas supply.