


— 8 —
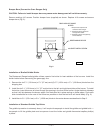
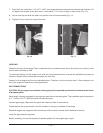
Bumper Bars (Convection Oven Ranges Only)
CAUTION: Failure to install bumper bars may cause motor damage and will void the warranty.
Remove existing #10 screws. Position bumper bars (supplied) as shown. Replace #10 screws and secure
bumper bars (Fig. 2).
Fig. 2
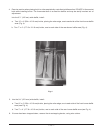
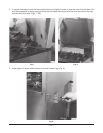
Installation of Broiler/Griddle Bricks
The Restaurant Range broiler/griddle utilizes ceramic fire bricks for heat radiation of the burners. Install the
broiler bricks before connecting the gas supply line.
1. Remove the six 5
1
/4" (133.4 mm) x 2
1
/4" (57 mm) and (6) 5
1
/4" (133.4 mm) x 5
1
/16" (128.6 mm) bricks from the
shipping box.
2. Install the six 5
1
/4" (133.4 mm) x 2
1
/4" (57 mm) bricks to the left- and right-hand sides of the burner. To install
the bricks, insert them one at a time through the opening in the front of the broiler. Angle the brick sideways
so that it will slip between the burner edges. Set the bricks flat in place resting on these edges. Push each
brick installed as far to the rear of the burner as possible so that the last brick will install easily (Fig. 3).
3. Install the six 5
1
/4" (133.4 mm) x 5
1
/16" (128.6 mm) bricks to the center burners as described in Step 2.
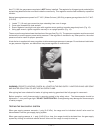
Installation of Standard Griddle Top Bricks
The griddle top section is extremely heavy. It will require three people to install the griddle and griddle brick —
two people to lift the griddle plate and one person to set the bricks and griddle thermostat capillary bulb(s)
in place.
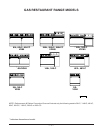
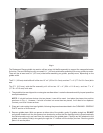
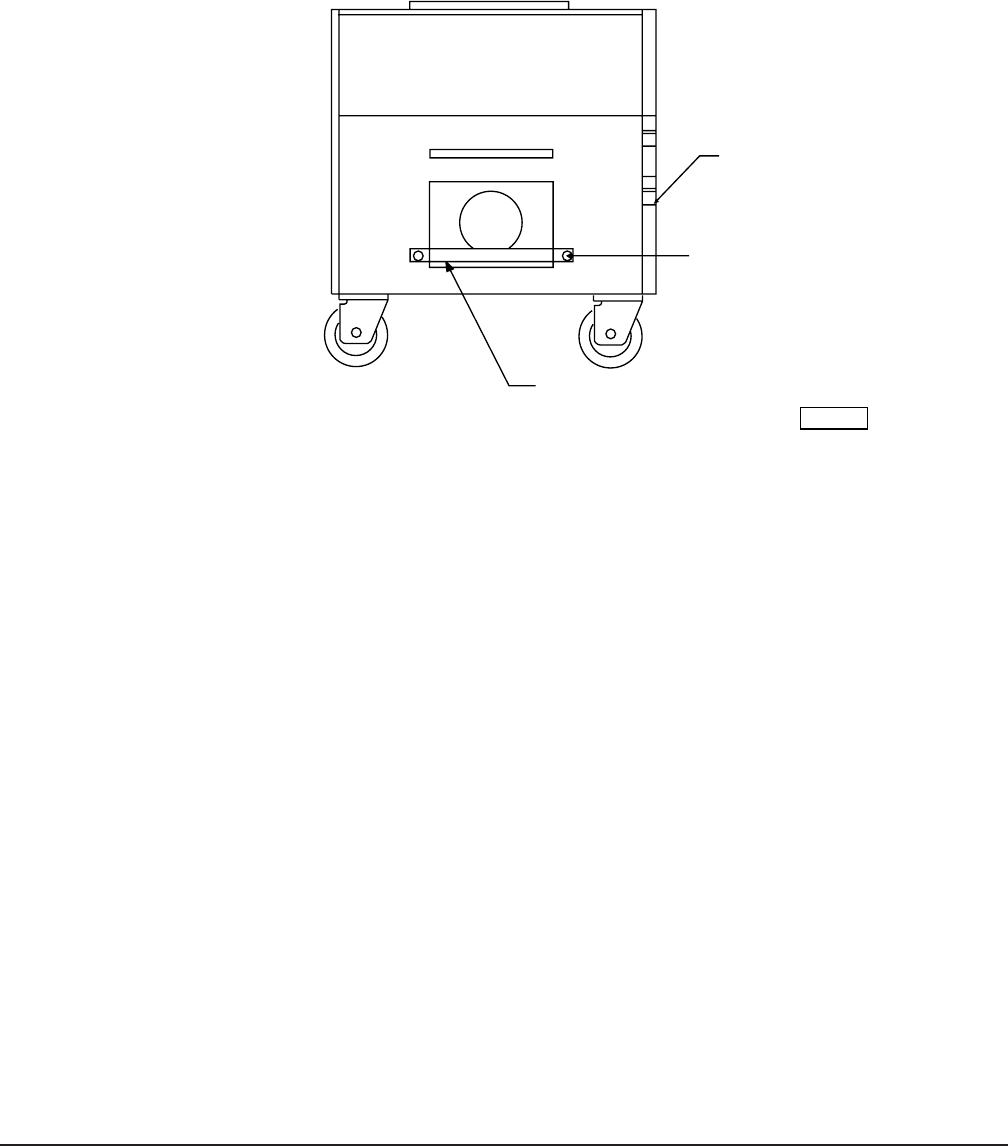
REAR VIEW OF RANGE
NOTES:
1. Bumper bars required for all
Convection Oven Ranges.
2. Restraining device required for
all ranges with casters.
3. Restraining device not supplied by
unit manufacturer.
RESTRAINING DEVICE
#10 SHEET METAL SCREW
BUMPER BAR
PL-50109