


_ .
!&wlA II
If\1
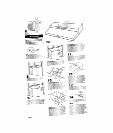
green grounding
screw
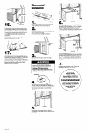
Remove terminal box cover.
Connect the white and black wires of the
power supply cable to the white and black
leads in the hood with twist-on connectors,
Connect the power supply grounding wire
to the green, grounding wire inside the
range terminal box with a twist-on wire
connector.
Use caulking to seal wire opening.
Replace terminal box cover.
Pull firmly on tab to remove filter/light lens
from range hood. Turn filter/light lens so that
charcoal filter pad is facing up. Lift tabs and
remove charcoal filter pad. Discard
charcoal filter pad. Place edge of filter/light
lens in opening so that right side is above
flange and tab faces downward. Press
filter/light lens into position.
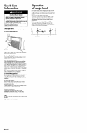
Non-vented
installation
Check vent baffle on top of range hood.
“Non-vented” should be facing up.
2.
Remove knockout from the wiring opening
(rear or top) to be used.
Do Not remove venting knockouts.
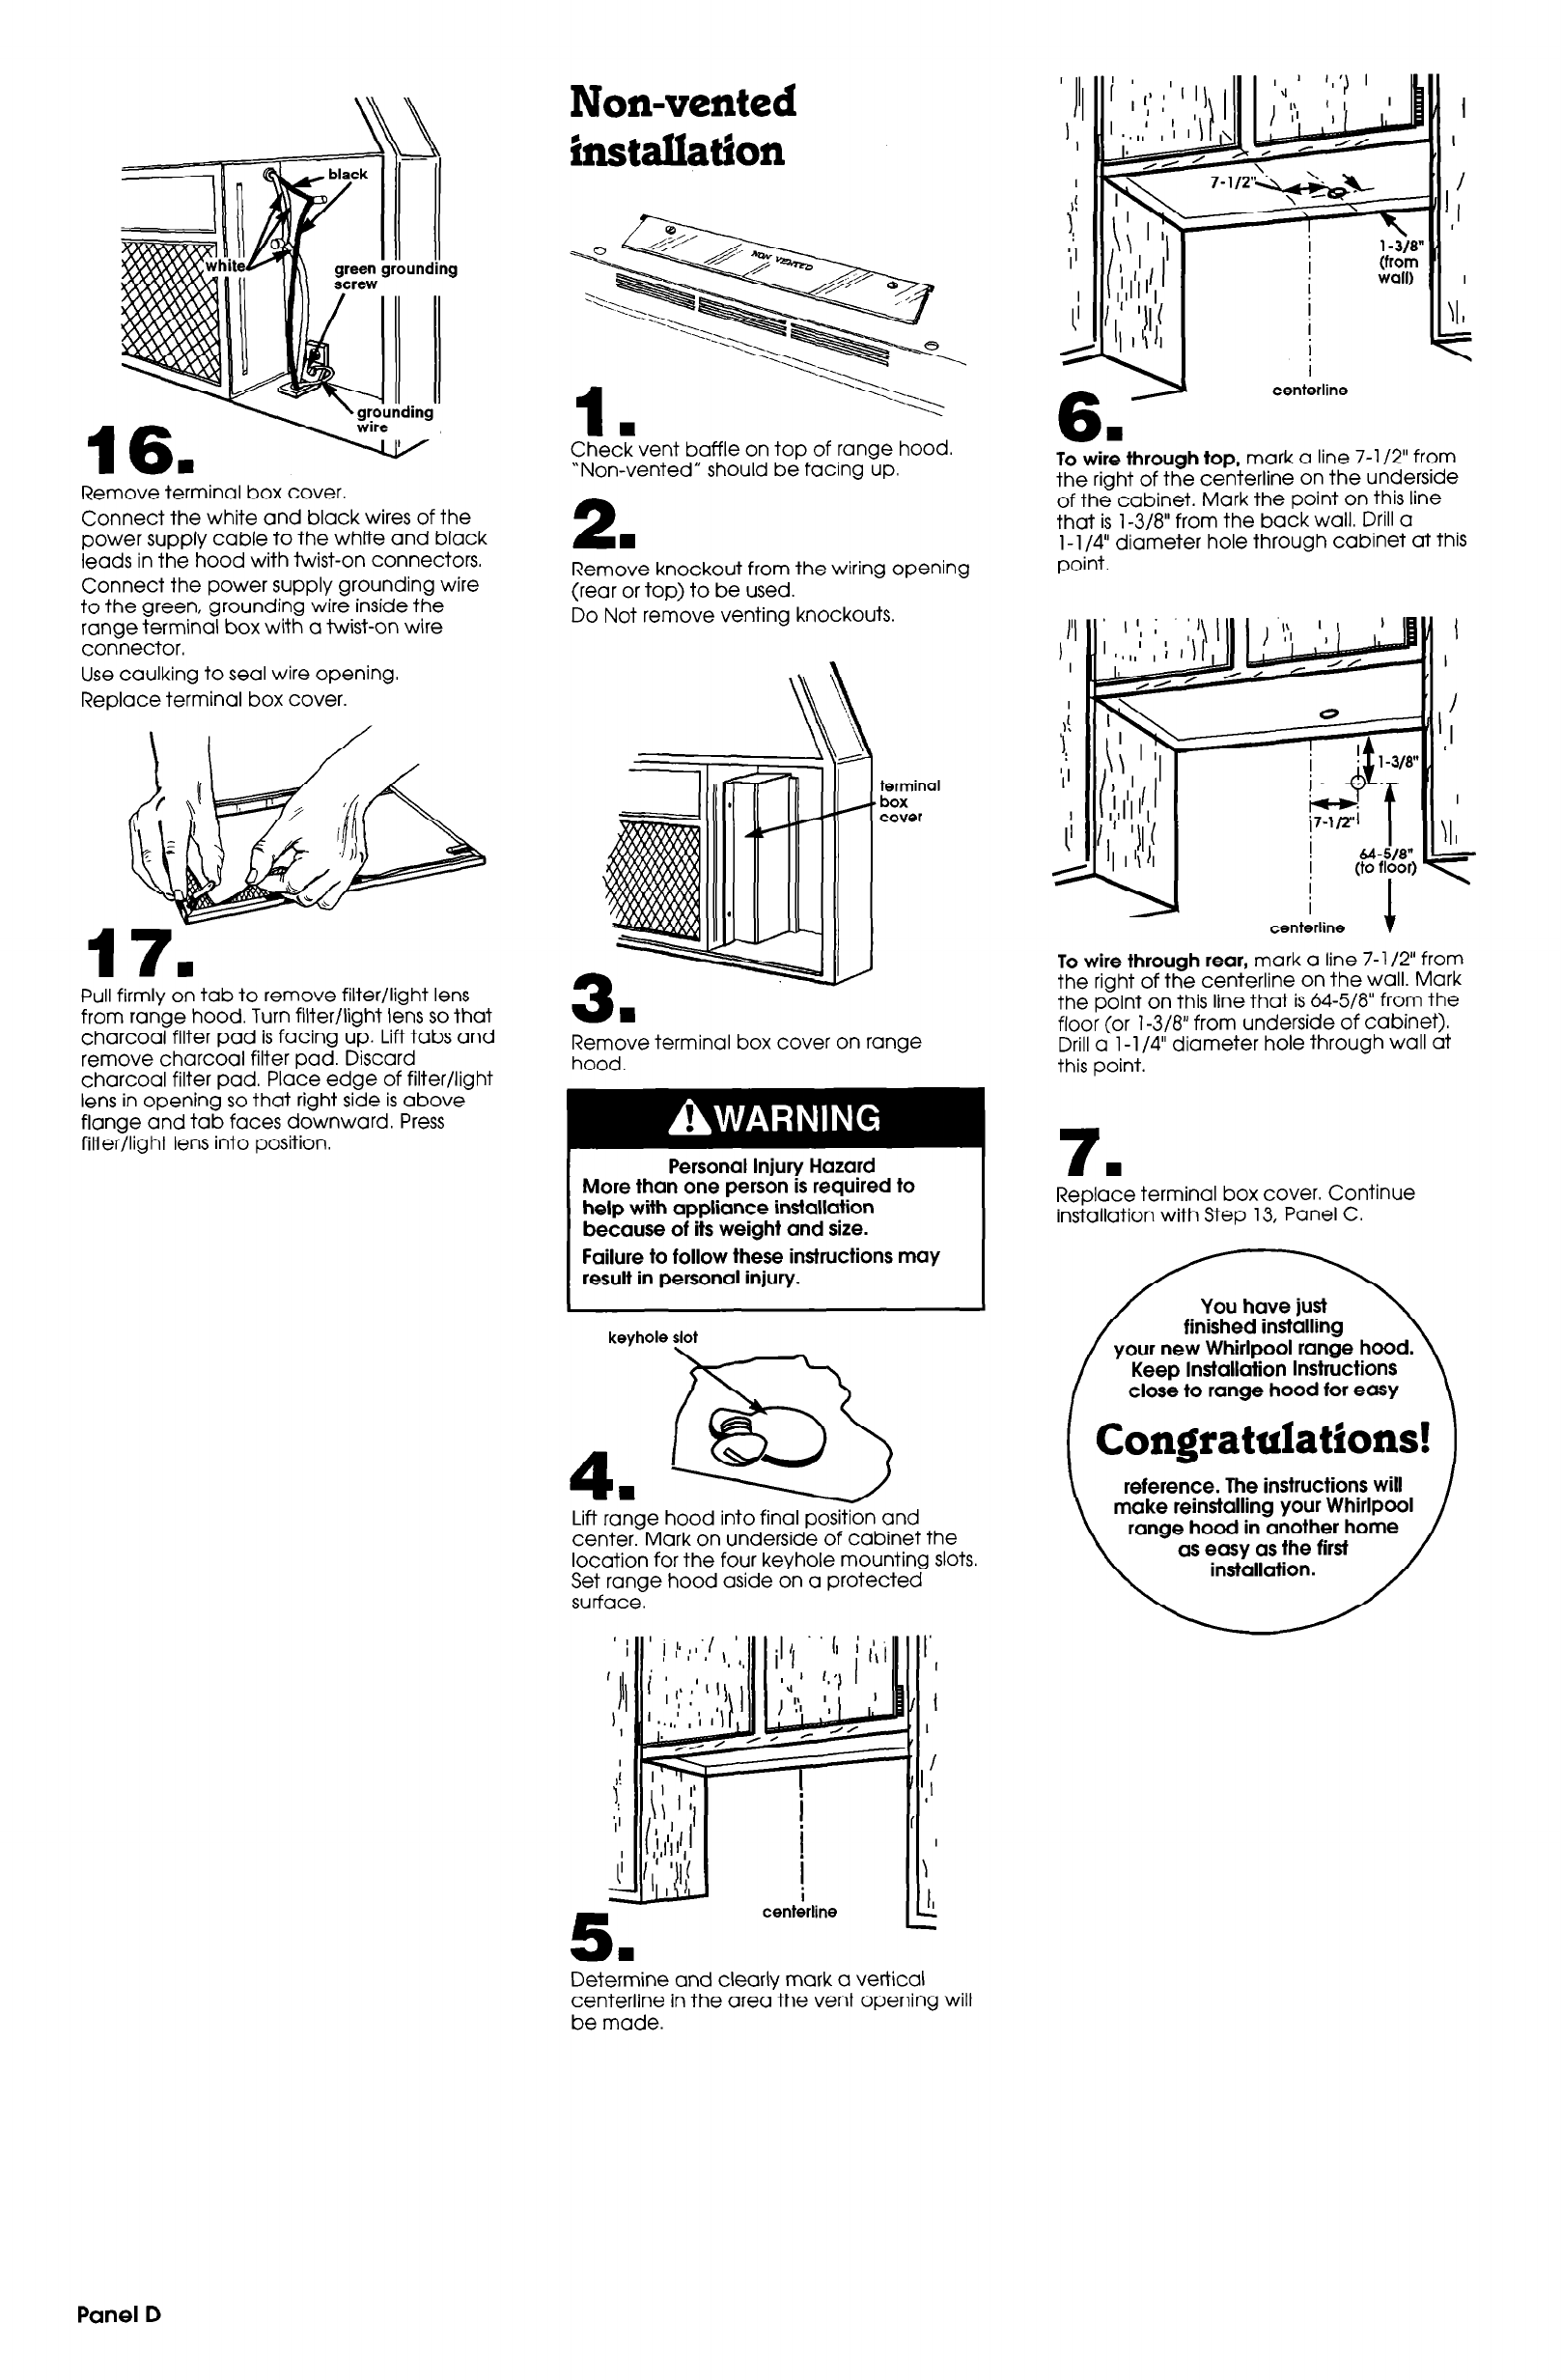
terminal
box
cover
Remove terminal box cover on range
hood.
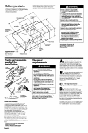
Personal Injury Hazard
More than one person is required to
help with appliance installation
because of its weight and size.
Failure to follow these instructions may
result in personal injury.
keyhole slot
4
6
L----i-
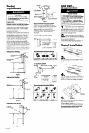
Lift range hood into final position and
center. Mark on underside of cabinet the
location for the four keyhole mounting slots.
Set range hood uside on a protected
surface.
6.-
I
I
I
centerline
To wire through top, mark a line 7-l /2” from
the right of the centerline on the underside
of the cabinet. Mark the point on this line
that is l-3/8” from the back wall. Drill a
l-l /4” diameter hole through cabinet at this
point.
centerline
To wire through rear, mark a line 7-l /2” from
the right of the centerline on the wall. Mark
the point on this line that is 64-5/8” from the
floor (or l-3/8” from underside of cabinet).
Drill a l-l /4” diameter hole through wall at
this point.
7.
Replace terminal box cover. Continue
installation with Step 13, Panel C.
/$jiiJi~~~~ij
Keep Installation Instructions
[ Congratulations! )
reference. The instructions will
make reinstalling your Whirlpool
5.
cent&line
L
IL!
Determine and clearly mark a vertical
centerline in the area the vent opening will
be made.
Panel D