


Before you start.. .
Proper installation is your responsibility,
Make sure you have everything
necessary for correct installation.
It is the responsibility of the customer
to contact a qualified installer to
assure that the plumbing and
electrical installations are adequate
and meet all national and local codes
and ordinances
Proper eiectncal, drain and water
supply lines must be avai!able or must
be installed as specified within shaded
area. See Electrical, Water and Drain
requirements Plumbing and wiring
should not cross In front of motor or
dishwasher legs.
Check location where dishwasher will
be installed. The location should
provide:
l Easy
access to water,
electricity
and drainage lines.
l Convenient loading - the best
position is left or right of kitcnen sink.
l Opening that is square for proper
dishwasher operation and
appearance.
l Cabinet front that is perpendicular
to floor.
l Protection so that water inlet valve
and drain cannot freeze.
l l/4” minimum ciearance between
motor and flooring to prevent the
motor from overheating.
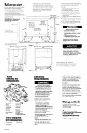
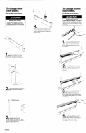
corner location
2” min. door to
cabinet or wall
IMPORTANT: Observe all
governing codes and
ordinances.
L
24”,
Water line l/2”
hole or larger.
Drain line 1 l/2”
hole or lalger.
‘S~““F” I”,
electrical
cable hole
(metal cabinets)
Electrical line I /2”
hole cr larger.
Electrical ground
I$ rPc-71 Ilr@d SPP
- .-
-l-L”- -’ -- -
Elect:ical requirements.
The unshaded
area must be free
of pipes or wires.
24” opening
Electrical Shock Hazard
l Electrical wiring and
components must not contact
any plumbing material or drain
hose.
l Cabinet opening must
completely enclose sides, top
and back of dishwasher.
Failure to do so may result in
personal injury from exposti
wiring.
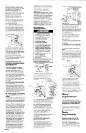
Do Not Install dishwasher
width -
Figure 1
over carpeted flooring.
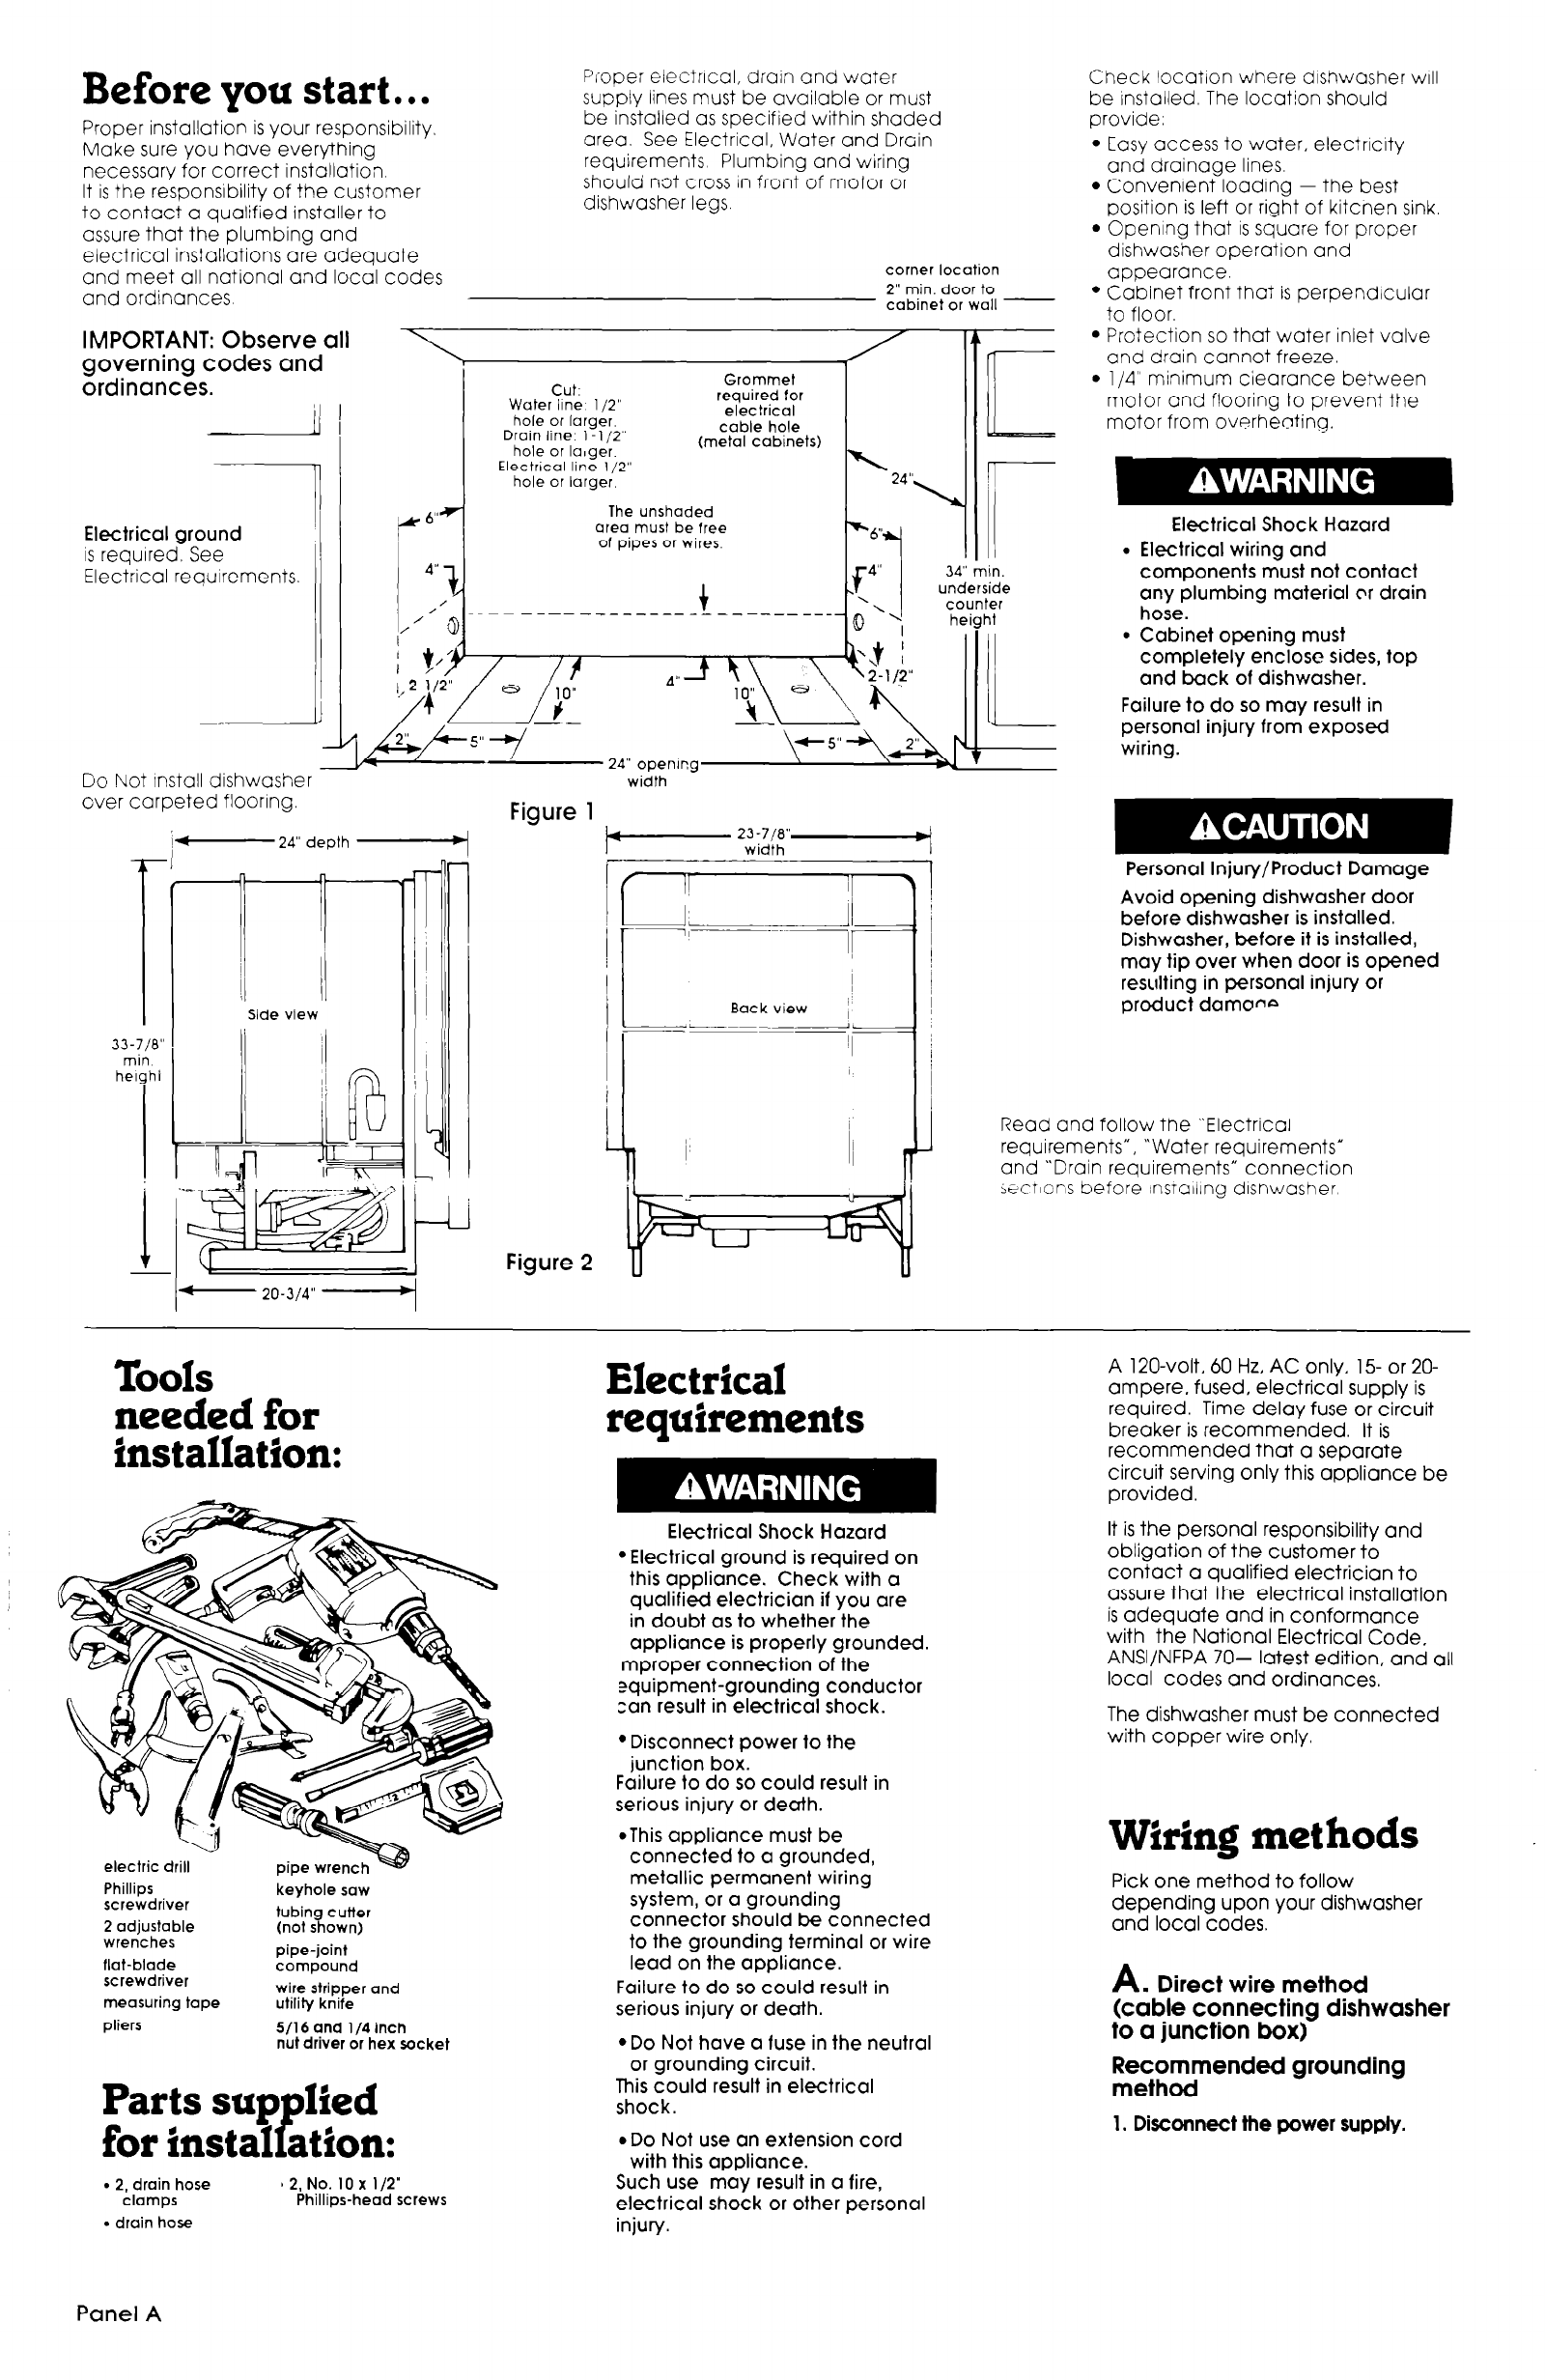
i- 24” depth -
7’.
I/
I
II
Side view
33-7/a”
min.
helghi
Personal Injury/Product Damage
Avoid opening dishwasher door
before dishwasher is installed.
Dishwasher, before it is installed,
may tip over when door is opened
resulting in personal injury or
product darnone
Read and follow the “Electrical
requirements”,
“Water requirements”
and “Drain requirements” connection
j?ctlons before nsralilng dlsnwasher
Figure 2
- 20-314”
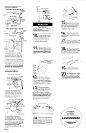
Tools
needed for
Electrical
requirements
A
120-volt, 60 Hz,
AC only, 15 or 20-
ampere, fused, electrical supply is
required. Time-delay fuse or circuit
breaker is recommended. It is
recommended that a separate
circuit serving only this appliance be
provided.
It is the personal responsibility and
obligation of the customer to
contact a qualified electrician to
assure that the electrical installation
is adequate and in conformance
with the National Electrical Code,
ANSI/NFPA 70- latest edition, and all
local codes and ordinances,
The dishwasher must be connected
with copper wire only.
installation:
Electrical Shock Hazard
.Electrical ground is required on
this appliance. Check with a
qualified electrician if you are
in doubt as to whether the
appliance is properly grounded.
mproper connection of the
equipment-grounding conductor
can result in electrical shock.
l Disconnect power to the
junction box.
Failure to do so could result in
serious injury or death.
*This appliance
must be
connected to a grounded,
metallic permanent wiring
system, or a grounding
connector should be connected
to the grounding terminal or wire
lead on the appliance.
Failure to do so could result in
serious injury or death.
*Do Not have a fuse in the neutral
or grounding circuit.
This could result in electrical
shock.
l Do Not use an extension cord
with this appliance.
Such use may result in a fire,
electrical shock or other personal
injury.
Wiring methods
electric drill
Phillips
screwdriver
2 adjustable
wrenches
flat-blade
screwdriver
measuring tape
pliers
pipe wrench
keyhole saw
tubing cutter
(not shown)
pipe-joint
compound
wire stripper and
utility knife
5116 and l/A inch
nut driver or hex socket
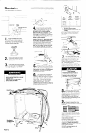
Pick one method to follow
depending upon your dishwasher
and local codes.
A
Direct wire method
(cdble connecting dishwasher
to a junction box)
;Tt;;mended grounding
1.
Disconnect the power supply.
Parts sup
lied
for instal
P ation:
l
2, drain hose
clamps
l
drain hose
12, No. 10 x l/2”
Phillips-head screws
Panel A