


Gas conversions
Gas conversions (from Natural gas to L.P. gas; or
from L.P. gas to Natural gas) must be done by a
qualified installer.
L.P. gas conversion
1. Complete installation sections A-C (Pages
4-5) before converting cooktop to L.P. gas. Check
that main gas supply line has been shut off and
the power supply cord is disconnected.
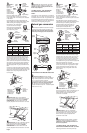
Fire Hazard
Shut off gas supply line valve.
Make all conversions before turning gas
supply valve back on.
Failure to follow these instructions can
result in explosion, fire or other injury.
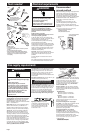
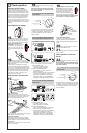
23.Check the broil burner for
proper flame. The flame should be 1/2"
long, with inner cone of bluish-green,
and outer mantle of dark blue, and
should be clean and soft in character. No
yellow tips, blowing or lifting of flame
should occur.
If flame needs to be adjusted:
Loosen the lock screw on the air shutter
located at the rear of the broil burner.
Adjust the air shutter as needed.
Tighten lock screw.
You have just finished installing
your new range. To get the most
efficient use from your range, read your
Use & Care Guide.
Keep Installation Instructions and Guide
close to range for easy reference.
The instructions will make installing the
range in another home as easy as the
first installation.
Check operation
(cont.)
E
24.Turn the oven control knob to “OFF”
or press the “OFF/CANCEL” pad.
Page 7
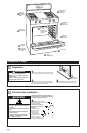
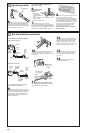
If your oven has this type of electronic
control pads (with and without timer):
1. Press the “CUSTOM BROIL” pad.
• “525” or “HI” will appear in the display.
• The “BROIL” indicator will light.
2. Press the “START/ENTER” pad.
• “HEAT”(console B only) and “ON” indicators
will light.
• If the burner fails to light due to air remaining
in the gas line, reset the oven control by
pressing the “OFF/CANCEL” pad and then
pressing the “CUSTOM BROIL” and
“START/ENTER” pads again to reactivate the
bake operation.
1. Press the “CUSTOM BROIL” pad.
• “HI” will appear in the display.
• The “BROIL” indicator will light.
2. Press the “START/ENTER” pad.
• “HEAT”and “ON” indicators will light.
• If the burner fails to light due to air remaining
in the gas line, reset the oven control by
pressing the “OFF/CANCEL” pad and then
pressing the “CUSTOM BROIL” and
“START/ENTER” pads again to reactivate the
bake operation.
OFF
CANCEL
START
ENTER
TEMP
CLEAN
ON
BAKE
BROIL
START ?
PREHEAT
DOOR LOCKED
CLOSE DOOR
5 SEC
AUTO
CLEAN
BAKE
CUSTOM
BROIL
8 8 8
TEMP
CLEAN
ON
BAKE
BROIL
START ?
HEAT
DOOR LOCKED
TIMER
TEMP
AUTO
CLEAN
BAKE
CUSTOM
BROIL
8 8 8
TEMP/
TIME
OFF
CANCEL
START
ENTER
5 SEC
CLOCK
TIMER
TEMP
OFF
CANCEL
START
ENTER
5 SEC
CANCEL
88:88
HEAT
BAKE
CLEAN TIMER
F
ON
BROIL
HR
AUTO
CLEAN
BAKE
CUSTOM
BROIL
LIGHT
CLOCK
TEMP
MIN
TIMER
SET
TIMER
OFF
888
°
CANCEL
888
TEMP
88:88
HEAT
DELAY
TIMED
BAKE
BROIL
TIMER
LOCKED
COOK
C
F
START?
OFF
CANCEL
START
ENTER
STOP
CLEAN
TIME
5 SEC
HR
AUTO
CLEAN
BAKE
CUSTOM
BROIL
STOP
TIME
COOK
TIME
DELAY
START
TIME
TEMP
MIN
CLOCK
LIGHT
TIMER
SET
TIMER
OFF
ON
A
C
B
D
If your oven has this type of electronic
control pads:
WARNING
air shutter
and lock screw
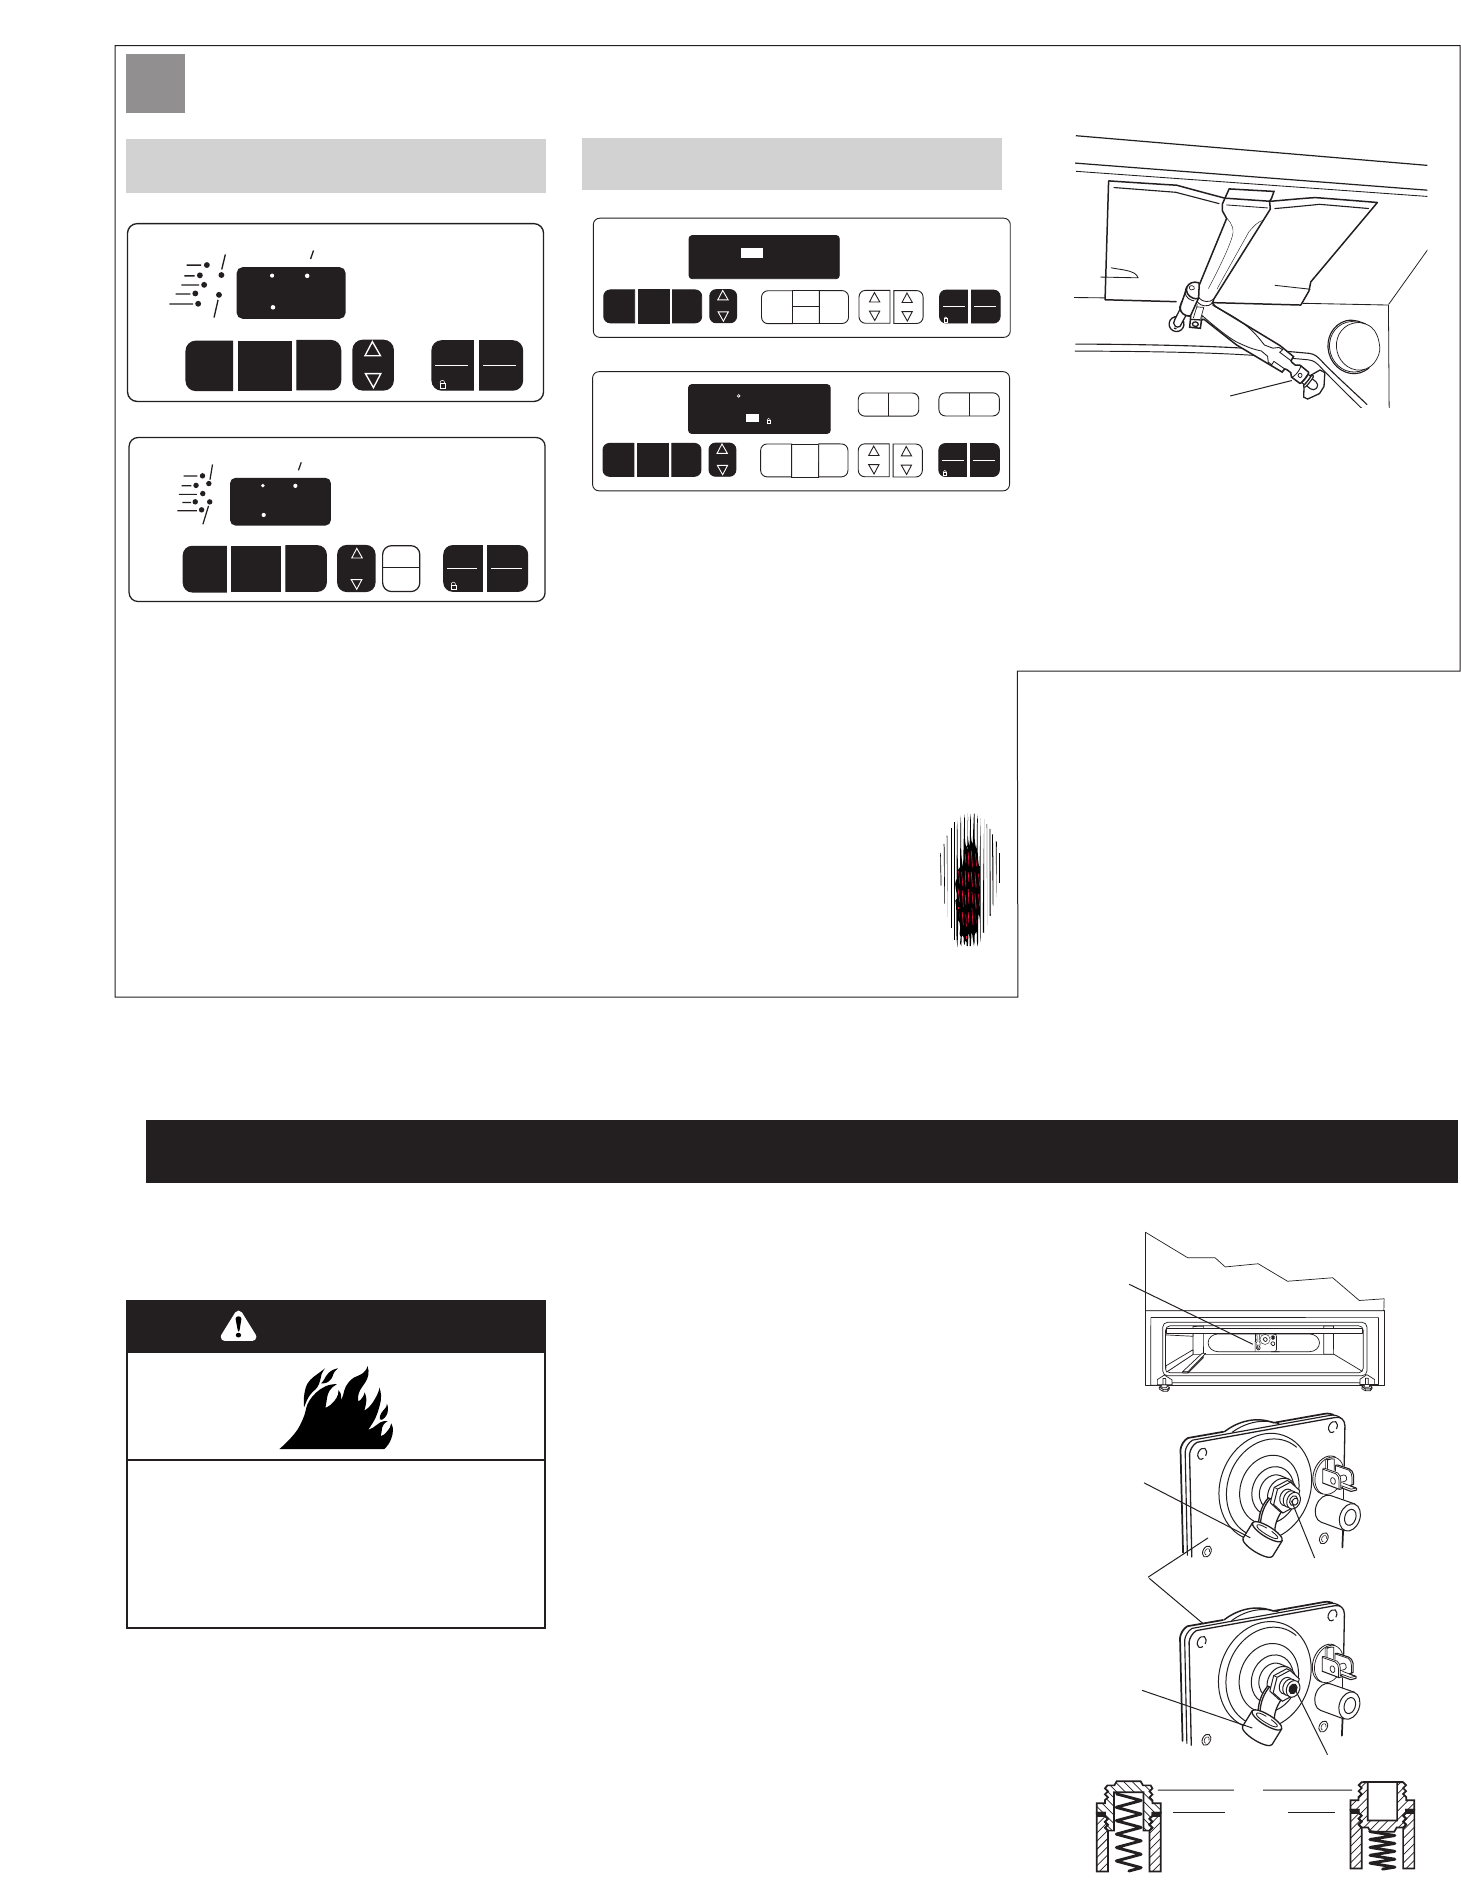
DO NOT REMOVE THE PRESSURE REGULATOR.
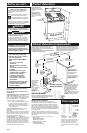
2.Pressure regulator: Remove storage
drawer and locate pressure regulator at back of
range. Remove plastic cover. Turn cap marked
“N” on front of pressure regulator
counterclockwise with a wrench to remove. Do
Not disturb or remove the spring beneath the
cap. Turn the cap over and reinstall cap on
regulator so that the letters “L.P.” are visible.
Replace plastic cover over cap.
L.P.
cap
washer
pressure
regulator
Nat. gas
L.P. gas
pressure
regulator
Natural
plastic
cover
plastic
cover