


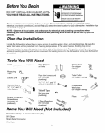


Installation Tips
Read all instructions prior to installation
.
.
.
.
.
.
.
.
l
.
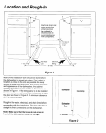
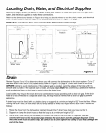
Water, electric, and drain connections are not the same for all age, brand, or models of
dishwashers. Check and compare the location and length of your current utilities so you
can plan your new installation (refeer to pages 4 and 8).
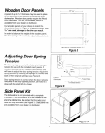
Each home installation is different and some parts may be needed to meet your individual
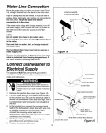
installation needs. You will need a 3/~” National Pipe Thread “Street C’ or compatible right
angle fittings (not included) to make the final water connections to the dishwasher valve
(refer to page 9).
Clean dishes require an adequate supply of hot water. A water temperature of 140°F
(60°C) is desirable, 120°F (49°C) is minimum, 160°F (71 “C) is maximum. A minimum
water supply line of 3/8” (outside diameter) copper tubing is recommended.
Reasonable water pressure is needed (15-l 20 PSI [pounds-per-square-inch]) flow rate
minimum (2 gallons/minute). Refer to page 9.
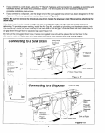
A separate 15-20 amp, grounded 120V AC electrical supply is required for your new
dishwasher. You may need a strain relief connector and wire nuts or suitable
connectors (not included) for connecting house wiring to the dishwasher.
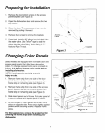
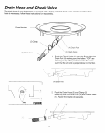
If the dishwasher drain hose is connected to a garbage disposer for the first time,
remember to knock out the plug in the disposer inlet. This plug is inside the inlet and you
may not see the plug from the outside (refer to page 8).
The dishwasher drain hose to the house drain must have a 32” loop above the floor or a
suitable air gap must be used to prevent water from siphoning out of the dishwasher and
causing washing problems (refer to page 7).
Kinked water or drain lines can cause problems. Run lines with generous curves. Make
sure lines are long enough to allow for generous curves.
Flush the water line prior to making final connections. A bunched towel over the end of the
line can help prevent splashing. Let water drain into a bucket or pan. This will prevent
premature clogging of the filter screen in the inlet valve.
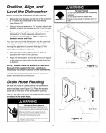
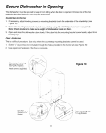
There must be a l/4” air gap between the bottom of the motor and the floor. If the floor is
carpeted, it will be necessary to cut away the carpeting underneath the motor to allow
ventilation for the motor (refer to page IO.)
The dishwasher will look, sound, and work better if it is properly leveled. Take time to
adjust the leveling legs so that all of them touch the floor and the dishwasher is level. Use
#8 x 5/~” Phillips head screws (supplied) to anchor dishwasher to countertop (refer to
pages 10 and 13).