


3
Recommended:
■ A time-delay fuse or time-delay circuit breaker.
■ A separate circuit serving only this microwave oven.
Microwave Oven Preparation
1. Unplug microwave oven before proceeding with installation.
2. Remove any loose items inside microwave oven.
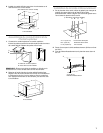
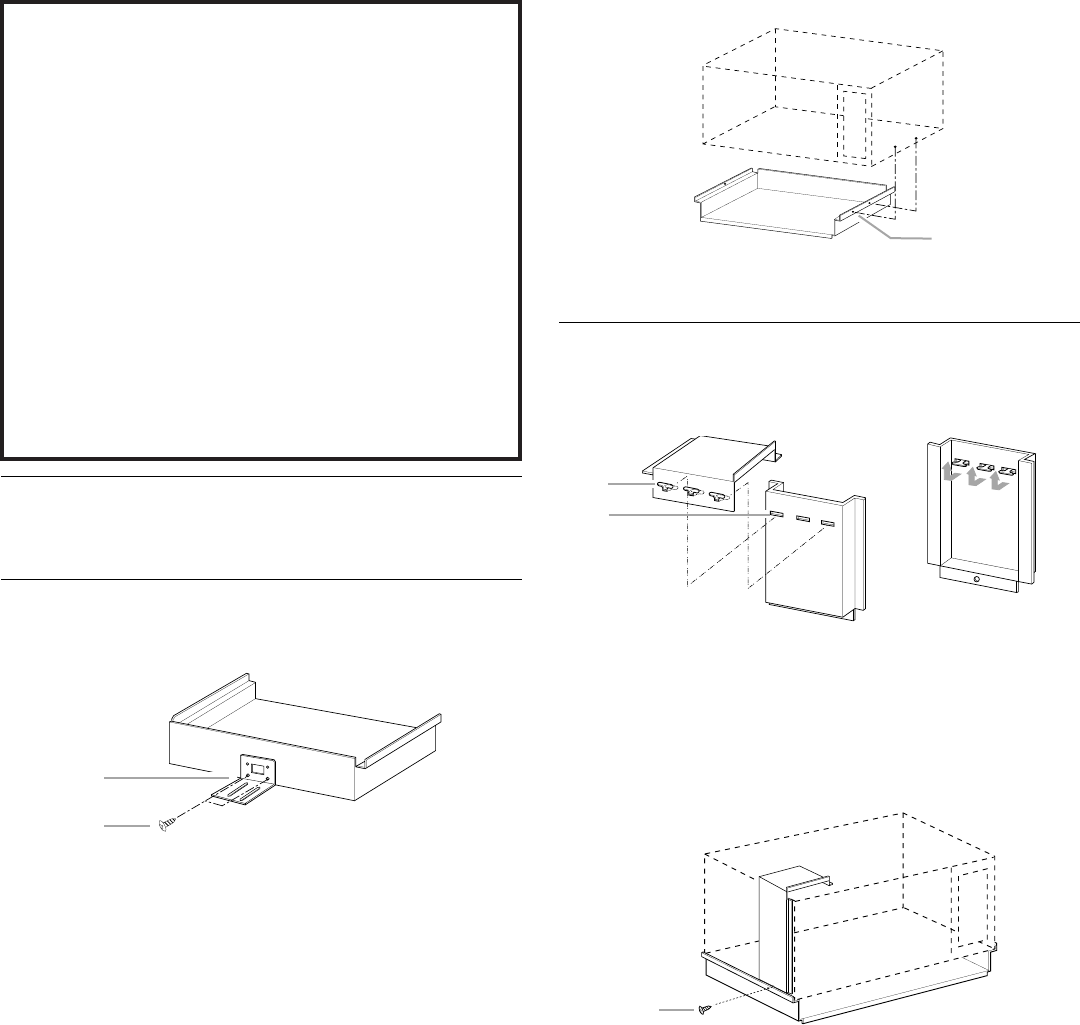
Bottom Duct Assembly
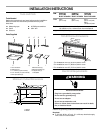
1. Fasten bottom bracket to bottom duct using two ¹⁄₂" screws.
(Rear view of bottom duct)
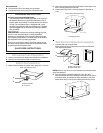
2. Remove 2 existing screws from right side of microwave oven,
and 1 existing screw from left side.
3. Install bottom duct with 2 existing screws on right side of
oven.
(Front view of microwave oven)
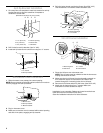
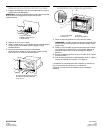
Side Duct and Upper Duct Assembly
1. Connect side duct to upper duct:
Insert projecting tabs of upper duct into holes of side duct.
Then bend tabs upward.
NOTE: Remove any dirt or oil on microwave oven surface before
ducts are attached.
2. Peel off backing of double-sided tape. Align the duct
assembly screw hole to the existing screw hole on left side of
microwave oven, and attach the duct assembly to the oven.
Press down firmly on ducts, then fasten with existing screw.
A. Bottom bracket
B.
¹⁄₂
" screws
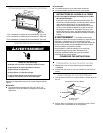
GROUNDING INSTRUCTIONS
SAVE THESE INSTRUCTIONS
■
For all cord connected appliances:
The microwave oven must be grounded. In the event of
an electrical short circuit, grounding reduces the risk of
electric shock by providing an escape wire for the electric
current. The microwave oven is equipped with a cord
having a grounding wire with a grounding plug. The plug
must be plugged into an outlet that is properly installed
and grounded.
WARNING: Improper use of the grounding plug can
result in a risk of electric shock. Consult a qualified
electrician or serviceman if the grounding instructions are
not completely understood, or if doubt exists as to whether
the microwave oven is properly grounded.
Do not use an extension cord. If the power supply cord is
too short, have a qualified electrician or serviceman install
an outlet near the microwave oven.
A
B
A. Existing screws
A. Tabs of upper duct
B. Holes in side duct
A. Existing screw
A
A
B
A