


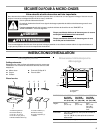
4
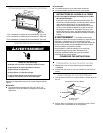
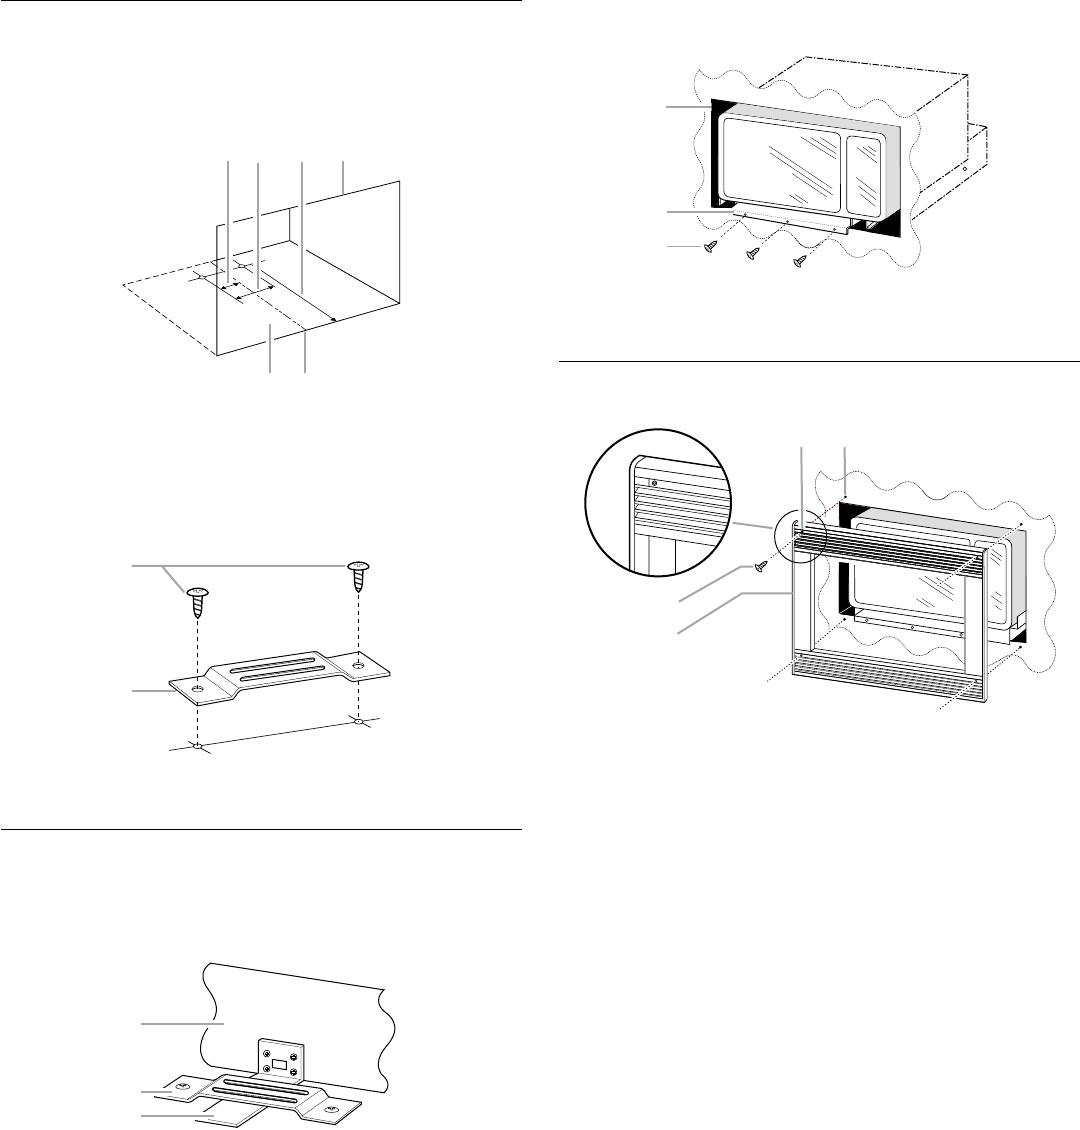
Anti-Tip Bracket Installation
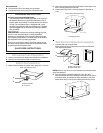
1. On cutout floor, use template to mark hole centers for anti-tip
bracket. Be sure to align the centerline of template to
centerline of cutout floor.
(Dimensions as shown are not to scale.)
2. Drill 2 holes for anti-tip bracket. (Use ⁵⁄₆₄" drill.)
3. Install anti-tip bracket onto cutout floor using two ¹⁄₂" screws.
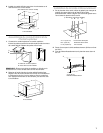
Microwave Oven Placement
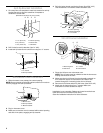
1. Slide microwave oven partway into cutout opening.
NOTE: Bottom bracket must be flat against cutout floor in order to
correctly engage with anti-tip bracket.
2. Plug in microwave oven.
3. Make sure microwave oven is centered within cutout opening
and slide it into place, engaging anti-tip bracket.
4. Drill pilot holes through positioning flange. (Use 5/64" drill.)
Then install three 1/2" screws at front of bottom duct.
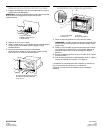
Trim Kit Frame Installation
1. Place trim kit frame over microwave oven.
NOTE: Trim kit frame must be oriented so that the louvers are
sloping downward in the front.
2. Make sure the trim kit frame is level and equally centered on
all 4 sides with respect to microwave oven. Mark 4 hole
centers through the 4 mounting holes of trim kit frame.
3. Remove trim kit frame and drill 4 pilot holes. (Use 5/64" drill.)
4. Attach trim kit frame using four 1" screws. Make sure
orientation is correct as stated in Step 2.
Installation is now complete. Replace any loose items that have
been removed from microwave oven cavity.
Save this installation instruction for future reference.
A. 1
¹⁄₂
" (3.81 cm)
B. 3" (7.62 cm)
C. 16" (40.64 cm)
D. Cutout opening
E. Cutout floor
F. Centerline
A.
¹⁄₂
" screws
B. Anti-tip bracket
A. Bottom duct
B. Anti-tip bracket
C. Bottom bracket
A B C D
E F
A
B
A
B
C
A. Cutout opening
B. Positioning flange
C. 1/2" screws
A. Mounting hole
B. Pilot hole
C. 1" screw
D. Trim kit frame
A
B
C
A B
C
D