


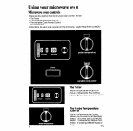
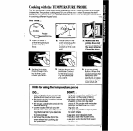
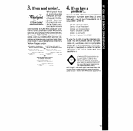

3. Set cooking times longer than IO
minutes by turning the Timer Knob
and Wheel. First set the Timer
Knob, then move the Wheel.
Example: To set 22 minutes, 313
seconds...
l
Set 2 minutes, 30 seconds by
pushing in and turning the Timer
Knob.
l
Set 20 minutes by pushing up on
the Wheel.
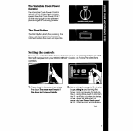
5. Push the START Button. The oven
light will come on and the cook-
ing will begin. You will hear the
fan running during oven
operation.
When the set time is up, the oven
will shut off automatically. You will
hear a bell, the light will go off
and the fan will stop.
To stop the oven
1. Push in and turn the Timer Knob
counterclockwise to 0O:OO.
OR
2.
Open the oven door.
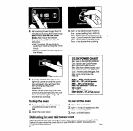
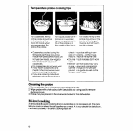
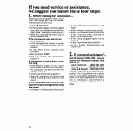
4. Set t! le Variable Cook Power to
the ( esired setting from HIGH to
KEEF WARM. Some recipes call for
lowf r Cook Powers for best results.
(See chart.) The lower the Cook
Pow’ !r, the slower the cooking.
COOK POWER CHART
Ret pes in the MICRO MENUS’
Cot:; kbook use Cook Power
sefti’lgs from HIGH to LOW.
Recipes from other books and
ma&azines may use different
Cot:‘< Power percentages. The
follc: Ning chart may be
hell: ful:
HIGH - 100% of full power
MED -HI - 70% of full power
MED - 50% of full power
MED .LO/DEFROST - 30% of
full power
LO -. 15% of full power
KEEP WARM - 5% of full power
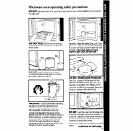
To resll art the oven
1. Clos the oven door.
2. Set tr 3 Timer [if needed] to the
desir ?d cooking time.
3. Push 78 START Button.
Defrosting in your microwave oven
Use the MED-LO/DEFROST setting to thaw frozen foot before cooking. See the
Defrost Guide inside the oven door or your MICRO-I IENUS’ Cookbook for
suggested defrost times.
‘Tmk.
B