


Before you plug it in
IMPORTANT
This is the only ftne print you’ll find in this booklet.
l
is useI only for jobs expected of home
Please read it to be sure you use your refrigerator refrlge cltors.
properly.
l
is prop ?rly maintalned.
We build refrigerators to last, but we can’t con-
l
is out c the weather.
trol how they are used. Before using your refriger-
l
IS usea n an area where the room temperature
ator, you are personally responsible for making
will noi fall below 55” F. (13” C).
sure that It...
l
IS not rt n where there are explosive fumes.
l
is installed and leveled on a floor that will hold
l
is not I sed by children or others who may not
the weight, and In an area suitable for Its size
unders and how it should be used.
and use.
l
is not I( aded with food before it has time to get
l
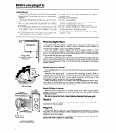
IS connected only to the right kind of outlet, with
proper y cold.
the right electric supply and grounding.
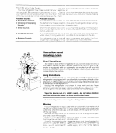
but do YOU want it
thai way?
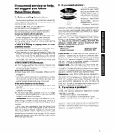
Raise
lower
Right to Raise;
Left to Lower
3-prong
grounding type
wall receptacle
3-prong
+
grounding plug
Refrigerator
Power Cord
Pick the Right Place,
Save steps by putting yo Jr refrigerator near the sink and next to a
countertop. It should not tie near a stove, radiator, water heater or
any source of heat...includlng direct sunlight.
You can install it flush c gainst the wall in back. Leave % inch
(1.3 cm) clearance against cabinets on each side for ease of instal-
lation. Do you want it in a cl>rner? Leave some room on the wall side
if you want the doors to op+tn wider.
Planning to add the autcinatic ice maker? Will the refrigerator be
near a cold water pipe? Some people run the water line through the
floor to the basement. Othc rs run it behind the cabinets to the pipes
under the sink.
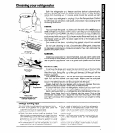
Make Sure It’s Level<
Your refrigerator is on rol ers; the two front ones are adjustable for
leveling.
Remove the base grill lo uncover the leveling screws. With a
screwdriver, turn each screw to the right to raise the front. Turn them
to the left to lower the fron.1 (If you have someone tilt the top of the
refrigerator back while turr ing, it will be easier.)
Keep adjusting one or tile other until the refrigerator won’t rock.
Then raise or lower both by the same number of turns until the refrig-
erator is level (use a level tc’ check this).
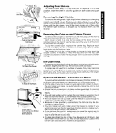
Peel Off the labels.
Remove the Consumer Euy Guide label and other inside labels
before using the refrigeralor. Any glue left can be taken off with
rubbing alcohol.
Do not remove the Tech Sheet fastened behind the base grill.
Wash It.
To clean your refrigerate r before using it. check the washing in-
structions in this booklet.
Plug It In.
A 120 Volt, 60 Hz., AC only, 15 ampere fused electrical supply is
required. It is recommended that a separate circuit serving only this
appliance be provided.
Do not use an extension ( ord. Use a receptacle which cannot be
turned off with a switch or pull chain.
Recommended
Grounding Method
2