6
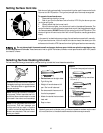
Setting Surface Controls
Each burner lights automatically from an electric ignitor each time a control knob
is turned to the LITE position. Two ignitors (one per set of burners) are supplied.
To operate the surface burner:
1. Place cooking utensil on burner.
2. Push in and turn the Surface Control knob to LITE. Only the burner you are
turning on will ignite.
3. Visually check that the burner has lit.
4. After the burner lights, turn the control knob to the desired flame size. The
control knobs do not have to be set at a particular mark. Use the guides and adjust
the flame as needed. DO NOT cook with the control knob in the LITE position. (The
electronic ignitor will continue to click if left in the LITE position, causing premature
wear.)
In the event of an electrical power outage, the surface burners can be lit manually.
To light a surface burner, hold a lit match to the burner head, then slowly turn the
surface control knob to LITE. Use caution when lighting surface burners manually.
Do not place plastic items such as salt and pepper shakers, spoon holders or plastic wrappings on top
of the range when it is in use. These items could melt or ignite. Potholders, towels or wood spoons could catch fire if placed
too close to a flame.
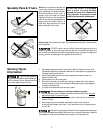
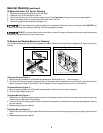
Pans should have flat bottoms. Check for
flatness by rotating a ruler across the bot-
tom. There should be no gaps between
the pan and ruler.
Note: Always use a utensil for its intend-
ed purpose. Follow manufacturer's in-
structions. Some utensils were not made
to be used in the oven or on the cooktop.
* Specialty pans such as lobster pots, griddles and pressure cookers may be used
but must conform to the above recommended cookware requirements.
Note: Do not use griddle over more than
one burner. That can damage your
cooktop and that can result in exposure
to carbon monoxide levels above allow-
able current standards. That can hazard-
ous to your health.
Selecting Surface Cooking Utensils
For best results and energy conservation, choose cooking utensils that have these characteristics:
*GOOD
• Flat bottom and straight sides.
• Tight fitting lids.
• Weight of handle does not tilt
pan. Pan is well balanced.
• Pan sizes match the amount of
food to be prepared.
• Made of material that conducts
heat well.
• Easy to clean.
POOR
• Curved and warped pan bottoms.
• Pan overhangs unit by more than
2.5 cm (1”).
• Heavy handle tilts pan.
• Flame extends beyond unit.


