MIX 301 • Installation and Operation
MIX 301 • Installation and Operation
Installation and Operation, cont’d
5
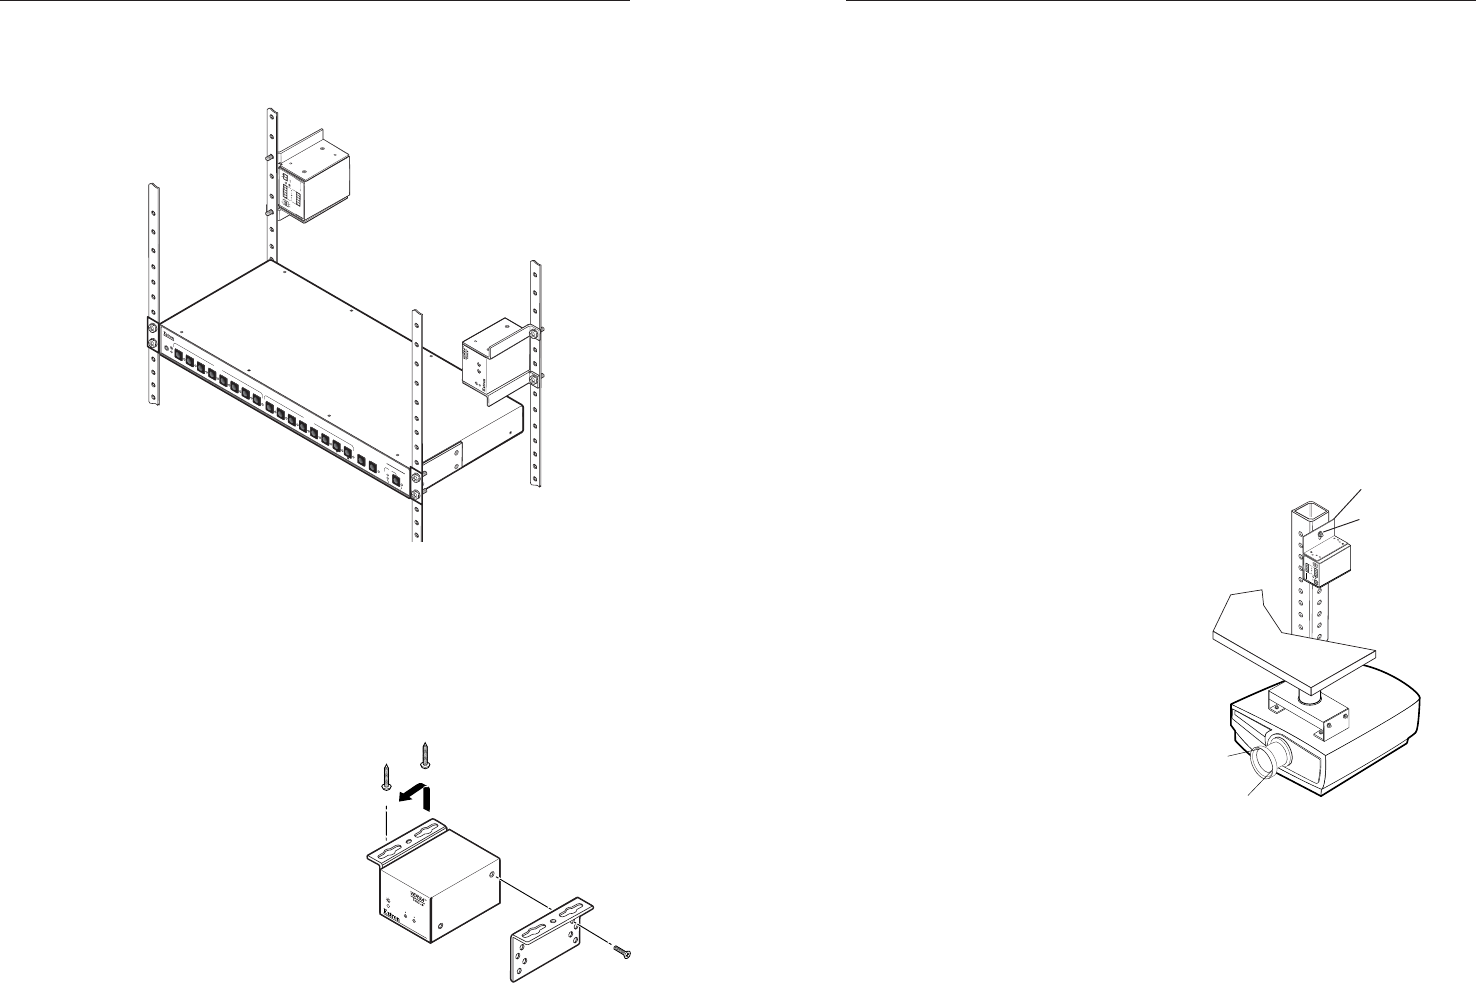
Furniture/Projector mounting
Use the optional mounting kit (furniture, part #70-212-01, or
projector, part #70-217-01) to mount the MIX 301, as follows.
Furniture mounting
1. Remove the rubber
feet if they were
previously installed.
2. Attach the mounting
bracket to the MIX 301,
as shown here.
a. Remove the two
machine screws
from one side of
the unit. Save
these screws for
future use.
b. After lining up a
bracket with the holes, attach the bracket using the
longer machine screws provided.
c. Repeat this step to attach the other bracket.
L
R
4
2. Mount the unit on the rack using the two included rack
screws. The MIX 301 can be vertically mounted facing in
either direction, as shown in the following diagram.
BUC
102
A
U
D
IO
B
A
L
/U
N
B
A
L
C
O
N
V
E
R
T
E
R
P
O
W
E
R
1
2
V
0
.2
A
M
A
X
L
R
B
A
L
/U
N
B
A
L
O
U
T
P
U
T
S
L
R
B
A
L
/U
N
B
A
L
IN
P
U
T
S
S
P
A
R
E
O
N
B
A
L
U
N
B
A
L
1
2
M
A
V
S
E
R
I
E
S
A
V
M
A
T
R
I
X
S
W
I
T
C
H
E
R
I
/
O
A
U
D
A
U
D
I
O
S
E
T
U
P
P
R
E
S
E
T
V
I
D
I
R
+
d
B
-
d
B
E
N
T
E
R
2
7
6
5
2
4
1
INPUTS
OUTPUTS
8
3
1
8
6
5
4
3
7
+
+
L
R
3. Attach the MIX 301 to the furniture.
a. Hold the unit against the underside of the table or
other furniture, and mark the locations for four screws
(two screws per bracket) on the mounting surface.
b. At each mark, drill a 3/32" (2 mm) diameter pilot hole
approximately 0.25" (6 mm) deep in the mounting
surface.
c. Insert #8 wood screws into the four pilot holes.
Tighten each screw into the mounting surface until just
less than 0.25" (6 mm) of the screw protrudes.
d. Align the bracket slots with the wood screws and place
the unit against the mounting surface.
e. Slide the unit either forward or backward until the
screws are in contact with the edge of the bracket slots.
Then, tighten each screw to secure the unit in place.
Projector mounting
1. Remove the rubber feet if
they were previously
installed.
2. Attach the mounting
bracket to the MIX 301
with the machine screws
provided.
3. Secure the unit to a
projector mount or other
surface using mounting
bolts as shown in the
following diagram.
Digital Projector
Projector
Mounting
Bracket
Ceiling
Mounting
Bolt
BUC 102
AUDIO
BAL/UNBAL
CONVERTER
POWER
12V
0.2A
MAX
L
R
BAL/UNBAL OUTPUTS
L
R
BAL/UNBAL INPUTS
SPARE
ON
BAL
UNBAL
1
2


