GPS 400 Pilot’s Guide and Reference
190-00140-60 Rev. H
10-8
SECTION 10
ADDITIONAL FEATURES
Traffic Page Display Range
Various display ranges can be selected for optimal
display of TIS traffic information.
Changing the display range on the Traffic
Page:
Press the RNG Key to zoom through the range
selections which are: 12/6 nm, 6/2 nm, and 2
nm.
Map Page
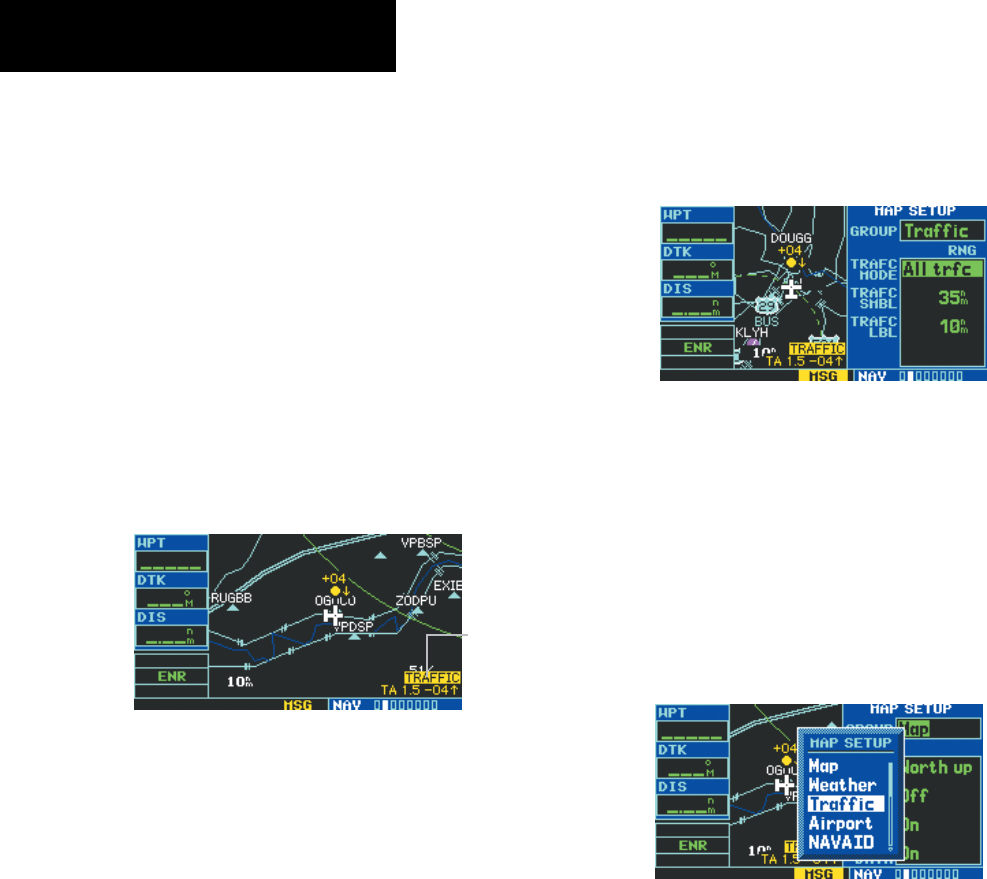
TIS trafc is displayed on the Map Page (Figure 10-15)
in addition to the Trafc Page. When a Trafc Advisory
is active, the Traffic Banner is displayed in the lower right
corner of the Map Page.
Figure 10-15 Map Page Displaying Traffic
Traffic
Advisory
Banner
The Trafc Mode Selection Menu (Figure 10-16) allows
the user to choose from the following options:
TRAFC Mode:
•
All trfc - All trafc is displayed on the Map Page
•
TA/PA - Only trafc and proximity advisories are
displayed on the Map Page (proximity advisories
are not applicable to TIS conguration)
•
TA only - Only trafc advisories are displayed on
the Map Page
TRAFC SMBL - Allows the user to select the map
range at which the trafc symbol(s) and TA text
appear.
TRAFC LBL - Allows the user to select at what
map range the altitude trend arrow and altitude
deviation indicator appear.
Figure 10-16 Traffic Mode Selection Window
Configuring TIS traffic on the Map Page:
1) Turn the small right knob to select the Map
Page.
2) Press the MENU key. Turn the small right
knob to select ‘Setup Map’?
3) The flashing cursor highlights the GROUP field.
Turn the small right knob to select ‘Traffic’
(Figure 10-17) and press the ENT Key.
Figure 10-17 Map Setup Window
4) Turn the large right knob to select the desired
Traffic Mode option. Turn the small right knob
to select the desired option and press the ENT
Key. Repeat the step for Traffic Symbol and
Traffic Label.
5) Press the CLR Key to return the Map Page.


