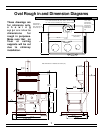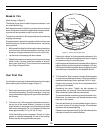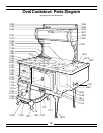
4
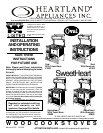
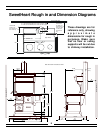
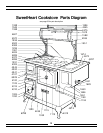
SweetHeart
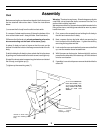
Warning: The stove is very heavy. Since the body frame may
dig into a soft floor, do not locate the stove, or even set it to rest,
on a surface that could be imprinted.
The Sweetheart is resting on a pad of styrofoam on the skid.
It consists of the range and a base assembly package.
The base assembly should be assembled and in position prior
to lifting the stove off of the skid; the base assembly instructions
follow below.
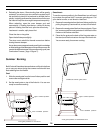
Base Assembly (Sweetheart only)
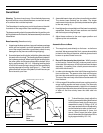
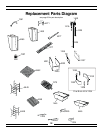
1. Unpackage the base sections, legs and hardware package
which are are located in a carton fastened to the skid at
rear of the range(it would be a good idea to check for any
damage that may have occured during shipping).
2. Screw the base levelling bolts (with teflon glider attached)
into each of the four legs. The levelling bolts are located in
the hardware package. When installing the levelling bolts,
the teflon glider should
extend
beyond the bottom of the
leg by approximately 1/8"-1/4". Adjusting levelling bolts
in too far will cause the leg to drag on the floor potentially
causing damage to flooring. (see figure 1 ) . Check that
gliders and floor are free of any debris, this will ensure you
do not scratch your floor.
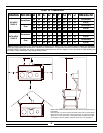
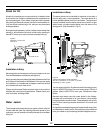
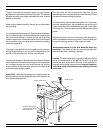
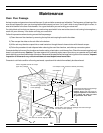
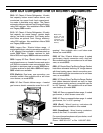
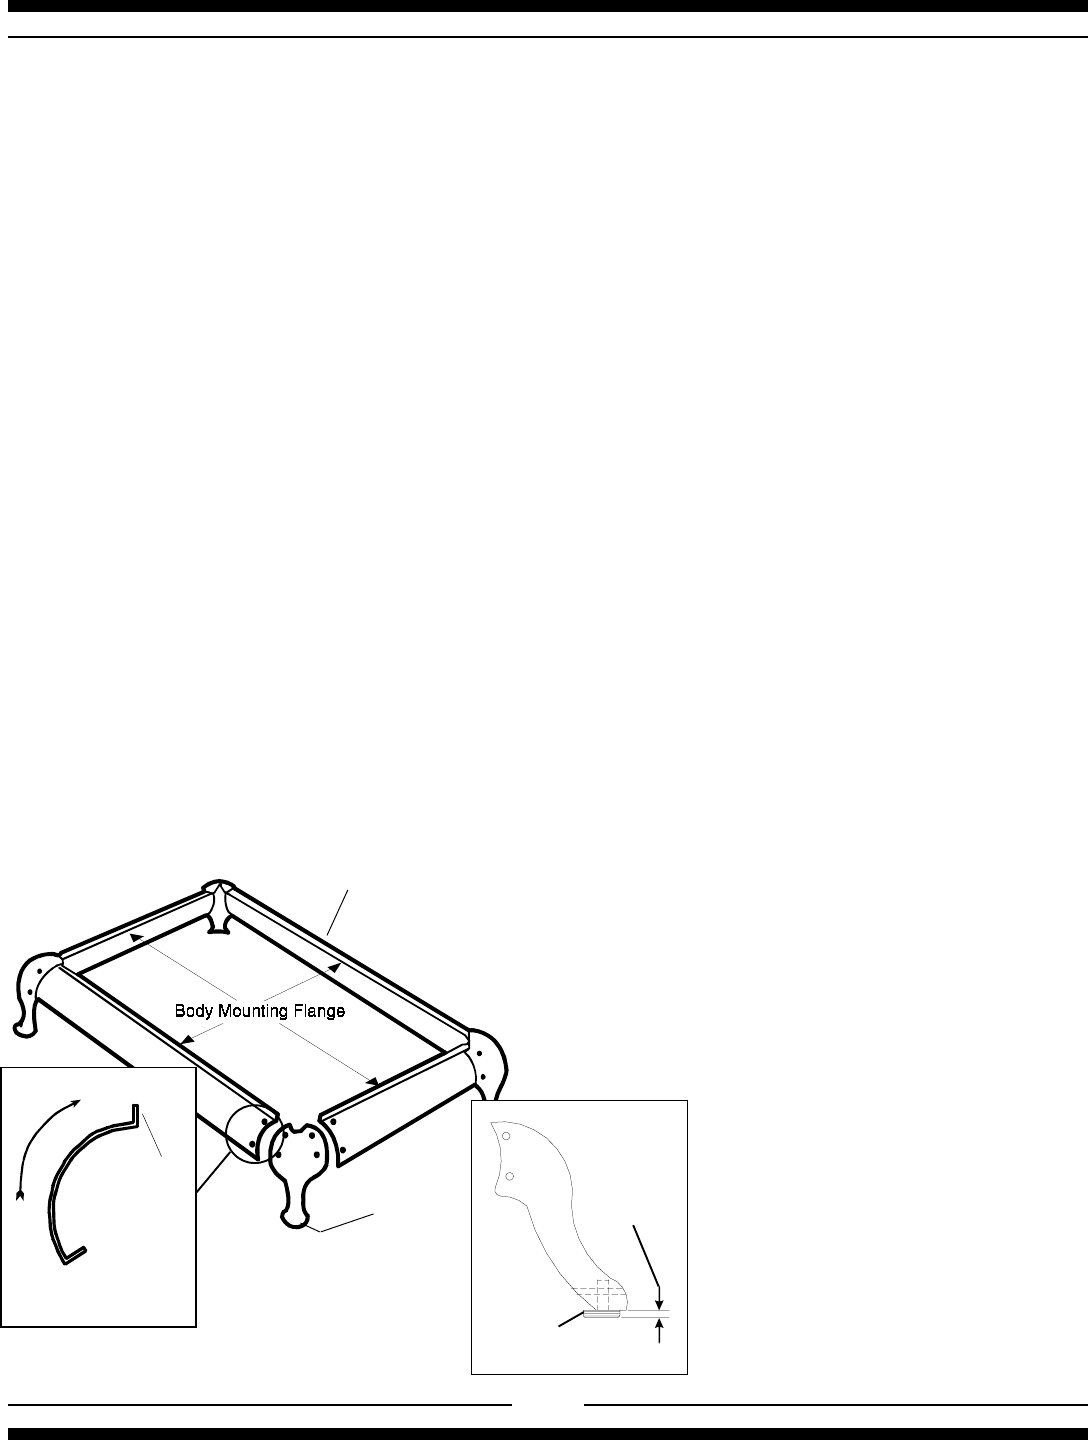
Figure 1
SweetHeart
Base
Assembly
3. Assemble base to legs using the nuts and bolts provided.
The shorter base sections are the sides. The longer
sections are front and rear.(the black painted section goes
to the rear, see fig. 1).
4. Hand tighten the nuts and bolts until the base is completely
assembled. Ensure that all base sections are installed
with the body mounting flange up.
5. Adjust base sections to the most upper position and
tighten up the nuts and bolts.
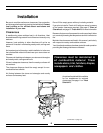
Assemble Stove to Base
1. The range body rests directly on the base - no bolts are
required. We recommend that 3 or 4 persons be available
to assist in the lifting of the stove, and that gloves should
be worn to protect hands from cuts.
2. Do not lift the stove by the nickel trim. With 2 persons
on the heavier, firebox side (left), and one person on the
other side, lift the stove up, off of the skid and onto the base
assembly. If possible, have a fourth person remove the
skid while the others lift.
3. In order not to damage the nickel trim lift the range from the
front and the rear . The person at the front can first open
the oven door and use the oven opening for a hand hold.
The rear of the oven body at the bottom can be used to lift
from the back.
4. Lift the range off the pallet and onto base, making sure the
range is sitting square and level on base. The stove sits
over the lip of the base assembly. Helpful hint: Instead of
trying to square the entire stove over the base, put one side
or back on first then slowly lower the other side into
position.
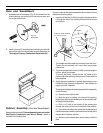
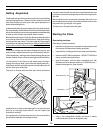
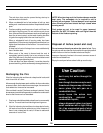
5. To level the stove, simply adjust the
levelling screws with teflon pads located
at the bottom of each leg (the ones you
assembled in step 2). Using a 5/16 (8
mm) open end wrench turn the adjusting
screw clockwise to raise up the corner,
and counter-clockwise to lower the
corner. (Don't forget the teflon glider
should
extend
beyond the bottom of the
leg by approximately 1/8"-1/4")
side view of skirt showing
position of body mounting
flange
adjust up
flange
Painted section goes to the rear
Teflon
Glider
1/8"- 1/4"